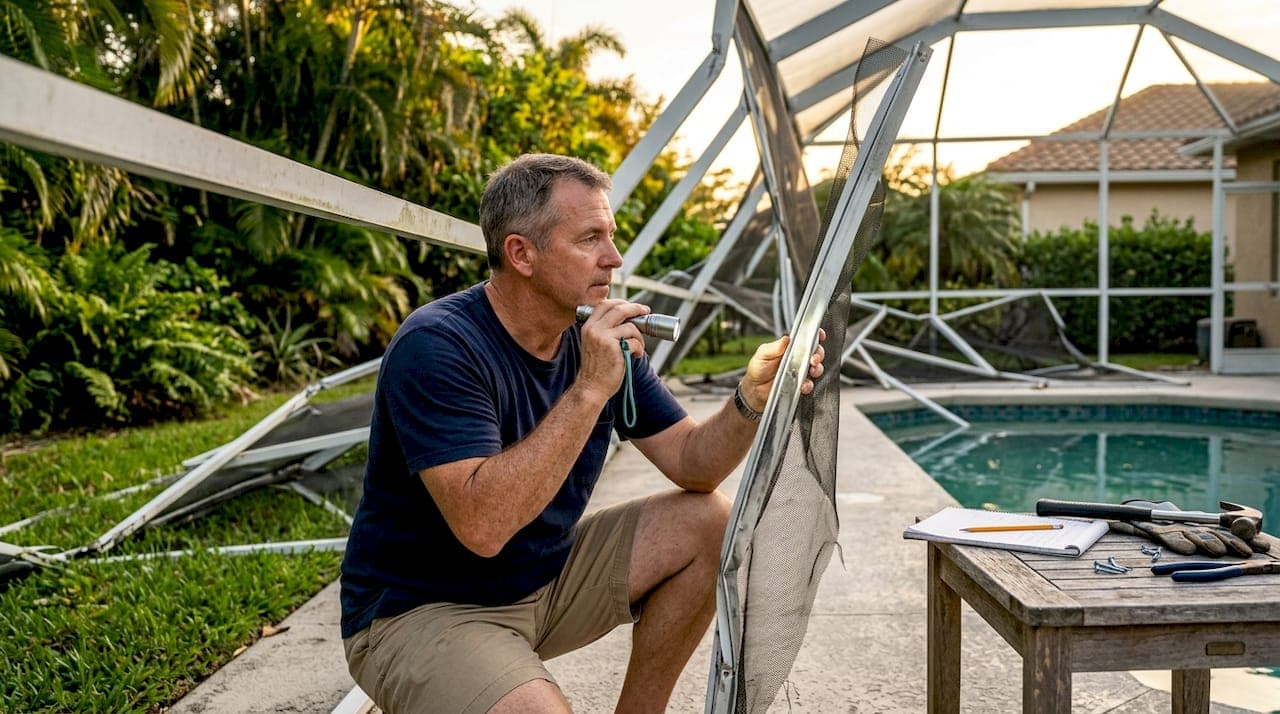
Pool cage storm damage repair is the process of restoring a structurally compromised screen enclosure through damage assessment, emergency screen removal, frame correction, and full rescreening. Homeowners who follow the right pool cage storm damage repair steps can save 80%–90% of what a full replacement would cost, provided the aluminum frame remains structurally sound and code-compliant. That gap is significant. Re-screening a 1,200-square-foot cage runs $1,200–$3,800, while a full rebuild can reach $35,000 or more. Mrpoolscreen specializes in exactly this kind of restoration for Central Florida homeowners, using industrial-grade materials and water-based acrylic coatings to deliver results that hold up through the next storm season.
What do you need before starting pool cage storm damage repairs?
Preparation determines whether your repair holds up for years or fails at the first strong wind. Before any tools come out, you need a clear picture of what the storm actually did to your enclosure.
Initial inspection checklist
Walk the entire perimeter and log every visible problem. Check these areas specifically:
- Frames and uprights: Look for bends, cracks, or sections that have shifted out of plumb.
- Screen tracks and splines: Damaged tracks make rescreening impossible without replacement.
- Hub connections: Loose or cracked hubs at beam intersections are a structural red flag.
- Anchor bolts and footings: Inspect where the frame meets the concrete slab. Cracks in the slab or loose anchor bolts require immediate attention.
- Door frames: Warped door frames indicate broader frame distortion.
Photograph every defect before touching anything. Those photos support your insurance claim.
Tools and materials overview
| Tool or Material | Purpose |
|---|---|
| Tape measure and level | Check frame alignment and plumb |
| Spline roller | Install new screen into tracks |
| Utility knife | Cut screen material cleanly |
| Torque wrench | Tighten anchor bolts to spec |
| Wire brush and rust converter | Treat surface corrosion before painting |
| Stainless steel fasteners | Replace corroded screws and bolts |
| Fiberglass or aluminum screen | Primary rescreening material |
| Water-based acrylic coating | Corrosion protection for painted surfaces |
Insurance and permits
Florida homeowners' insurance typically covers pool cage storm damage under dwelling coverage or Coverage B, with average claim payouts ranging from $11,500 to $28,000. Getting an independent damage estimate before accepting any settlement improves your outcome. Most Florida counties also require a building permit for structural pool cage repairs, so confirm local requirements before scheduling any frame work.
Pro Tip: Take timestamped photos of all damage from multiple angles before removing a single screen panel. Insurers use photo evidence to validate claims, and gaps in documentation are the most common reason partial damage disputes drag on.
What are the step-by-step repair actions for a storm-damaged pool cage?
Pool cage restoration step by step follows a logical sequence. Skipping steps or reordering them creates problems that cost more to fix later.
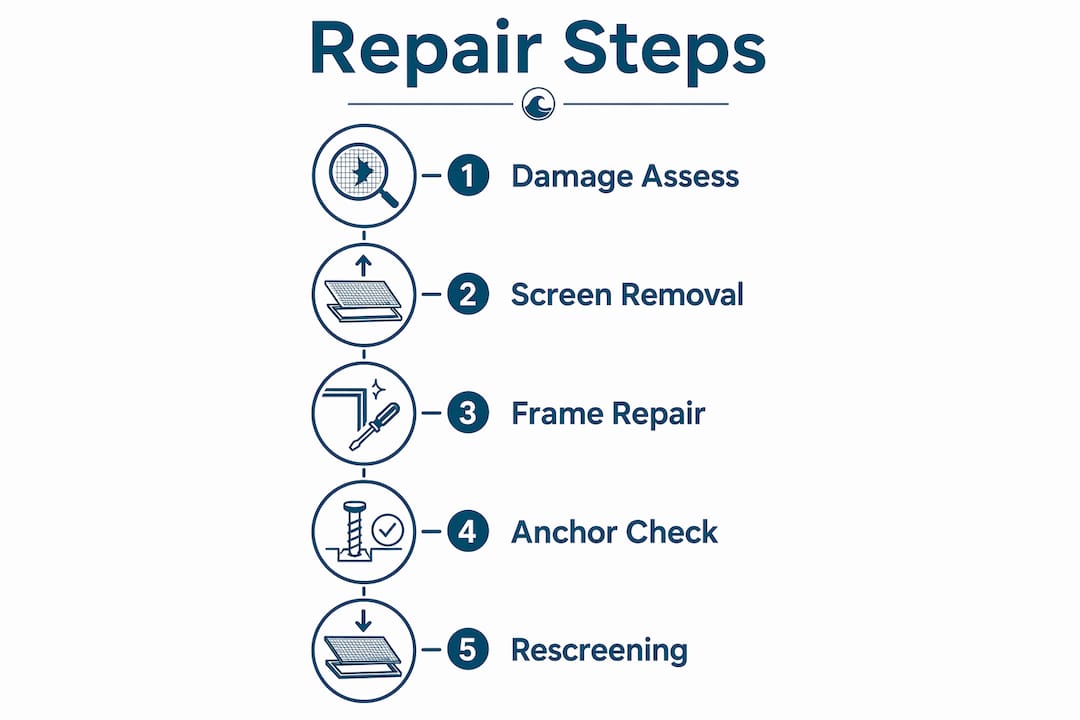
Step 1: Comprehensive damage assessment
Start with a full structural integrity check, not just a visual scan. Tap aluminum uprights with a rubber mallet and listen for hollow or cracking sounds that suggest internal fractures. Measure diagonal distances across each bay to detect frame racking. A square bay measures the same diagonally in both directions. Any difference greater than half an inch signals a racked frame that needs correction before rescreening.
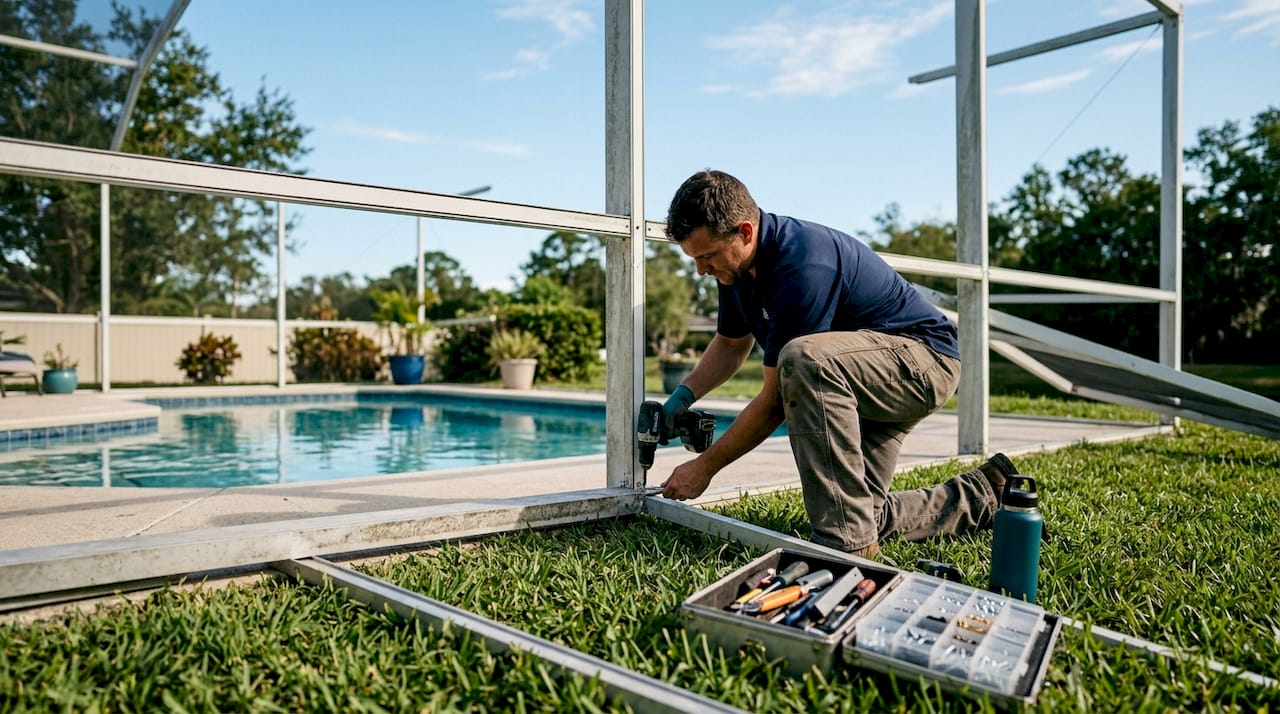
Surface rust and minor corrosion can often be addressed with cleaning and repainting, but widespread structural corrosion requires full section replacement. Focus your assessment on fastener health, post and beam stability, screen tracks, and door frame condition to determine restoration viability.
Step 2: Emergency screen removal
Shredded or torn screens act like sails in high winds, putting enormous lateral force on the frame. Cutting them loose early protects the frame from further harm. Use a utility knife to cut the spline out of the track and pull the screen free. Work from the top panels down so falling debris does not damage panels you have already cleared.
Do not attempt any structural repairs at this stage if your insurance adjuster has not yet visited. DIY structural fixes before the adjuster documents damage can reduce claim validity and complicate your settlement. Screen removal is safe to do immediately. Frame welding and anchor resetting are not.
Pro Tip: Bag and label the damaged screen panels by location before disposal. Adjusters sometimes request evidence of the original screen type and condition to calculate replacement material costs.
Step 3: Frame repair or partial replacement
Bent uprights cost $400–$1,200 per section to repair professionally. Hub re-bolting runs $300–$900 per cage. Both figures come in well below the cost of a full rebuild. For minor bends, a licensed contractor can straighten aluminum in place using hydraulic jacks and alignment guides. Sections with cracks or stress fractures require cutting out and splicing in new aluminum extrusion of the same gauge.
Beam and rafter repairs follow the same logic. Match the original extrusion profile exactly. Mismatched profiles create weak points at splice joints and can fail Florida wind-load requirements. Check the original permit drawings if available, as they specify the required aluminum gauge for your enclosure's wind zone.
Step 4: Anchor and footing inspection
Hurricane-force winds can damage pool cage footings and anchors without leaving obvious visual signs. A frame that looks straight may still sit on a compromised footing. Probe the concrete around each anchor bolt with a screwdriver. Spalled or crumbling concrete means the anchor has lost its grip. Failing to reset anchors and repair spalled concrete can invalidate insurance claims and violate Florida building codes.
Resetting an anchor involves drilling out the old bolt, cleaning the hole, injecting epoxy adhesive rated for concrete, and setting a new stainless steel anchor bolt to the specified embedment depth. Allow the epoxy to cure fully before applying any load to the frame.
Step 5: Rescreening with hardware upgrades
Rescreening is the final structural step and the most visible part of the restoration. Standard fiberglass screen works for most applications, but 20x20 mesh or pet-resistant screen adds durability in high-traffic areas. Roll the screen tight across each bay before pressing the spline into the track. Loose screen sags within months and tears faster in wind.
Upgrade hardware to corrosion-resistant fasteners and stronger anchors during this phase. Stainless steel screws and galvanized spline clips outlast standard aluminum hardware by years in Florida's salt air and humidity. The upgrade adds modest cost but meaningfully extends the enclosure's service life.
Pro Tip: Start rescreening at the roof panels and work down to the walls. Gravity helps keep the screen taut during installation, and any small alignment errors at the top are easier to correct before you reach the lower sections.
How do you troubleshoot common problems during pool cage repairs?
Repairs go wrong in predictable ways. Knowing the failure points in advance keeps your project on track and your insurance claim intact.
- Premature structural repairs: Any frame work done before the insurance adjuster visits can reduce your claim payout. Remove screens only. Document everything else and wait.
- Missed footing damage: Footings that look fine often are not. A professional inspection with a torque test on every anchor bolt catches hidden failures that a visual check misses.
- Misaligned frames: Rescreening a racked frame locks the distortion in place. Always correct alignment before installing new screen.
- Wrong fastener type: Standard zinc screws corrode within one to two seasons in Florida. Use stainless steel or coated aluminum fasteners exclusively.
- Skipping permits: Unpermitted structural repairs can trigger fines, void your homeowner's insurance coverage, and create problems when you sell the property.
Pro Tip: Request a written scope of work from any contractor before signing. The document should list every repair action, the materials specified, and the Florida building code section each repair satisfies. That paper trail protects you if a permit inspector raises questions.
What maintenance and upgrades improve storm resilience after repairs?
A repaired pool cage lasts longer with consistent upkeep. These practices reduce the risk of storm damage and catch problems before they become expensive.
- Annual anchor bolt inspection: Torque-test every anchor bolt each year before hurricane season, which runs june through november in Florida. Loose bolts are a five-minute fix before a storm and a major structural problem after one.
- Quarterly cleaning: Rinse aluminum frames with fresh water to remove salt, pollen, and organic debris. Salt deposits accelerate corrosion at fastener points.
- Corrosion treatment: Apply a water-based acrylic coating to painted surfaces every two to three years. The coating seals the aluminum and slows oxidation at cut edges and drill points.
- Screen tension checks: Walk the perimeter and press each screen panel lightly. Loose panels need spline replacement before storm season. A tight screen transfers wind load to the frame evenly. A loose one concentrates stress at the corners.
- Hardware upgrades at next repair: If any fasteners show surface rust, replace them with stainless steel equivalents during your next maintenance cycle. Mixing corroded and new hardware creates galvanic corrosion at contact points.
A pool cage visual upgrade does not require full replacement. Fresh paint, new screen, and stainless hardware can transform an aging enclosure into one that looks and performs like new, at a fraction of the cost.
Key Takeaways
Restoring a storm-damaged pool cage through structured repair steps costs 80%–90% less than full replacement while meeting Florida building codes and improving long-term storm resilience.
| Point | Details |
|---|---|
| Repair saves significant money | Re-screening costs $1,200–$3,800 versus $14,000–$35,000+ for a full rebuild. |
| Document before you repair | Photograph all damage before removal to protect your insurance claim. |
| Footings fail invisibly | Always torque-test anchors; hidden footing damage violates Florida building codes. |
| Upgrade hardware during repairs | Stainless steel fasteners and stronger anchors extend enclosure life in Florida's climate. |
| Permits protect your investment | Unpermitted structural repairs can void insurance coverage and create sale complications. |
What I have learned after years of pool cage storm damage work
Pool cage storm damage repairs reveal a consistent pattern. Homeowners who act fast on screen removal but slow down before touching the frame almost always come out ahead. The ones who rush into frame repairs before the adjuster arrives often end up in drawn-out claim disputes that cost them more than the repair itself.
The other thing I see constantly is underestimating footing damage. A frame can look perfectly straight and still be sitting on concrete that has lost its grip on the anchor bolts. That is not something you catch with a visual inspection. It takes a torque wrench and someone who knows what a properly set anchor feels like. Skipping that step is how a repaired cage fails in the next storm.
Restoration versus replacement is not always a close call. When the aluminum frame is structurally sound, restoration wins on cost, timeline, and disruption. When corrosion has compromised the posts and beams at a structural level, replacement is the right answer. The honest assessment comes from someone who has seen both outcomes and is not selling you the more expensive option by default.
The maintenance side is where most homeowners leave money on the table. A quarterly rinse, an annual anchor check, and a fresh coat of acrylic coating every few years extend the life of a restored cage dramatically. That is a small investment compared to another full repair cycle.
— Michel
How Mrpoolscreen can help with your pool cage restoration
Storm damage does not follow a schedule, and neither should your repair process. Mrpoolscreen works with Central Florida homeowners to assess damage, document findings for insurance claims, and carry out code-compliant repairs using stainless steel fasteners and industrial-grade acrylic coatings.

Every project starts with a professional inspection that covers frames, anchors, footings, and screen condition. Mrpoolscreen's restoration services address structural repairs, full rescreening, and corrosion protection in a single coordinated process. Homeowners can get online pricing before committing to anything, and a free estimate is available for those who want a professional assessment of their specific damage. The goal is a pool cage that meets Florida building codes, satisfies your insurer, and holds up through the next storm season.
FAQ
How much does pool cage storm damage repair cost?
Re-screening a 1,200-square-foot pool cage costs $1,200–$3,800, while a full replacement runs $14,000–$35,000 or more. Structural repairs like bent uprights add $400–$1,200 per section.
Can I remove damaged screens before the insurance adjuster arrives?
Yes. Removing shredded or torn screens immediately is safe and recommended because damaged screens act as sails and cause further frame damage. Avoid any structural repairs until the adjuster documents the damage.
Does homeowners insurance cover pool cage storm damage in Florida?
Florida homeowners' insurance typically covers pool cage storm damage under dwelling coverage or Coverage B, with average payouts ranging from $11,500 to $28,000. Getting an independent estimate before accepting a settlement improves your outcome.
How do I know if my pool cage needs repair or full replacement?
If the aluminum frame is structurally sound and free of widespread corrosion, restoration is the right choice and costs 80%–90% less than replacement. Widespread structural corrosion or severely compromised footings may require a full rebuild.
What is the most common mistake homeowners make after storm damage?
The most common mistake is making structural repairs before the insurance adjuster visits. Those repairs reduce claim validity and can complicate settlement. Remove screens, document damage thoroughly, and wait for the adjuster before touching the frame.