
Expect a standard professional repaint on your pool cage to last about 5 to 8 years in Florida's climate, with premium prep and coatings potentially extending that to around 7 to 10 years, according to Tru Colors Contracting. Factory powder coating can stretch past 10 years. The spread comes down to four things: UV intensity, salt exposure, chlorine drift from the pool, and how well the surface was prepped before anyone picked up a sprayer. If your cage is coming up on year five with no inspection yet, walk the frame this weekend and start budgeting for a repaint.
Key Takeaways
Pool cage paint longevity depends more on surface prep and coating choice than on brand, with Florida homeowners typically seeing 5 to 8 years from standard work and 7 to 10 years from premium systems.
| Point | Details |
|---|---|
| Expect 5 to 8 years | Standard professional repaints last this long; premium prep and coatings push toward 7 to 10 years. |
| Prep beats paint choice | Inadequate surface preparation is the top cause of early coating failure, regardless of coating type. |
| Coastal sites age faster | Salt spray can shorten lifespan to 3 to 5 years even with quality paint if rinsing is skipped. |
| Prefer DTM acrylic or polyurethane | These resist chlorine and UV better than standard exterior house paint on aluminum framing. |
| Restoration beats rebuilding | Mrpoolscreen's water-based acrylic restorations with stainless/Nylotech hardware can cost up to 60% less than a full rebuild. |
Table of Contents
- How Long Does Pool Cage Paint Last, Really?
- What Wears Down a Pool Cage Faster Than You'd Think
- Signs Your Pool Cage Needs Repainting or Restoration
- Which Coatings and Materials Actually Last on Aluminum Cages?
- Why Prep Work Determines Longevity More Than the Paint You Choose
- DIY Repaint or Call a Restoration Pro?
- Case Study: Restoring an Aging Enclosure Instead of Rebuilding It
- Sources
How Long Does Pool Cage Paint Last, Really?
"Lifespan" isn't one number. It's a band, and where your cage falls in that band depends almost entirely on prep quality and site exposure, not the paint can's marketing copy.
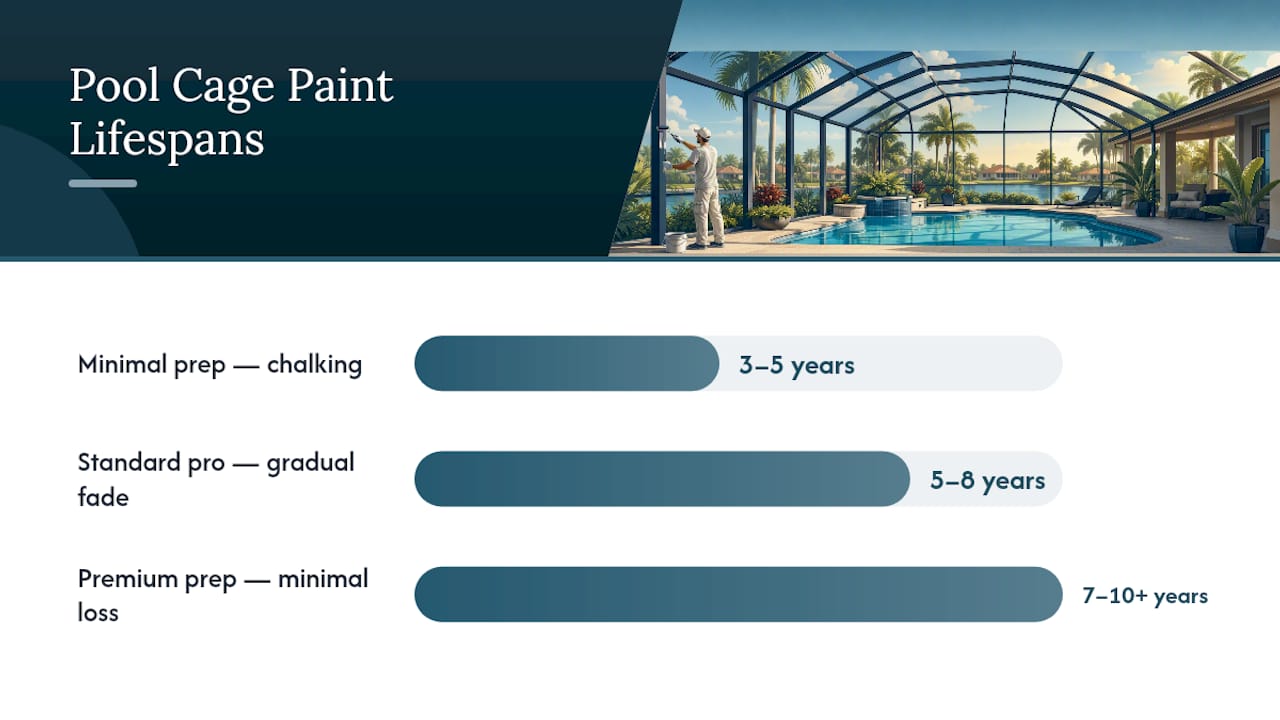
At the low end, a rushed job with minimal surface prep or a cheap acrylic latex on a coastal lot might hold up around 3 to 5 years before chalking and adhesion failure set in. A standard professional repaint, done with proper cleaning and a quality coating, typically runs about 5 to 8 years in Southwest Florida, per EFC Contractors. Push into premium territory, meaning full oxidation removal, aluminum primer, and a two-coat polyurethane or DTM acrylic system, and you're looking at approximately 7 to 10 years. Powder coating, applied as a factory finish rather than a field repaint, often exceeds a decade thanks to its baked-on chemical resistance.
| Lifespan band | Typical cause | Expected issues | Rough cost range |
|---|---|---|---|
| 3–5 years | Minimal prep, low-grade paint, high salt/sun exposure | Chalking, early peeling, spot rust | Low material cost, high refinish frequency |
| 5–8 years | Standard professional prep and coating | Gradual fading, minor chalking by year 6-7 | several thousand dollars for professional repaint |
| 7–10+ years | Premium prep, DTM/polyurethane, sheltered site | Slow fade, minimal adhesion loss | Higher upfront cost, fewer repaint cycles |
Cost figures for professional repainting commonly fall in the range of several thousand dollars depending on cage size and prep scope, as detailed at EFC Contractors. That's a wide range, and it's wide for a reason: a small inland cage with light oxidation costs a fraction of what a large, storm-battered coastal enclosure needs.
Pro Tip: If your cage sits within a half mile of saltwater, plan your budget around the shorter end of each band. Salt air doesn't care how good the paint job looked on day one.
Coastal placement changes everything. A cage two blocks from the Gulf faces salt spray that a cage in a landlocked subdivision never sees, and that alone can shave two to three years off any coating's service life. Inland homeowners in humid but non-coastal areas tend to land comfortably in the 7 to 10 year range with standard professional work, while beachfront properties should treat 5 years as the realistic planning horizon even with quality materials.
As a general exterior-painting reference point, most home exteriors follow a 5 to 10 year repaint cycle depending on material and exposure. Pool cages track that same logic, just with more aggressive chemical exposure from chlorine and pool chemicals thrown into the mix.
What Wears Down a Pool Cage Faster Than You'd Think
Six forces do almost all the damage, and most homeowners only notice one or two of them until a contractor points out the rest.
- UV degradation breaks down the resin binders in paint, causing the chalky, powdery surface you can wipe off with a finger.
- Salt spray accelerates corrosion on aluminum framing and speeds up adhesion failure at seams and fasteners.
- Humidity keeps moisture trapped against the metal longer, which invites oxidation under the paint film.
- Chlorine and pool chemical drift attacks lower-grade coatings that weren't formulated to resist chemical exposure.
- Wind-driven debris during storms scratches the surface, creating entry points for moisture.
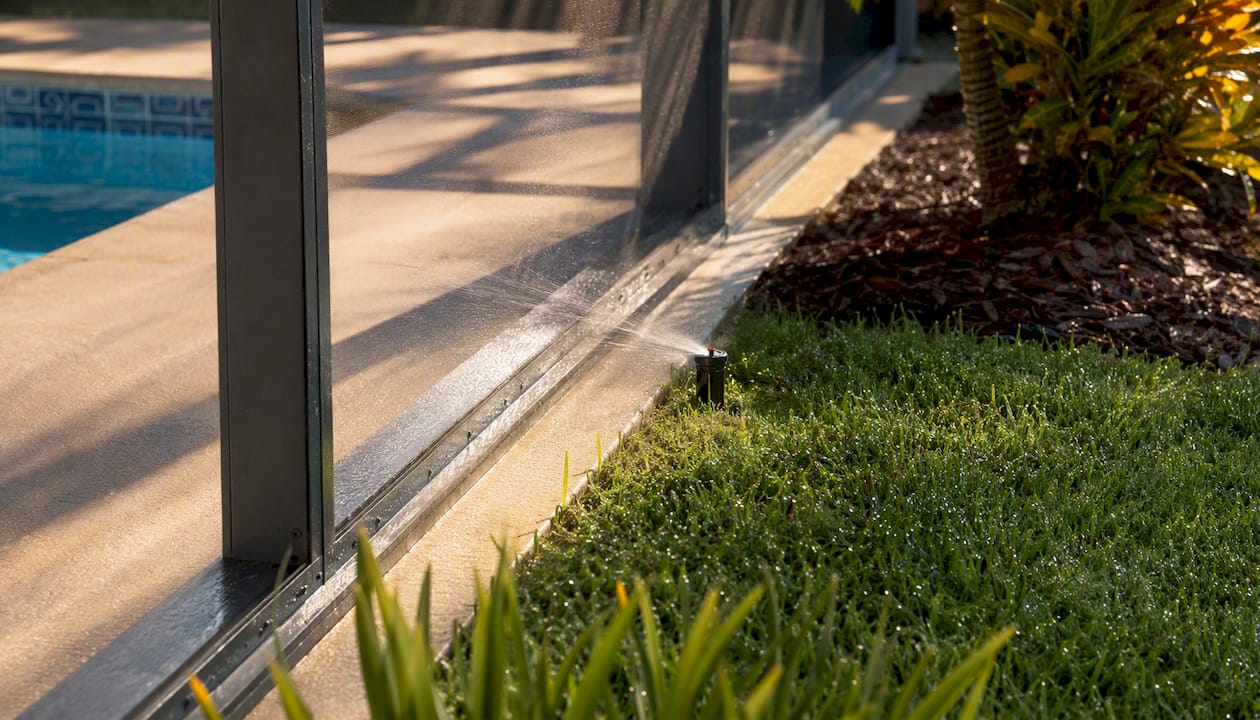
- Standing moisture from sprinklers hitting the base rails daily causes localized rust long before the rest of the frame shows wear.
Rinsing salt buildup off the frame after storms or heavy spray events measurably helps adhesion and delays failure, according to coastal painting contractors in the Fort Myers and Naples area.
Pro Tip: Redirect sprinkler heads away from your cage's base rails. That one adjustment prevents the kind of localized rust that shows up first at ground level, years before the rest of the frame looks tired.
Signs Your Pool Cage Needs Repainting or Restoration
A quick walk-around twice a year catches problems while they're still cheap to fix. Look for:
- Chalking: a powdery residue on your hand after touching the frame.
- Flaking or peeling, especially at joints and fastener points.
- White oxidation on aluminum, visible as a dull, crusty film.
- Pitting in the metal surface, a sign corrosion has moved past the coating.
- Adhesion failure at welds or where fasteners meet the frame.
- Bubbling or rough texture, which usually means moisture got trapped under the last coat.
Chalking alone often means a wash and touch-up will buy you another year or two. But once you see pitting, structural corrosion, or fasteners that wiggle when you touch them, call a professional before the next big storm, not after.
Which Coatings and Materials Actually Last on Aluminum Cages?
Coating choice matters almost as much as prep. Here's how the main options stack up on aluminum pool cage framing.
DTM (direct-to-metal) acrylic coatings go straight onto prepped aluminum without a separate primer step in many applications, resist chlorine and coastal moisture better than standard exterior house paint, and typically run in the 5 to 7 year range. Polyurethane topcoats offer stronger UV resistance and flexibility for thermal expansion, often reaching 7 to 10 years when paired with proper prep. Epoxy primers aren't a topcoat on their own, they improve adhesion to aluminum and boost overall system durability toward 8 to 10 years, but they need a UV-stable topcoat over them since epoxy alone chalks quickly in direct sun. Powder coat finishes, applied at the factory rather than in the field, deliver the longest baseline durability at 10-plus years thanks to a baked-on finish that resists chalking and UV breakdown far better than wet coatings. Water-based acrylic coatings, the system Mrpoolscreen applies during restorations, balance strong chemical and UV resistance with lower environmental impact and easier recoating down the line, generally landing in the 5 to 8 year window when applied over properly prepped aluminum.
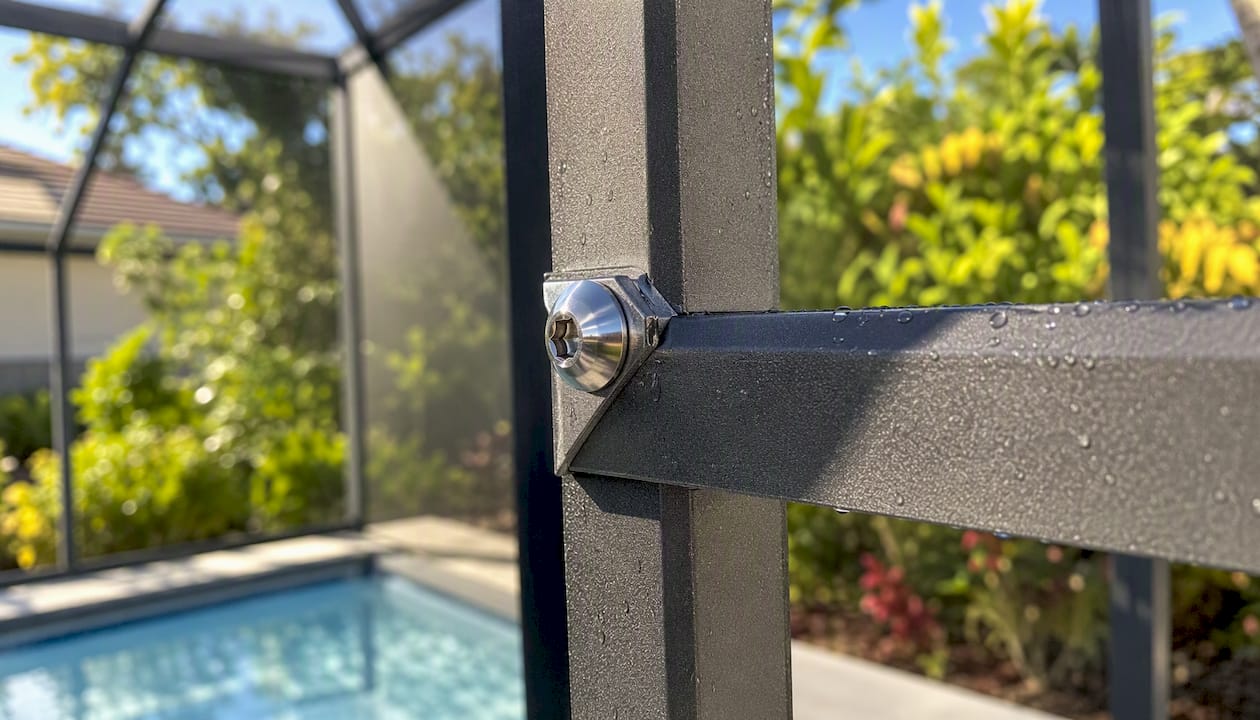
Hardware matters just as much as the paint sitting on top of it. Swapping rusted screws for stainless-steel fasteners or Nylotech hardware stops the rust streaks that bleed through fresh paint within a year of a repaint, a detail plenty of DIY jobs skip entirely.
Pro Tip: Darker colors absorb more heat, which accelerates thermal expansion and contraction at the aluminum joints. If your cage sits in full sun most of the day, a lighter shade in a DTM acrylic or polyurethane system will outlast the same coating in charcoal gray.
Why Prep Work Determines Longevity More Than the Paint You Choose
Inadequate surface preparation is the leading cause of early coating failure on Tampa Bay pool enclosures, and that finding holds true statewide. The paint can matters less than what happens before it ever gets opened.
Here's the sequence that actually extends lifespan:
- Wash and degrease the entire frame to remove pollen, salt film, and grease buildup.
- Remove oxidation with mechanical abrasion, not just a rinse.
- Sand and feather edges where old paint is chipped so the new coat doesn't telegraph the damage underneath.
- Etch or apply aluminum primer on bare metal spots to promote adhesion.
- Spot-prime any corrosion points before the full coat goes on.
- Mask and protect screening, pool decking, and landscaping.
- Build film thickness with multiple thin coats rather than one heavy pass.
Application method affects that final result more than most homeowners realize. HVLP spraying atomizes the coating into a fine mist that wraps around frame members and reaches the backsides of horizontal bars, spots a roller or brush physically can't get to. Skip that coverage and those unpainted backsides start oxidizing within a year or two, even though the front of the frame looks flawless.
Skip steps 1 through 5 and you'll see the difference within 18 months: peeling at the joints, rust bleeding through, and a coating that looked great on install day failing years ahead of schedule.
Pro Tip: Before the topcoat goes on, run your hand along every horizontal bar. Any grit, rough patch, or chalky residue means prep isn't finished, no matter how good the frame looks from a few feet away.
DIY Repaint or Call a Restoration Pro?
Small, single-story cages with easy ground-level access and only light surface chalking are reasonable DIY candidates if you're comfortable on a ladder and own or can rent a sprayer. Anything with second-story access, visible pitting, or corrosion at structural joints belongs with a professional, both for safety and because botched prep on a large cage costs more to fix later than it would have to hire out from the start.
If you're vetting a contractor, ask these questions before signing anything:
- What specific prep steps are included, and how is oxidation removed?
- What primer and topcoat system will be used, and why?
- What film thickness are you targeting, and how many coats?
- Does the quote include fastener replacement with stainless steel or Nylotech hardware?
- What warranty comes with the coating, and what does it actually cover?
- Are you insured, and can you provide references or before-and-after project examples?
Watch for red flags: no written scope of work, a warranty that's vague about what voids it, or a lowball price with zero mention of prep steps. That combination almost always means shortcuts you'll pay for in three years, not ten.
Case Study: Restoring an Aging Enclosure Instead of Rebuilding It
Mrpoolscreen recently restored a weathered pool cage on a coastal Central Florida property that showed heavy chalking, rust streaks at the fastener points, and visible oxidation after years of salt exposure. Rather than recommend a full rebuild, the restoration approach addressed the underlying problems directly.
- Removed oxidation and corrosion from the aluminum frame.
- Applied primer to bare and corroded spots before topcoat.
- Coated the full structure with a water-based acrylic system.
- Replaced rusted fasteners with stainless-steel and Nylotech hardware.
Restoration projects like this one typically run up to 60% less than a full rebuild, extending the enclosure's usable life by several more years without the cost or disruption of tearing the structure out and starting over. The full project appears in Mrpoolscreen's restoration gallery.
A Restoration Pro's Take on What Homeowners Get Wrong
The biggest mistake isn't picking the wrong paint, it's skipping the inspection until the frame's already pitted. Walk your cage twice a year, and get a professional estimate before small rust spots become structural problems.
Get a Free Estimate on Your Pool Cage Restoration
If your cage is chalking, streaked with rust, or just looking tired after a decade of Florida sun, restoration usually costs a fraction of a full rebuild while solving the same corrosion and adhesion problems at the root.

Mrpoolscreen handles the full scope: oxidation removal, water-based acrylic coating application, fastener upgrades to stainless steel or Nylotech hardware, re-screening, and pool deck staining when a project calls for it. Every job draws on industrial-grade materials rather than off-the-shelf hardware store paint, which is part of why restored cages hold up as long as they do. You can browse real project outcomes in the project gallery before deciding anything. When you're ready to see what restoration would cost for your own enclosure, request a free estimate through the pool screen restoration page and get a scope of work back before committing to anything.
Sources
- How Long Screen Enclosure Paint Lasts in Southwest Florida
- Pool Cage Painting Tampa & Westchase FL | Westchase Painting
- The Ultimate Guide to Pool Enclosure Painting in Florida: Expert Tips from Tru Colors Contracting - Tru Colors Contracting