
Yes, you can stain pool pavers, and for most well-prepared surfaces it's one of the highest-impact weekend projects a homeowner can tackle. But three things have to be true first: new concrete needs about 30 days to cure before any stain touches it, the surface has to pass a porosity test, and you can't stack more than three stain layers without risking peeling.
- Check for old sealer or paint. Strip it before doing anything else.
- Confirm the concrete's age and cure status.
- Run a water test before buying a drop of stain.
Pro Tip: If water beads up on the pavers instead of soaking in, there's an old sealer or coating underneath. Strip it with ProClean Degreaser™ first, or your new stain will flake within a season.
Key Takeaways
Staining pool pavers succeeds when the surface passes a porosity test, gets fully stripped of old coatings, and receives no more than three thin stain layers before sealing.
| Point | Details |
|---|---|
| Verify cure time first | New concrete needs about 30 days to cure before any stain or sealer touches it. |
| Run the water test | If water doesn't absorb within five minutes, etch the surface before staining. |
| Respect the coat limit | Never apply more than three stain layers; extra coats cause peeling and adhesion failure. |
| Seal with enough acrylic solids | Choose a sealer with at least 25% acrylic solids for durable, low-maintenance protection. |
| Know when to call a pro | Mrpoolscreen handles structural issues, heavy stripping, and combined deck-and-enclosure restoration jobs. |
Table of Contents
- Which Stain Systems Work Best for Pool Pavers?
- Prepping the Surface So Stain Actually Sticks
- How to Test Color Before Committing to the Whole Deck
- Step-by-Step: Applying Stain Around a Pool
- Sealing, Slip Resistance, and What Not to Mix
- How Long Does Pool Deck Stain Last?
- Fixing Uneven Color, Peeling, and Efflorescence
- When Should You Hire a Pool Deck Contractor Instead?
- What Homeowners Underestimate About DIY Staining
- Get a Professional Finish Without the Trial and Error
- Frequently Asked Questions
- Sources
Which Stain Systems Work Best for Pool Pavers?
Water-based stains dominate pool deck work because they resist UV fading better around chlorinated water and clean up without harsh solvents. Solvent-based stains penetrate deeper and can produce richer color on dense concrete, but they carry stronger odors and need more careful ventilation during application.
For color style, you're choosing between two philosophies:
- Antiquing™ and similar colorants create a mottled, natural stone look by reacting unevenly with the surface, which actually hides minor imperfections better than a flat color.
- EasyTint™, a tinted sealer, delivers fuller, more uniform coverage in one step, which suits homeowners who want a consistent color rather than variegated tones.
- Portico™ and PaveWave™ are formulated specifically for pavers and behave differently on concrete versus brick versus natural stone, so always confirm the label matches your surface.
Whatever you pick, check compatibility with sealers like EasySeal™ or HydroCryl™ and anti-slip additives like OxiGrip™ before you buy, since not every stain accepts every topcoat.
Prepping the Surface So Stain Actually Sticks
Skipping prep is the single biggest reason DIY stain jobs fail. Work through this sequence in order, not out of order:
- Sweep and clear all debris, then degrease with ProClean Degreaser™ to pull oils and sunscreen residue out of the pores.
- Strip any existing paint or sealer completely. Staining over old coatings is the fastest route to peeling.
- Power-wash the entire surface, then etch with CitrusEtch™ if water isn't absorbing.
- Neutralize the etchant and rinse thoroughly. Leftover acid residue interferes with color development.
- Let everything dry fully before you open a single container of stain.
Drying typically takes 24 to 48 hours depending on humidity, but new concrete needs roughly 30 days to cure before it's ready for any coating at all. Don't shortcut this. Porosity varies significantly between concrete, stone, and brick, and uneven absorption is what causes the blotchy patches homeowners complain about most.
Wear gloves, eye protection, and a respirator anytime you're working with solvent-based products or strong etchants. Your lungs will thank you later.
Pro Tip: Test absorption in at least three separate spots, not just one. A shaded corner near the coping often absorbs differently than a sun-baked stretch of open deck.
How to Test Color Before Committing to the Whole Deck
- Pour a cup of water on several spots around the deck. If it doesn't soak in within about five minutes, that area needs etching or has a sealed surface underneath.
- Apply a small trial kit using Antiquing™, EasyTint™, Portico™, or PaveWave™ on an inconspicuous corner to see the true color once it's sealed.
- Record what happened, including whether that patch needed extra etching or a second coat to look right.
Pro Tip: Test a full paver plus the joint sand next to it. Sand often pulls color differently than the paver face, and that contrast is easy to miss until it's too late to fix cheaply.
Step-by-Step: Applying Stain Around a Pool
Gather a low-pressure pump sprayer, a 3/8 inch nap roller for touch-ups, stiff brushes for edges, and a respirator if you're using solvent-based products.
- Mask the pool edge and coping thoroughly. Overspray on coping stone is nearly impossible to undo cleanly.
- Start in the farthest corner from your exit path so you're not walking through wet stain to leave.
- Apply thin, even coats. Two light coats beat one heavy coat every time, whether you're spraying in circular motions or rolling.
- Backroll sprayed sections when needed to smooth out streaking, and never let stain pool in low spots.
- Respect the three-layer maximum. More coats don't mean deeper color; they mean adhesion failure down the line.
A few timing notes worth writing down:
- EasyTint™ typically needs several hours between coats, and a thumbnail cure test tells you if it's ready for the next layer.
- Antiquing™ often allows saturated application with no wait between coats, but check the manufacturer sheet for your specific batch.
- Stain on mild, overcast days. Direct sun above roughly 90°F flashes the product too fast for even coverage, and wind or rain during the cure window ruins the finish.
Pro Tip: Pull the filter out of your sprayer for thicker products. It sounds counterintuitive, but a clogged filter is the number one cause of streaky, uneven spray patterns on deck jobs.
Sealing, Slip Resistance, and What Not to Mix
An acrylic sealer with at least 25% acrylic solids protects color and cuts down on future maintenance. EasySeal™ and HydroCryl™ are both common choices, though sheen and color-pop can differ slightly between them, so check a sample before committing to a full deck.
For slip resistance, mix an additive like OxiGrip™ directly into your final clear coat rather than applying it separately. Manufacturer guidance on ratio and compatibility matters here. Not every sealer accepts every additive, and some colorants shouldn't be layered directly under certain anti-slip products.
- Apply sealer with a sprayer, then backroll for even coverage.
- Keep coats thin. Puddled sealer dries cloudy or tacky.
- Most decks need one to two sealer coats, depending on the product and porosity.
Pro Tip: Always read the datasheet for the specific colorant and sealer combo you're using. Two great products can still fail together if they weren't designed to layer.
How Long Does Pool Deck Stain Last?
Plan on resealing every three to five years depending on sun exposure and foot traffic. Staining itself is cosmetic, so you only redo it when you actually want a color change, not on a fixed schedule.
- Sweep regularly and rinse with mild soap and water occasionally.
- Wipe up oils, sunscreen, and rust spots immediately before they set into the finish.
- Watch for fading, peeling, or blotchy discoloration as your cue to reseal or restain.
Fixing Uneven Color, Peeling, and Efflorescence
Blotchy color almost always traces back to inconsistent porosity or rushed prep. Spot-etch and re-clean the problem area, then apply a localized recoat once it's fully dry.
- Peeling usually means you stained over old sealer or exceeded the three-coat limit. Strip it back and start over correctly.
- White powdery efflorescence needs a dedicated cleaner and a fully dry surface before you attempt to restain.
Pro Tip: Persistent efflorescence that keeps returning after cleaning often signals moisture moving up through the slab, which is a job for a professional, not another coat of stain.
When Should You Hire a Pool Deck Contractor Instead?
DIY makes sense for a clean, well-prepped patio with no prior coatings. Hire a pro when you're dealing with structural cracks, heavy efflorescence, drainage problems near the pool, or multiple layers of old paint that need stripping.
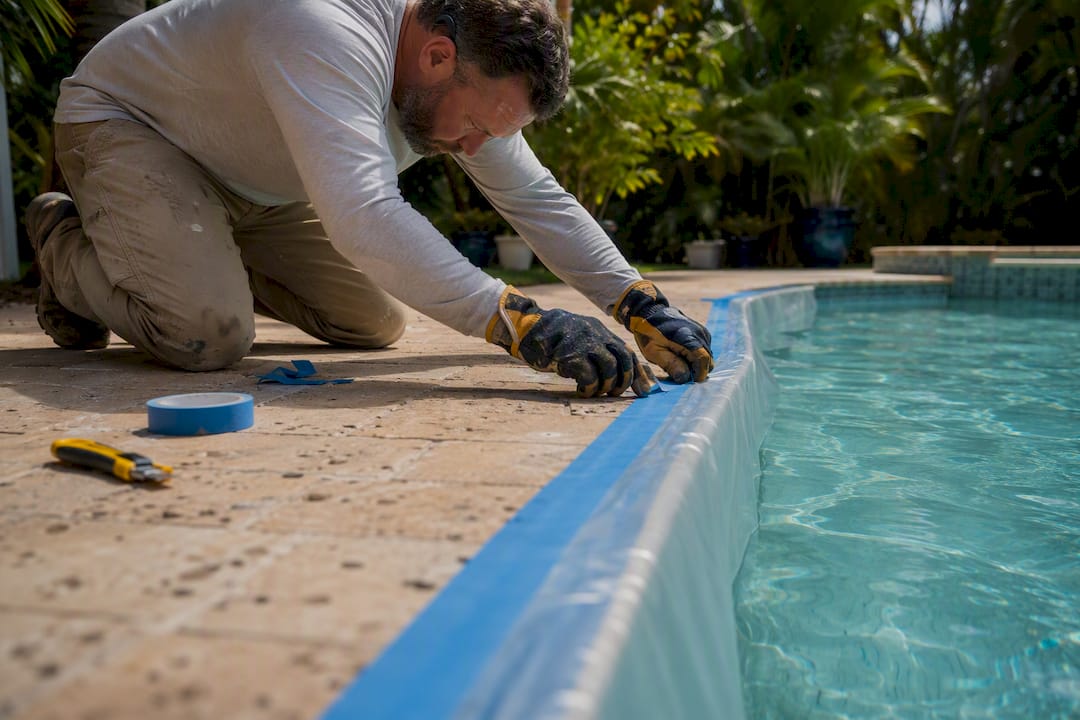
A qualified contractor should offer a full assessment, run test patches before committing to the whole deck, and mask and protect the pool during work. Ask for references or a project gallery, proof of insurance, and a clear timeline that accounts for cure time.
Pro Tip: A contractor who skips the water absorption test on your specific deck hasn't done their homework. Walk away and find one who does.
What Homeowners Underestimate About DIY Staining
Cost savings pull most homeowners toward DIY, and for a small, well-prepped patio with no prior coatings, that's usually the right call. Where people get burned is skipping the boring parts. Prep and drying eat up more time than the actual staining, and rushing either one is what turns a weekend project into a redo.
Use trial kits before you commit to a color. Stay conservative on coat count even when the deck looks like it needs "just one more pass." Large decks, drainage issues, or a history of previous coatings push a job past reasonable DIY territory, and that's when a restoration specialist earns their fee.
Get a Professional Finish Without the Trial and Error
Staining pavers yourself saves money when the deck is simple and well-prepped. When your deck has old coatings to strip, drainage quirks, or a screen enclosure that needs attention alongside the deck itself, Mrpoolscreen handles the full scope in one visit instead of you coordinating separate contractors for the cage and the concrete.

Mrpoolscreen's pool deck staining service includes surface assessment, professional stripping and etching, stain and sealer application, and slip-resistance options when you want them. Ask any contractor you're vetting for the same things you'd ask us: what remediation steps they'll take, which topcoat products they're using, whether they offer a workmanship warranty, and how they account for cure time in the schedule. Browse the project gallery to see finished decks before you decide, then request an estimate for your own.
Frequently Asked Questions
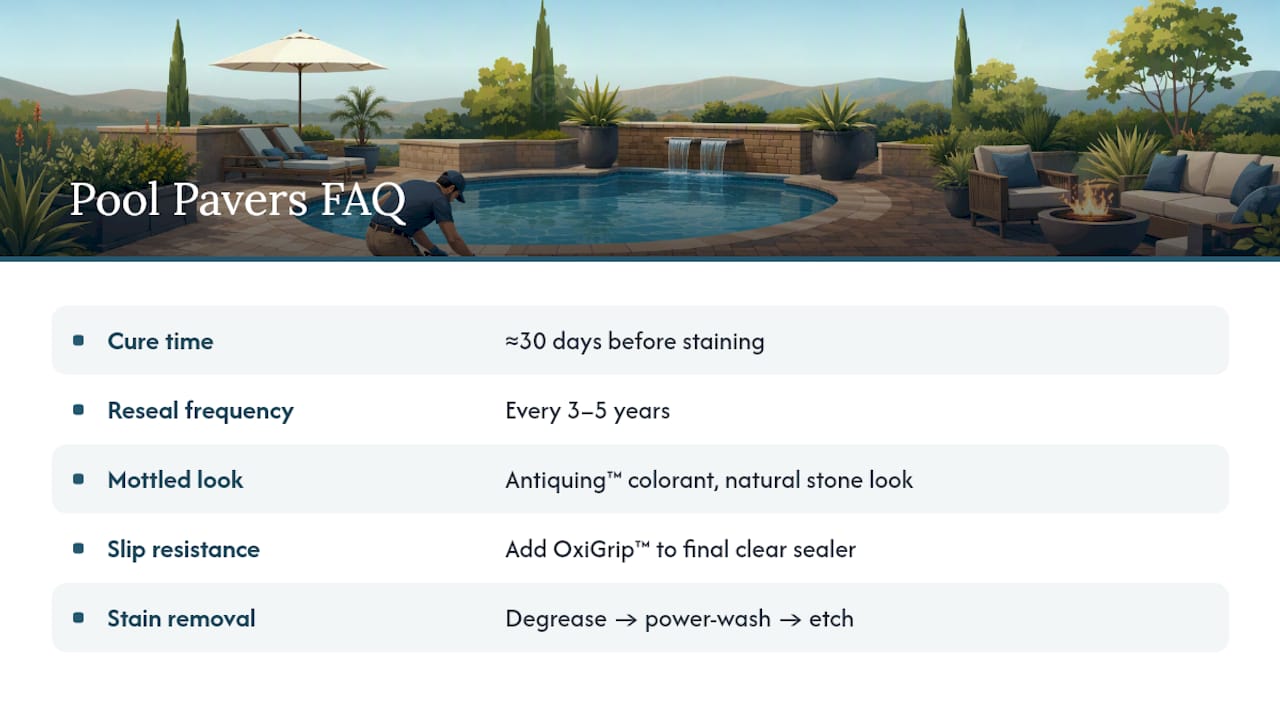
How long do I need to wait before staining new pool pavers? New concrete pavers need roughly 30 days to cure before staining. Staining too early traps moisture and causes discoloration or bond failure.
What's the best stain for pool pavers if I want a natural, mottled look? Antiquing™ style colorants react unevenly with the surface to create a natural stone effect, while tinted sealers like EasyTint™ give more uniform, solid coverage.
Can I add slip resistance without changing the color? Yes. Mix an additive like OxiGrip™ into your final clear sealer coat rather than the colored base coat, so it adds texture without altering the tone.
How do I remove stains from pool pavers before restaining? Degrease with a product like ProClean Degreaser™, power-wash thoroughly, and etch with something like CitrusEtch™ if the surface still resists water absorption.
How often should I reseal stained pool pavers? Most decks need resealing every three to five years, depending on sun exposure and foot traffic, while the stain color itself only needs refreshing when you want a change.
Sources
Check manufacturer application sheets for whatever stain you choose. Datasheets list exact recoat windows and sealer compatibility that generic guides can't cover.
- Staining Your Pool Concrete Deck Stain: A How-To Guide (Direct Colors blog)
- Stain concrete & brick pavers (Direct Colors)
- Staining Pavers 101: A Complete How-To Guide (Gappsi)
- How often should you reseal your pavers? (AskAway blog)