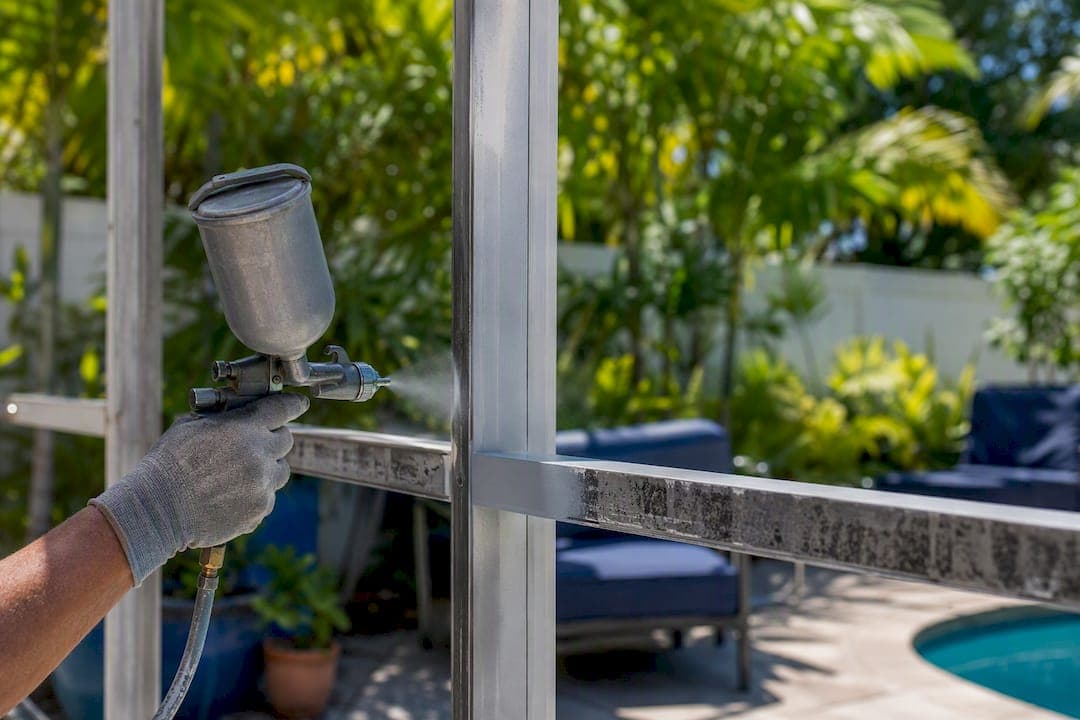
Paint a pool cage only during a dry stretch when daytime temperatures sit roughly between 50°F and 85°F and relative humidity stays below 60%. The structure also needs to have been fully dry for at least 48 to 72 hours before you start. That's the whole rule. Everything else in pool cage painting weather conditions planning is really just detail underneath it.
Start early in the morning, before the sun climbs and humidity swings back up in the afternoon. Before you commit to a date, run through this:
- A 48 to 72 hour dry forecast, with no rain creeping back in
- Little to no overnight dew expected the morning of the job
- No standing water in gutters, lower rails, or other horizontal members from a recent storm
Miss any one of these and you're not painting a pool cage, you're setting up a callback in six months.
TL;DR:
- The optimal weather window for painting a pool cage is during dry, cool mornings when the temperature is between 50°F and 85°F and humidity stays below 60%.
- It is crucial to ensure the structure has been fully dry for at least 48 to 72 hours before painting, especially after rain or heavy dew, to prevent premature coating failure.
- Coastal and shaded properties require longer dry periods and a broader buffer for moisture, as salt air and shade retain moisture longer, impacting drying time.
- Starting early in the morning avoids midday heat and humidity spikes that cause flash-drying and poor adhesion, with work stopping before late afternoon humidity rises.
- Professionals can manage surface prep, surface moisture detection, and optimal application timing, reducing the risk of peeling and prolonging coating durability.
Table of Contents
- What Determines the Best Weather for Pool Cage Painting?
- What Temperature and Humidity Are Safe for Paint to Cure?
- Why Do Pros Paint Early in the Morning?
- How Do You Know the Structure Is Dry Enough to Paint?
- Which Coatings Hold Up Best Against Sun and Humidity?
- A Homeowner's Scheduling Checklist Before Painting Day
- What Happens If Rain Hits Mid-Job?
- How Do You Protect the Pool, Plants, and Patio During Painting?
- Why Does Direct Sun Ruin a Paint Job Faster Than Rain?
- Does Dew Really Matter for Pool Cage Painting?
- What Ventilation Do You Need While Painting or Curing?
- An Editor's Take on Weather Mistakes We See Most
- Let Mr. Pool Screen Handle the Weather Judgment Calls
- Key Takeaways
- Sources
What Determines the Best Weather for Pool Cage Painting?
Central Florida doesn't hand you a clean calendar. The general rule of thumb favors the dry season, roughly November through May, when humidity drops and afternoon thunderstorms become less of a daily threat. But "dry season" is a heuristic, not a guarantee. Coastal properties, shaded lots, and screened areas near ponds or canals can run wetter and stickier than the regional average, storms or not.
Here's how to actually turn that heuristic into a booking window:
- Pull a 7-day forecast, not a 3-day one. A single dry day sandwiched between storms isn't enough time for full cure, especially on aluminum, which handles moisture differently than wood siding.
- Look for a 48 to 72 hour dry stretch minimum, and lean toward the longer end if the property sits near salt water or has heavy tree cover holding in overnight moisture.
- Flag any named storm or tropical system within 10 days, even if it's projected to miss you. Barometric shifts often bring humidity spikes before the rain arrives.
- Extend your buffer near the coast. Salt air keeps surfaces tacky longer and slows evaporation, so what reads as "dry" on paper may not be dry against the metal.
High UV exposure cuts the other direction. It shortens your working window during the day even as it lengthens the season overall, since intense midday sun can flash-dry a coating before it levels properly. The fix isn't waiting for a cooler month. It's shifting your start time earlier and structuring the whole job around morning hours, which the next section covers in more detail.
What Temperature and Humidity Are Safe for Paint to Cure?
Fifty to 85°F is the working range for most exterior coatings, and it isn't an arbitrary number. Below 50°F, most water-based acrylics struggle to form a proper film, leaving a chalky, weak bond. Above 85°F, the surface temperature of aluminum in direct sun can run 20 to 30 degrees hotter than the air, which flash-dries the coating before it has a chance to level and adhere.
Statistic to know: Once relative humidity climbs above roughly 60%, drying and cure time slow down enough to risk incomplete adhesion, according to exterior painting guidance commonly cited by aluminum coating specialists.
A few numbers worth checking before you commit to a date:
- Daytime temp: 50°F to 85°F, checked at the job site, not just the regional forecast
- Relative humidity: below 60% for the bulk of the workday
- Dew point: the closer it sits to the air temperature, the higher your overnight condensation risk
- Coating variance: epoxies and polyurethanes generally tolerate a slightly wider humidity range than water-based acrylics, but all of them cure faster and cleaner in the ranges above
Why Do Pros Paint Early in the Morning?
Morning air holds less humidity than afternoon air, right up until the moment dew burns off, and that's the sweet spot. Professional crews aim for early starts specifically to avoid the heat and humidity swing that hits mid to late afternoon.
Painting under peak sun causes real problems: flash-drying, surface bubbling, and poor flow that leaves visible lap marks in the finish. Wind matters too. Anything above roughly 15 mph makes masking unreliable and turns overspray into a nuisance for the pool, patio furniture, and the neighbor's car.
- Start once dew has fully evaporated, usually mid-morning
- Stop before humidity climbs back up in late afternoon
- Treat gusty days as a no-go, not just an inconvenience
Pro Tip: If you're timing a DIY job, touch the frame with the back of your hand before you open a paint can. If it feels cool or slightly damp, dew hasn't cleared yet, no matter what the clock says.
How Do You Know the Structure Is Dry Enough to Paint?
Surface prep decides whether your paint job lasts three years or ten, and weather is half of what surface prep depends on. Skipping this step on a damp or contaminated frame is the single most common reason coatings fail within months rather than years.
- Power wash and degrease first. This strips pollen, mildew, and salt film that block adhesion regardless of how good the paint is.
- Sand or abrasive-clean any oxidized aluminum. Chalky white residue on old frames means the metal has started oxidizing, and paint won't stick to it without mechanical prep.
- Replace corroded fasteners before painting, not after. Rust bleeds through new coatings within weeks if it isn't addressed at the source.
- Check hidden moisture zones, especially horizontal rails, gutter tracks, and corner joints, where water pools and lingers long after the rest of the frame looks dry.
- Wait longer than you think after rain. Visible surface dryness doesn't mean the joints are dry. Give it a full day beyond what looks dry to the eye, especially on shaded sections.
- Apply a bonding primer suited to aluminum before any topcoat. This matters more for long-term durability than the color or brand of paint you choose on top of it.
Pro Tip: A cheap pin-type moisture meter, the kind sold for woodworking, works surprisingly well on aluminum joints. If it reads high near a gutter seam, give that section another day before priming.
Which Coatings Hold Up Best Against Sun and Humidity?
Not every coating handles Florida weather the same way, and the differences show up fast once summer hits.
- Water-based acrylic: flexible enough to move with aluminum as it expands and contracts in heat, strong UV resistance, and easier cleanup and application than solvent-based options. This is the category industrial-grade acrylic systems used in restoration work fall into, and it's a practical fit for most pool cages.
- Epoxy: excellent hardness and chemical resistance, but it's rigid and can crack under thermal cycling unless it's paired correctly with a flexible primer underneath.
- Polyurethane: strong UV topcoat performance, often used as the final layer in a multi-coat system rather than standing alone.
- Powder coat: durable but typically limited to new fabrication rather than field restoration, since it requires factory-controlled curing conditions you can't replicate on-site.
A layered system, primer plus a UV-stable topcoat, makes sense on older frames with more oxidation or previous coating failures. Whatever coating goes on, pair it with stainless steel fasteners rather than the standard hardware most cages ship with. Corrosion at the fastener level undermines even a well-applied coating from the inside out.
A Homeowner's Scheduling Checklist Before Painting Day
Run through this before you sign off on a date, whether you're doing the work yourself or approving a contractor's plan:
- Confirm a 48 to 72 hour dry forecast window with no rain creeping back in, and no overnight dew expected on the target morning.
- Check daytime temperature and humidity against the 50°F to 85°F and sub 60% RH thresholds, not just a general "nice day" impression.
- Verify prep work, power washing, sanding, fastener replacement, and primer, is scheduled to finish before paint day, not squeezed in the same morning.
- Ask your contractor directly about start time, their wind threshold, how they'll protect the pool and nearby plants, and what they check after the final coat to confirm it cured properly.
A five-minute conversation covering those four points catches most of the mistakes that lead to peeling paint within the first year.
What Happens If Rain Hits Mid-Job?
Even a well-planned dry window can turn on you. Florida's afternoon storm pattern is famous for a reason, and a forecast that looked clean at 7 a.m. can produce a pop-up cell by 2 p.m.
The damage depends entirely on timing. Rain hitting a coating within the first hour or two after application, before it's set up, usually means streaking, washout, or spotting that requires resanding and recoating the affected section. Rain hitting a coating that's had four to six hours to skin over is far less destructive, though it can still leave a slight texture change if the surface hadn't fully cured.
The mitigation is mostly about sequencing, not luck. Pros work in sections rather than committing the whole cage at once, so a surprise storm only compromises the portion in progress, not the entire structure. They also keep a rain check built into the day: covering freshly coated panels with breathable tarps rather than plastic sheeting, since plastic traps moisture against wet paint and makes the problem worse, not better.
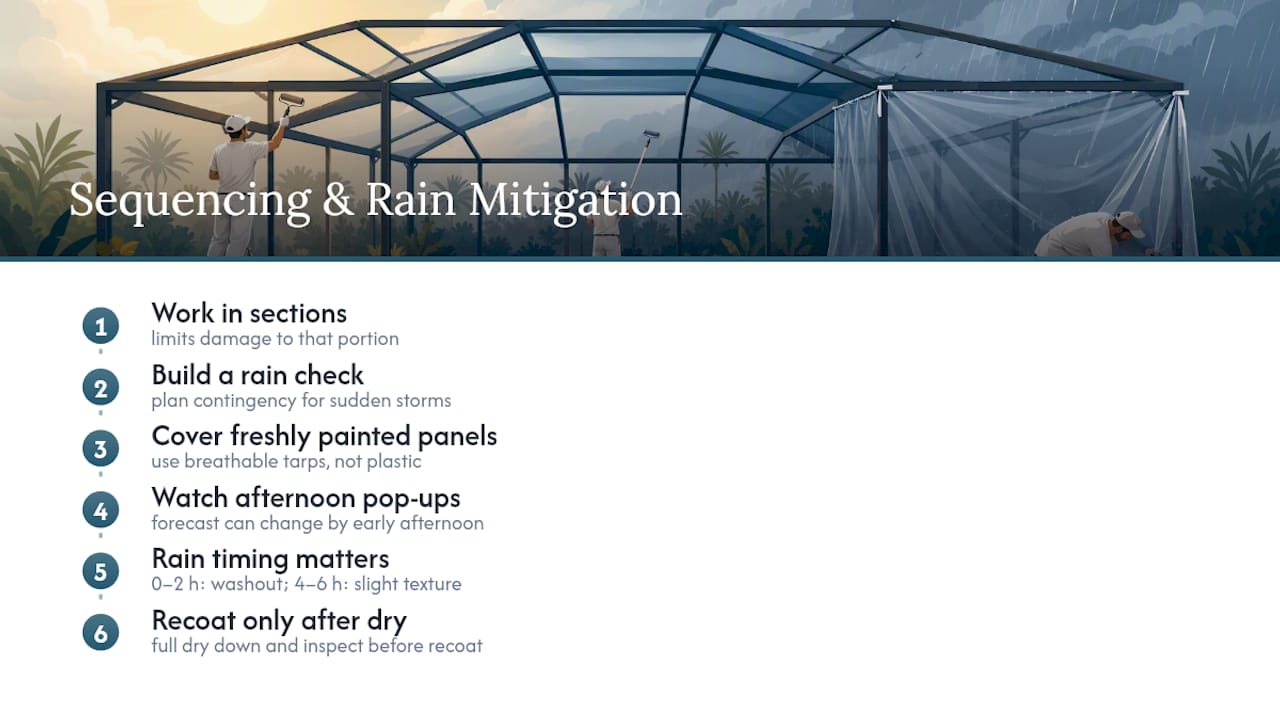
If a storm does interrupt the job, the section gets a full dry down before any recoat, not just a quick towel wipe. That means checking it the way you'd check the frame before starting in the first place. A rushed patch job on a rain-hit section is exactly how a homeowner ends up with one visibly different panel on an otherwise even finish.
How Do You Protect the Pool, Plants, and Patio During Painting?
The pool itself is the biggest thing at stake. Overspray and drips in the water aren't just cosmetic. Acrylic coatings can affect water chemistry and irritate skin if enough gets in, so covering the pool surface with a floating tarp or plastic sheeting secured at the edges is standard practice, not an optional extra.
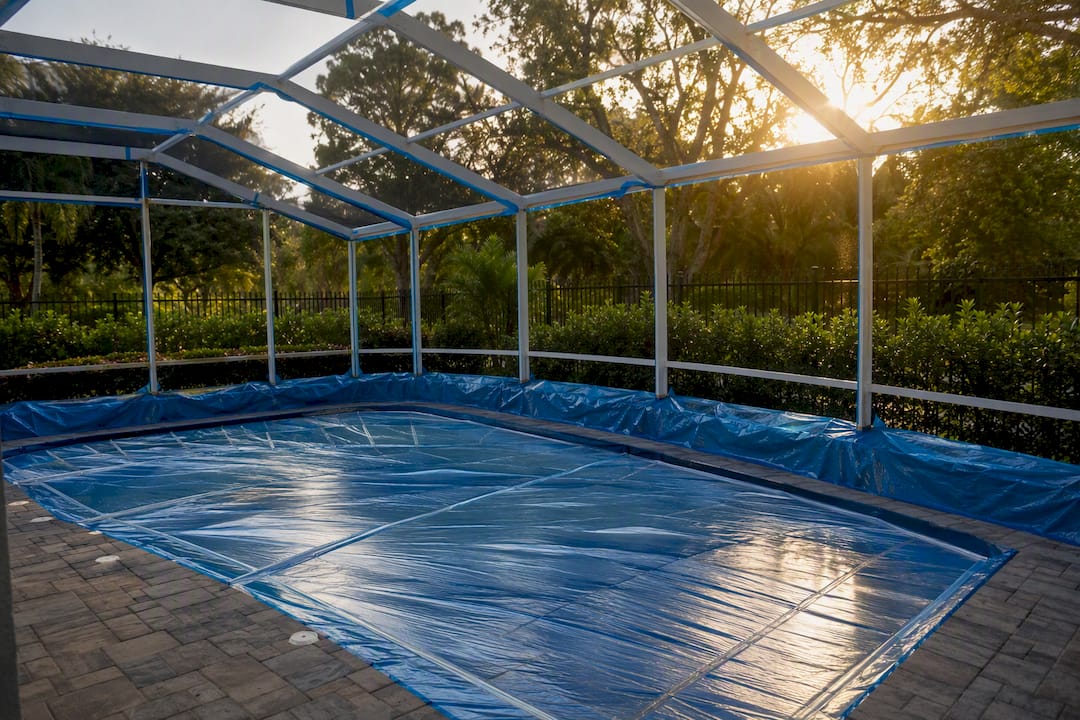
Plants near the enclosure need protection too, especially anything directly beneath the frame. Overspray settling on leaves can block light and, depending on the coating, leave residue that's hard to rinse off. A simple drop cloth or plastic sheeting draped over nearby shrubs during the spray or roll phase solves most of this.
Patio furniture, pavers, and pool decking benefit from the same basic masking logic. Painters' tape along frame bases and plastic sheeting over decking within a few feet of the work area catch drips before they set into a textured surface, where they're far harder to remove than off a smooth one.
Wind plays into all of this directly. On breezy days, overspray travels farther than most homeowners expect, which is one more reason contractors watch wind speed as closely as temperature and humidity before starting. A calm morning isn't just about the paint. It's about everything sitting near the paint too.
Why Does Direct Sun Ruin a Paint Job Faster Than Rain?
Rain gets blamed for most painting disasters, but harsh midday sun causes just as much damage, just slower and less obviously. Aluminum absorbs heat fast, and a frame sitting in direct sun can run well above the surrounding air temperature by midmorning.
That heat creates flash-drying: the coating's surface skins over before the layer underneath has a chance to level and bond properly. The result looks fine for the first few weeks, then shows up as bubbling, poor adhesion, or a slightly uneven sheen once the frame goes through a few heat cycles. It's a slow failure rather than a dramatic one, which is exactly why so many homeowners don't connect it back to the day they painted.
Blistering is the more visible version of the same problem. Trapped solvent or moisture beneath a skinned-over surface expands as temperatures rise, pushing small bubbles up through the coating. Once that happens, the fix isn't a touch-up. It's sanding back to bare metal and recoating that section from scratch.
The practical fix is scheduling around the sun, not fighting it. Painting the shaded side of the enclosure in late morning and the sun-exposed side earlier, before direct light hits it, keeps surface temperature in a workable range throughout the job. On cages with little natural shade, some crews will paint before 10 a.m. and stop entirely rather than push into peak sun hours, picking the job back up the next morning if there's more surface left to cover.
Does Dew Really Matter for Pool Cage Painting?
Overnight dew and trapped water in gutters cause paint failures more often than homeowners expect, even on days that look completely dry by the time anyone starts working.
Dew forms when overnight temperatures drop close to the dew point, leaving a thin film of moisture across metal, screen frames, and especially horizontal surfaces like top rails and gutter tracks. That film can look like it's evaporated within an hour of sunrise while still sitting, unevaporated, in shaded corners or under eaves where direct sun doesn't reach until later in the day.
Painting over a surface that still carries dew moisture, even a trace amount, traps that moisture under the coating film. It doesn't cause immediate failure. It shows up weeks or months later as small blisters or a patch of peeling that seems to come out of nowhere.
The planning fix is simple: check the morning's dew point forecast, not just the temperature. If the dew point sits within a few degrees of the overnight low, expect heavy dew and plan a later start. Waiting for direct sun to hit the specific section you're about to paint, rather than just checking the general time of day, catches the shaded-corner problem that a simple clock check misses.
What Ventilation Do You Need While Painting or Curing?
Ventilation isn't just a fume issue, though that matters too, especially with any solvent-based component in a coating system. It's also a drying issue, since airflow across a wet coating speeds evaporation and helps the film cure evenly rather than skinning unevenly in patches.
On still, humid days, airflow around the cage matters more than it seems. Screen mesh actually helps here, since a screened enclosure naturally allows cross ventilation that a fully enclosed structure wouldn't get. But if nearby landscaping, a privacy wall, or an adjacent structure blocks airflow on one side, that section cures slower and unevenly compared to the rest of the frame.
On windy days, the opposite problem shows up. Too much airflow speeds surface drying faster than the coating underneath can keep up, contributing to the same flash-drying issue harsh sun causes. This is one more reason wind speed and humidity get checked together rather than separately. Ten mph on a humid day behaves differently than ten mph on a dry one.
The safety half of ventilation is straightforward: never work in fully enclosed spaces with any solvent-based primer or coating without cross airflow, and avoid painting during dead-calm, high-humidity stretches where fumes and moisture both linger longer than usual near the work area.
An Editor's Take on Weather Mistakes We See Most
Homeowners rarely get burned by a rainy day. They get burned by the dry-looking day that wasn't actually dry, gutters holding overnight water, a shaded rail nobody checked, dew nobody accounted for. That's the pattern behind most premature peeling we've reviewed through Mr. Pool Screen's restoration case work, and it's why the process leans on industrial water-based acrylics and stainless fasteners rather than whatever's cheapest at the hardware store.
— Michel
Let Mr. Pool Screen Handle the Weather Judgment Calls
Mr. Pool Screen is the practical alternative to guessing at forecasts and hoping a DIY weekend lines up with a dry stretch. Advanced rust, tight scheduling windows, or hard-to-reach frame sections are exactly where a professional call pays for itself instead of costing you a redo.

The restoration process covers the full picture: power washing and prep, corrosion repair with stainless steel or Nylotech fasteners, and application of industrial-grade water-based acrylic coatings built to move with aluminum through Florida's heat cycles rather than crack against it. Many homeowners pair the enclosure work with pool deck staining at the same time, since crews are already on-site and weather windows overlap.
If your pool cage shows chalky oxidation, rust bleeding through old paint, or a coating that's peeling faster than it should, the pool screen restoration service page has details on scope and how to get a project estimate scheduled.
Key Takeaways
Successful pool cage painting depends on hitting a narrow weather window: 50°F to 85°F, humidity under 60%, and a fully dry structure, more than it depends on the paint brand itself.
| Point | Details |
|---|---|
| Confirm the dry window | Check for a 48 to 72 hour dry forecast with no overnight dew before scheduling paint day. |
| Match temperature and humidity | Stay within 50°F to 85°F and keep relative humidity under 60% during the workday. |
| Start early, stop before afternoon | Begin after morning dew clears and finish before humidity climbs back up later in the day. |
| Check hidden moisture first | Inspect gutters, horizontal rails, and joint corners, since trapped water causes most early paint failures. |
| Call a professional for complex jobs | Mr. Pool Screen handles corrosion repair, scheduling, and industrial water-based acrylic application for homeowners who want the weather judgment calls handled for them. |
Sources
The Pool Cage Painting Guide covers prep steps and timing in more depth. The Fort Myers and Naples painting guide breaks down coating system choices for coastal homes. For company-side detail, see Mr. Pool Screen's project gallery and the blog post on paint peeling causes and fixes.
- Pool Cage Painting Guide: Prep, Timing & Finish Options
- The Ultimate Guide to Pool Enclosure Painting in Florida: Expert Tips from Tru Colors Contracting