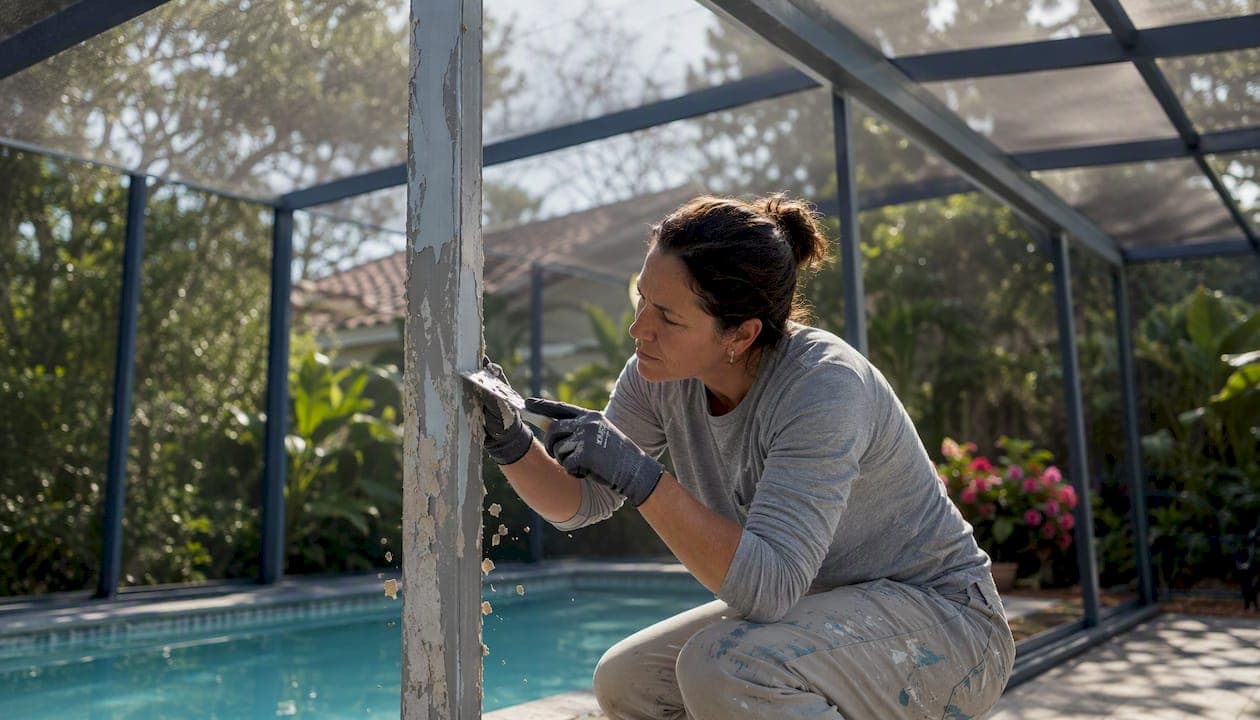
Peeling paint on an aluminum enclosure is an adhesion failure, almost always traceable to one of four causes: surface contamination, inadequate prep, an incompatible coating system, or corrosion working its way out from underneath. The fix isn't complicated, but skipping steps is exactly what caused the problem initially. Right now, pull off any loose flakes by hand or with a scraper to stop the peeling from spreading, then keep that bare metal dry until you're ready to work. Three quick tests tell you how serious it is before you spend a dollar: the water-break test (water beads on a contaminated surface instead of sheeting off), the ASTM D3359 crosshatch tape test (press tape over a scored grid, pull it back, and count what lifts), and a visual chalk check (rub your hand across the surface; heavy chalking means the binder has broken down).
Key Takeaways
Aluminum enclosure paint peeling is an adhesion failure driven by contamination, poor prep, incompatible coatings, or corrosion, and the right primer and surface treatment are what make the repair last.
| Point | Details |
|---|---|
| Diagnose before you repair | Run the water-break, crosshatch (ASTM D3359), and chalk tests to separate surface failure from structural corrosion. |
| Prep is the highest-ROI step | Cleaning, deoxidizing, and abrading to a mechanical profile matters more than paint brand choice. |
| Coating lifespan varies widely | Expect 3–5 years for weak-prep or coastal jobs; 7–10+ years with strong prep and sheltered conditions. |
| Replace corroded fasteners | Swap steel screws for stainless steel immediately; corroding fasteners lift surrounding paint within one season. |
| Mrpoolscreen for full restoration | When peeling is widespread or corrosion is present under the coating, professional restoration saves significantly versus full enclosure replacement. |
Table of Contents
- What commonly causes aluminum enclosure paint peeling
- How to inspect and test peeling so you know how bad it is
- Step-by-step DIY repair for peeling paint on an aluminum enclosure
- Which primers and topcoats work best on aluminum enclosures
- When is a restoration pro the right choice?
- How to prevent paint peeling and maintain your aluminum enclosure
- How Mrpoolscreen approaches peeling paint: a real restoration workflow
- The part most homeowners get backwards
- Mrpoolscreen's pool enclosure restoration service
- Sources
What commonly causes aluminum enclosure paint peeling
Paint doesn't just fall off aluminum on its own. It fails because the bond between the coating and the metal was compromised, either from the start or over time. Coatings that lift, flake, blister, or fail a tape test typically point to surface contamination, inadequate prep, incompatible products, or improper cure conditions, and aluminum enclosures hit all four triggers regularly.
The most common culprits:
- Surface contamination. Oil, silicone from sealants, mold-release residue, or even sunscreen left on the frame blocks mechanical bonding before the first coat dries.
- Inadequate abrasion. Aluminum is naturally smooth and forms an oxide layer within hours of exposure. Paint applied to an unscuffed or unprimed surface has almost nothing to grip.
- Incompatible coatings. Applying an oil-based topcoat over a water-based primer, or a new coat over a chalked, degraded old finish, creates a weak interface that peels as a sheet.
- Oxidation and fastener corrosion. Steel screws corroding inside aluminum frames push rust outward, lifting the coating from beneath. The signs of fastener failure often show up as rust halos around screw heads before the surrounding paint starts to go.
- UV and weather exposure. Florida's full-sun environment breaks down binder resins, chalks the surface, and makes the film brittle. Once the topcoat chalks heavily, it can no longer flex with thermal expansion.
- Moisture and blistering. Adhesion depends on mechanical and electrostatic forces at the coating-substrate interface; blistering and peeling often reflect reduced bond strength or trapped moisture beneath the coating. Pool splash, rain infiltration, and condensation all drive moisture under a compromised film.
- Poor cure or recoat timing. Applying a second coat before the first has cured traps solvents, which gas out and blister the finish from inside.
Location matters a lot here. A pool enclosure in coastal Central Florida faces salt spray, pool chlorine, and UV intensity that can cut a standard coating's life nearly in half compared to a sheltered inland installation. Coastal and high-sun jobs with weak prep can fail in a few years, while well-prepared, sheltered enclosures may last significantly longer.
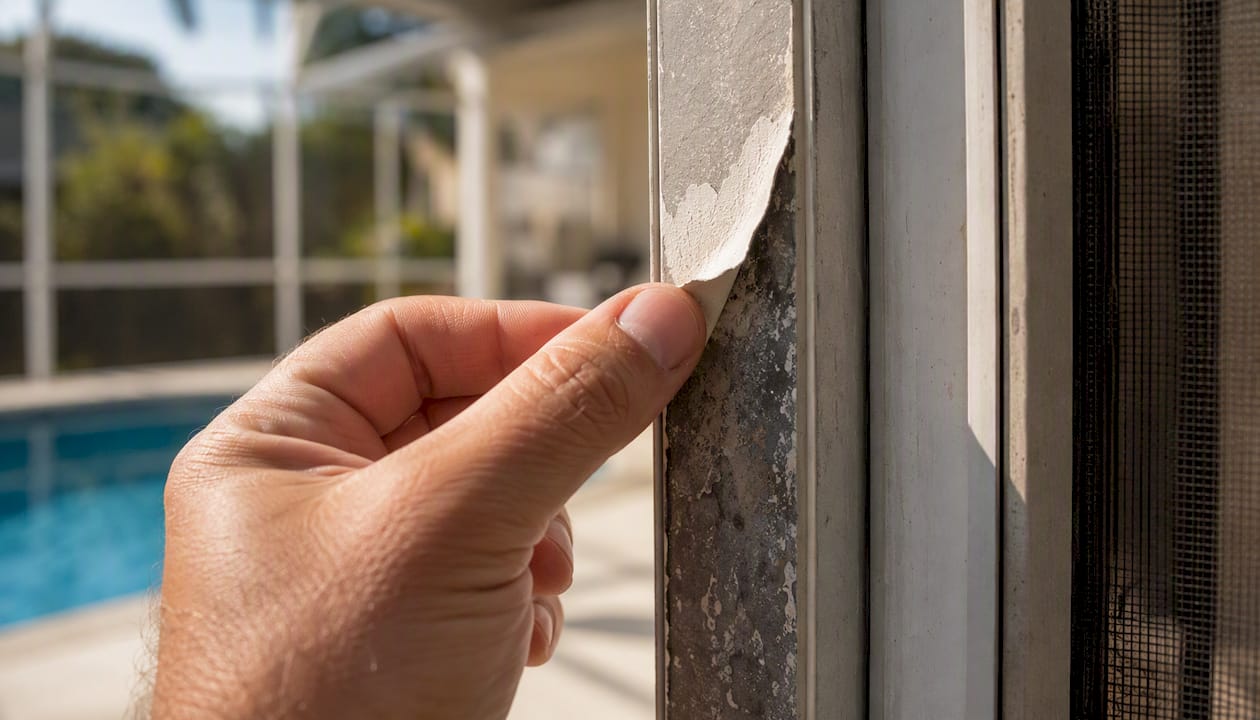
Pro Tip: Before assuming you need a full repaint, press your thumbnail firmly against the peeling edge. If the coating lifts cleanly as a film, you're dealing with adhesion failure at the interface. If the metal underneath is pitted, soft, or powdery, corrosion is already eating the substrate, and surface prep alone won't fix it.
How to inspect and test peeling so you know how bad it is
A five-minute inspection tells you whether you're looking at a manageable DIY patch or a job that needs professional restoration. Work through this in order.
Visual signs to look for:
- Chalking: a white, powdery residue that rubs off on your hand means UV has broken down the binder.
- Flaking or peeling sheets: coating lifting at edges or corners, often starting near welds and fasteners.
- Blistering: bubbles under the film, usually caused by trapped moisture or solvent.
- Rust halos around screw heads or at welds: a reliable sign that corrosion is working from inside the frame outward.
- Exposed bare aluminum that has turned dull gray or white: oxidation has already formed, and paint won't stick to it without treatment.
Three tests to run:
- Water-break test. Wet the surface with clean water. If it sheets off evenly, the surface is clean. If it beads or pulls away in droplets, contamination is present and must be removed before any coating goes on.
- Crosshatch adhesion test (ASTM D3359 basics). Score a 1-inch grid through the existing coating with a utility knife (six cuts each direction, 1–2 mm apart). Press a piece of packing tape firmly over the grid, then pull it back at a sharp angle. No removal is a 5B rating (excellent adhesion). More than 65% of the grid lifts with the tape is a 0B rating, meaning the coating system has failed and needs full rework.
- Chalk/tactile test. Rub your palm across the surface. Light chalking is normal aging. Heavy chalking that coats your hand means the existing finish is too degraded to paint over without stripping.
Decision rule: A small area of peeling (under roughly one square foot), no corrosion under the coating, and a 4B or 5B crosshatch result on surrounding paint means a DIY patch is reasonable. Widespread peeling across multiple panels, a 0B–2B crosshatch result, visible pitting or rust under the film, or fasteners that spin freely in their holes means the job has moved past DIY territory. Check the aging pool enclosure repair checklist for a more detailed triage before you commit to either path.
Step-by-step DIY repair for peeling paint on an aluminum enclosure
Done right, a DIY repair on a contained area holds for years. Done halfway, it peels again in one season. The difference is almost entirely in the prep.
Tools and materials you'll need:
- Stiff plastic scraper and wire brush (brass bristle to avoid scratching aluminum)
- 80-grit and 120-grit sandpaper or sanding sponges
- Orbital sander (for larger areas)
- Phosphate-free cleaner or aluminum-safe degreaser
- Self-etching primer or metal-bonding primer rated for aluminum
- Exterior metal topcoat (water-based acrylic, exterior grade)
- Stainless steel replacement fasteners (for any corroded screws)
- Drop cloths, painter's tape
- Safety glasses, nitrile gloves, N95 respirator (P100 if spraying)
- Ladder rated for your working height
Step-by-step procedure:
- Set up safely. Lay drop cloths to catch debris. If working above ground level, use a rated ladder with a spotter. Ventilate any enclosed spaces. Wear your respirator before sanding.
- Remove all loose paint and corrosion. Scrape off every flake that moves. Use the wire brush on rust halos and oxidized spots. Don't just feather the edges and paint over them — anything loose will take the new coat with it.
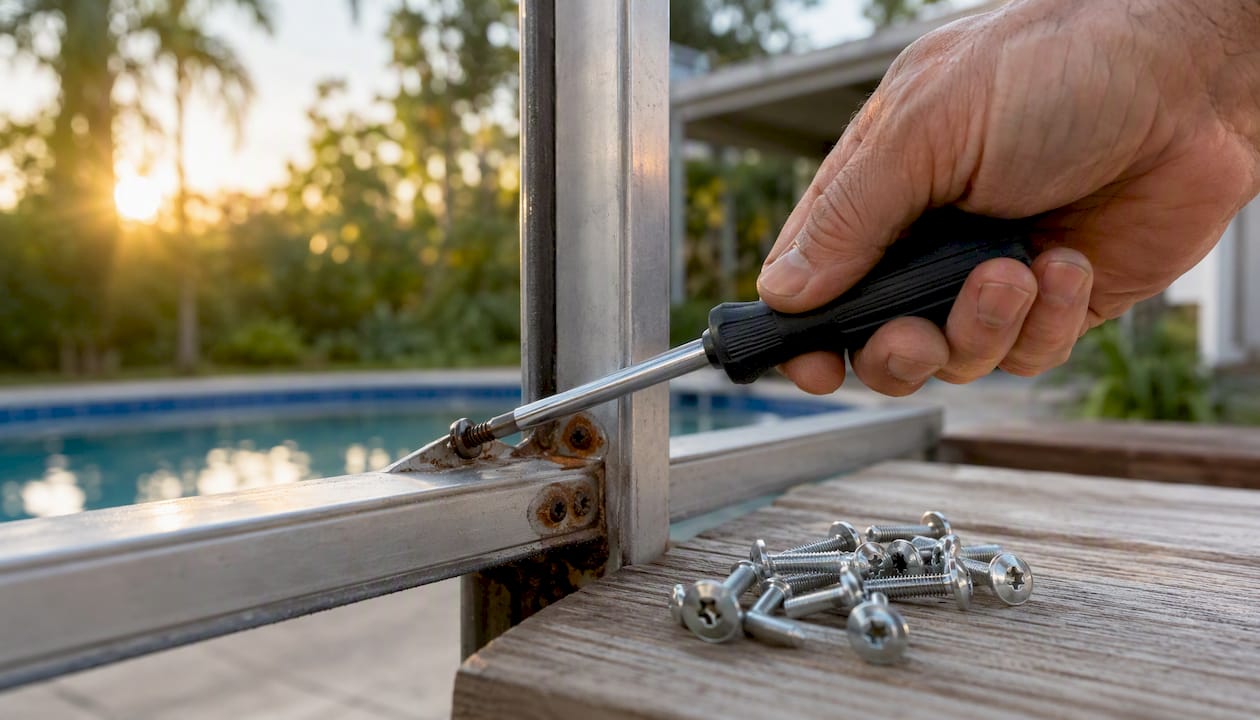
- Replace corroded fasteners. Swap out any steel screws that show rust with stainless steel equivalents. Painting over a corroding fastener is a short-term fix at best. For guidance on pool screen frame rust removal, Mrpoolscreen's homeowner guide covers the process in detail.
- Clean and degrease. Wash the entire repair area with an aluminum-safe degreaser. Rinse thoroughly and let it dry completely. The water-break test here confirms you're clean.
- Abrade to create a mechanical profile. Sand the bare aluminum and the surrounding paint edges with 80-grit, then finish with 120-grit. You're not trying to make it smooth — you want a fine scratch pattern the primer can grip. Feather the edges of the existing coating so there's no hard lip.
- Apply primer per the manufacturer's TDS. Self-etching primers chemically bond to bare aluminum and are the right choice for bare spots. Apply in thin, even coats. Typical dry-to-touch time is 30–60 minutes; recoat windows vary by product, so read the technical data sheet before you proceed.
- Apply the topcoat with proper film build. Two thin coats beat one thick one. Allow the full recoat window between coats (commonly 2–4 hours for water-based acrylics, longer in humid conditions). Rushing this step is one of the most common causes of blistering.
- Inspect adhesion after cure. Wait the full cure time (typically 24–72 hours before light exposure, 7 days before full weathering) and run a quick tape test on the repaired area. If the coating holds cleanly, you're done.
| Stage | Typical timeframe | Notes |
|---|---|---|
| Prep and cleaning | 1–3 hours | Longer for larger areas or heavy corrosion |
| Primer dry-to-recoat | 30 min–2 hours | Check product TDS; humidity extends this |
| Topcoat recoat window | 2–4 hours per coat | Water-based acrylics; oil-based takes longer |
| Full cure before exposure | 24–72 hours minimum | 7 days for full hardness |
Pro Tip: Always check the manufacturer's technical data sheet (TDS) for your specific primer and topcoat before you start. Recoat windows and compatible chemistries vary by brand. Applying a topcoat outside the recoat window — too soon or too late — is one of the most preventable causes of adhesion failure.
Which primers and topcoats work best on aluminum enclosures
Proper preparation for painted aluminum requires cleaning, light sanding to create a profile, and an aluminum-specific primer before topcoating; skipping these steps is the most common reason paint peels. The primer choice matters almost as much as the prep.
Recommended product types:
- Self-etching primer. Contains a mild acid (usually phosphoric acid) that chemically etches bare aluminum for a stronger bond. Best choice for bare or stripped surfaces. Apply directly to clean, bare metal.
- Metal-bonding primer. A water-based or solvent-based primer formulated for non-ferrous metals. Less aggressive than self-etching but compatible with a wider range of topcoats.
- Epoxy primer. Excellent corrosion resistance and adhesion, often used in marine and industrial applications. Requires careful mixing and has a pot life, so it's less forgiving for DIY use.
- Water-based acrylic exterior metal paint. The standard topcoat for aluminum enclosures. Flexible enough to handle thermal expansion, UV-resistant formulations are widely available, and cleanup is straightforward.
- Oil-based metal paint. More durable in some conditions but slower to cure, less flexible over time, and harder to apply in humid weather. Compatibility with water-based primers requires checking the TDS.
- Powder coating. The longest-lasting option, applied electrostatically and cured in an oven. Not a DIY option, but worth knowing about for full-frame restorations. A well-applied powder coat can outlast a brush-applied topcoat by years.
Can you paint over existing paint? Yes, if the existing coating passes the crosshatch test (4B or 5B), is not chalking heavily, and is chemically compatible with the new product. Clean it, scuff it with 120-grit, and apply a bonding primer before the topcoat. If the existing finish is chalked, delaminating, or fails the tape test, strip it back to bare aluminum. Painting over a failed coating just gives the new coat something unstable to peel from.
For color, lighter shades absorb less heat and tend to hold their color longer in high-UV environments. Dark colors look sharp initially but can fade noticeably within a couple of seasons in full Florida sun. In coastal or pool-adjacent settings, look specifically for topcoats rated for salt and chemical exposure. Reviewing screen enclosure visual upgrade options can help you weigh finish choices before committing to a color.
When is a restoration pro the right choice?
Some peeling is a DIY patch. Some is a warning that the whole system is failing. Knowing which is which saves you from spending money on a repair that won't last.
Signs you should hire a professional:
- Peeling covers more than a few square feet or spans multiple frame sections.
- The crosshatch test returns a 0B or 1B result across the enclosure, not just at one spot.
- Corrosion is visible under the coating or the metal surface is pitted.
- Fasteners are corroding through the frame, not just surface-rusting.
- The enclosure hasn't been repainted in over 8 years and is showing widespread chalking.
- You're considering a full-frame powder-coat restoration, which requires industrial equipment.
What a professional does differently:
- Full assessment of adhesion, corrosion extent, and fastener condition before any work starts.
- Chemical deoxidizers or controlled media blasting to remove oxidation that hand-sanding can't reach.
- Industrial-grade self-etching primers applied by spray for consistent film build across the entire frame.
- Stainless steel or Nylotech fastener replacement throughout, not just at visible rust spots.
- Factory-grade water-based acrylic topcoats with controlled cure conditions and post-cure adhesion verification.
Cost and timeline context: A DIY patch on a small area typically costs $50–$150 in materials and a weekend afternoon. A professional restoration of a full pool enclosure in Central Florida generally runs several hundred to a few thousand dollars depending on enclosure size, corrosion extent, and coating system chosen. That's still substantially less than a full enclosure rebuild. For budgeting context on aluminum structure costs, aluminum fence and structure pricing guides give a useful frame of reference for material and labor ranges.
Before hiring, ask any contractor for a written materials list (primer brand, topcoat product, fastener spec), a warranty on labor and materials, and a timeline with cure milestones. A contractor who can't answer those questions specifically is worth skipping.
How to prevent paint peeling and maintain your aluminum enclosure
The enclosures that hold their finish longest aren't the ones with the most expensive paint. They're the ones that get inspected and cleaned on a regular schedule, with small problems fixed before they become large ones.
Practical maintenance schedule:
- Quarterly: Walk the perimeter and look for new chips, rust halos around fasteners, or areas where the coating looks dull or chalky. Catching a chip early means a $10 touch-up instead of a $500 repair.
- Biannual: Wash the entire frame with a mild detergent and soft brush. Avoid abrasive cleaners, pressure washers aimed directly at seals or edges, and any solvent-based cleaners that can strip the topcoat. Rinse thoroughly.
- Annual: Run the chalk test and a spot crosshatch test on the most sun-exposed sections. If chalking is moderate, a light scuff and fresh topcoat on those panels extends the life of the whole system. Check and tighten or replace any fasteners showing surface rust.
Quick-touch prevention habits:
- Replace any steel fastener showing rust with stainless steel immediately. One corroding screw can lift paint in a 6-inch radius around it within a season.
- Address chip and edge wear at corners and welds promptly. Bare aluminum oxidizes within hours and becomes harder to bond to the longer it's left exposed.
- In coastal or pool-adjacent environments, increase cleaning frequency and use a topcoat specifically rated for salt and chemical exposure.
- Keep pool splash and chemical overspray off the lower frame sections where possible. Chlorine accelerates coating breakdown.
The pool enclosure weather damage prevention guide from Mrpoolscreen covers inspection points specific to Florida's climate in more detail.
Pro Tip: UV-resistant topcoats cost a few dollars more per quart but meaningfully extend the recoat interval in high-sun climates. In Central Florida, that difference can be the gap between repainting every 4 years and every 7.
How Mrpoolscreen approaches peeling paint: a real restoration workflow
When Mrpoolscreen assesses a pool enclosure with widespread paint failure, the process starts with a systematic inspection, not a paint gun. Every frame section gets checked for adhesion, corrosion depth, and fastener condition before any work begins. That assessment determines whether the job is a targeted repair or a full restoration.
The Mrpoolscreen restoration workflow:
- Assessment: Visual inspection plus adhesion testing across the frame. Corrosion at welds and fastener points is mapped before pricing.
- Corrosion treatment: Corroded areas are treated with chemical deoxidizers or mechanical abrasion to remove oxidation down to sound metal. Surface contamination is removed with industrial-grade cleaners.
- Fastener replacement: Every corroded steel fastener is pulled and replaced with stainless steel or Nylotech hardware. This step alone prevents the rust-halo peeling pattern from recurring.
- Priming: Industrial self-etching primer is applied by spray for consistent coverage across the entire frame, including welds, corners, and fastener holes.
- Topcoat: Water-based acrylic exterior topcoat is applied in controlled film build, with proper recoat windows observed between coats.
- Post-cure inspection: Adhesion is verified after cure before the job is signed off.
The result is a restored enclosure that looks and performs like a new installation at a fraction of the replacement cost. Mrpoolscreen's restoration approach can save homeowners significantly compared to a full enclosure rebuild, with the project gallery showing before-and-after results across a range of enclosure conditions. The key difference from a DIY patch isn't just the materials; it's the systematic approach to every failure point across the whole frame, not just the spots that are already visibly peeling.
The part most homeowners get backwards
The most common mistake isn't choosing the wrong paint. It's treating aluminum enclosure paint peeling as a cosmetic problem when it's actually a structural maintenance signal.
Every time paint peels on an aluminum enclosure, it's telling you something about what happened underneath: a missed cleaning step, a fastener that was already corroding when the last coat went on, a recoat window that got ignored because the weather looked fine. The paint is just the messenger.
What actually protects an enclosure long-term is the sequence: clean metal, mechanical profile, compatible primer, compatible topcoat, and proper cure. Get that sequence right once, and the coating holds. Skip any step, and you're back to scraping in three years.
For homeowners on a limited budget, the priority order is straightforward. Fix any active moisture entry first, because no coating survives a wet substrate. Then clean and touch up chips before they spread. If corrosion is already present under the coating, plan a full restoration rather than patching over it. A patch on top of active corrosion is a temporary fix that delays the inevitable and usually makes the eventual restoration more expensive.
The stainless fastener upgrade is the single most underrated step in the whole process. Most enclosure paint failures I've seen that recur within a few years trace back to steel fasteners that were left in place. The rust works outward, lifts the coating, and the cycle starts again. Swap them out once, and that failure mode disappears.
Mrpoolscreen's pool enclosure restoration service
Widespread peeling, visible corrosion, or a frame that hasn't been properly restored in years calls for more than a weekend patch job. Mrpoolscreen's pool screen restoration service covers the full workflow: on-site assessment, corrosion treatment, stainless fastener replacement, industrial primer, and a water-based acrylic topcoat applied to a professional standard.

The process starts with an inspection that maps every failure point across the frame, so you get an accurate scope and estimate before any work begins. Mrpoolscreen serves homeowners across Central Florida and has built a track record of restoring enclosures that clients assumed needed full replacement. Restoration typically costs significantly less than rebuilding, and the results hold because the prep is done right. If your enclosure is showing widespread paint failure or corrosion, request an assessment and get a clear picture of what the job actually involves.
Sources
These sources cover the technical details referenced throughout this article. Each is worth bookmarking if you're planning a repair or hiring a contractor.
- Paint Adhesion Problems | Troubleshooting Guide | WERCS Inc
- Adhesion in Paint and Coatings: Theories, Types & Test Methods
- Painting Aluminum Pool Enclosures: Tips, Benefits, And Best Practices | ShunShelter
- How Long Screen Enclosure Paint Lasts in Southwest Florida