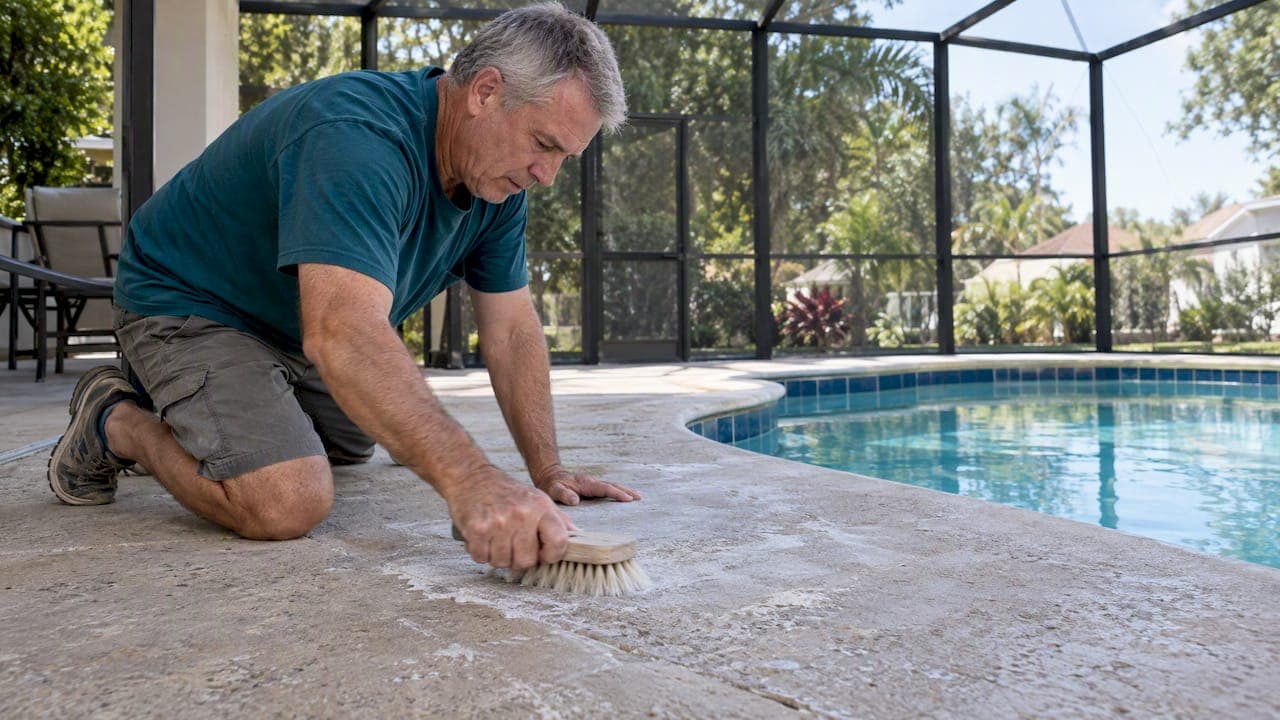
Most pool deck efflorescence comes off with dry brushing and a water rinse. Reach for a poultice or a heavily diluted acid wash only if that fails, and always test any chemical on a small, hidden spot first. Acid treatments need a full rinse and neutralization afterward to stop ongoing etching.
TL;DR:
- Efflorescence softens or partly dissolves with water and follows joints or coping; hard, glassy deposits suggest scale, while orange streaks point to metal rust.
- Dry brush and rinse first; use a poultice for stubborn salts, reserving acid for last and limiting each test patch to four square feet.
- For colored concrete, keep acid near 2%; acids can etch natural stone, lighten pigment, and leave patches, so test discreetly and rinse until neutral.
- Recurring deposits signal an unresolved moisture route; redirect sprinklers, improve drainage, and repair joints before sealing, using vapor permeable products that let moisture escape.
- Choose professional restoration for widespread crust, colored or textured decks, or stone surfaces, where uneven spot treatment can force refinishing across the entire deck.
Table of Contents
- Is that white residue efflorescence, scale, or rust?
- Step-by-step removal, from gentle to aggressive
- Fixing the moisture problem so it doesn't come back
- Testing, safety, and what aggressive cleaning can do to your deck
- When a professional restoration makes more sense than DIY
- What causes efflorescence to form on a pool deck in the first place
- Which deck materials efflorescence affects, and why removal differs by surface
- How efflorescence affects a deck's durability and appearance over time
- Keeping efflorescence from coming back after you clean it
- DIY cleaning versus professional restoration: what each actually gets you
- Our take: start gentle, but don't chase a bad patch forever
- Getting professional help with pool deck staining and restoration
- FAQ
- Sources
Is that white residue efflorescence, scale, or rust?
Efflorescence shows up as a fine white or grayish powder that often brushes away easily, though it can harden into a chalky crust over time. Calcium scale tends to feel harder and more glassy, while rust leaves reddish or orange staining that spreads from a metal source like a fastener or rebar.
A simple water test helps tell them apart:
- Drop a little water on the deposit: true efflorescence usually softens or partly dissolves, while hard mineral scale resists.
- Check the pattern: efflorescence tends to follow mortar joints, pop up under coping stones, or cluster near sprinkler heads and irrigation lines, since those are the spots where moisture moves through the slab.
- Look at the source: rust stains trace back to a specific metal object, while efflorescence spreads more generally across porous surfaces.
The formation itself depends on three things working together: soluble salts in the concrete, moisture to carry them, and evaporation to leave them behind at the surface, according to CMHA guidance on efflorescence control. If the deposit keeps returning in the same spot no matter how often you clean it, or if you're unsure what you're looking at, a contractor inspection is worth the call before you reach for any acid.
Step-by-step removal, from gentle to aggressive
Work through these steps in order and stop as soon as the deposit is gone. Jumping straight to acid on a problem that dry brushing would have solved just adds risk for no benefit.
Tools and protection: stiff nylon brush, shop vacuum, garden hose with a low-pressure nozzle, white nylon scrub pads, plastic (not metal) scrapers, rubber gloves, and eye protection.
- Dry brush and vacuum. Sweep the deposit with a stiff nylon brush, then vacuum up the loose powder. This step alone resolves most light efflorescence, according to CMHA.
- Wet brush and rinse. If powder remains, scrub with a damp brush and flush thoroughly with a low-pressure hose. Rinse until the runoff looks clear, since leftover salty water that evaporates on the surface can redeposit the same minerals you just removed.
- Try a poultice on stubborn spots. Mix an absorbent paper pulp or clay paste, saturate it with water, spread it over the stain, and let it dry slowly under cover. The drying poultice draws salts up out of the pores; peel it off and repeat if needed. InspectApedia notes this method works well for salts buried deep in the substrate, even though it takes longer than scrubbing.
- Use dilute acid only as a last resort. Wet the surface first to limit how deep the acid soaks in, then apply to a small area, about 4 square feet or less, according to GSA removal guidance. Muriatic (hydrochloric) acid is typically diluted between 1:9 and 1:19 with water; for integrally colored or stone-look decks, CMHA recommends going as weak as roughly 2% to avoid etching. Phosphoric acid or acetic-phosphoric blends are gentler alternatives, often mixed around 1:9 to 1:19 as well, per Laticrete's technical guidance. Let it sit about five minutes, scrub with a stiff nonmetallic brush, then rinse thoroughly and neutralize if the product calls for it.
- Consider mechanical methods for hard crusts. Light brush-sandblasting or a cautious high-pressure water jet can break up calcium carbonate crusts that resist acid, though NCMA warns these methods can alter surface texture and often require treating the whole deck for a consistent look.
Pro Tip: Repeat a mild treatment two or three times rather than reaching for a stronger acid concentration on the first pass.
If you've worked through dry brushing, rinsing, and a poultice without success, or if the deck is colored, textured, or large enough that spot treatment risks blotching, that's the point to call a professional rather than escalate the acid.
Fixing the moisture problem so it doesn't come back
Cleaning efflorescence off the surface doesn't stop it from returning if the underlying moisture path stays open. Formation needs all three conditions, salts, moisture, and evaporation, so removing even one tends to break the cycle, per the ERDC/USACE technical report.
- Redirect sprinklers and irrigation heads away from the deck edge and coping.
- Improve slope and drainage so water moves off the slab instead of pooling or soaking in.
- Repair cracked joints and caulking where water can wick into the substrate.
- Add flashing or a membrane at grade transitions where groundwater commonly enters.
Sealers can help once the deck is clean, but the choice matters. Vapor-permeable, impregnating sealers let residual moisture escape while still resisting new water intake, while a solid surface film can trap moisture and salts underneath, which sets up future spalling instead of preventing it, according to the ERDC/USACE report. If the deck has recurring staining across a wide area rather than one isolated spot, a full-surface seal or refinish usually outperforms repeated spot cleaning, a point worth weighing against our masonry pool deck coating guidance on joint prep before sealing.
Testing, safety, and what aggressive cleaning can do to your deck
Before any acid touches the full deck, test it on an inconspicuous 1 to 2 square foot patch and photograph it before and after, then wait for the spot to dry fully before judging the color change. Cover nearby plants, metal fixtures, and pool equipment with tarps, and route rinse runoff away from the pool itself.
After acid use, flush repeatedly until the surface no longer reacts to a pH check, since leftover acid keeps etching the concrete. GSA guidance recommends waiting at least a month of weathering, or neutralizing per the product label, before applying paint over a treated area.
Aggressive removal has real appearance tradeoffs. Acid and mechanical methods can lighten color, expose aggregate, or leave a patchy look that forces you to treat the entire surface for a uniform finish, a tradeoff NCMA specifically flags for calcium carbonate crusts.
When a professional restoration makes more sense than DIY
Widespread or recurring efflorescence, a hard crust that resists a poultice, or an integrally colored or textured deck all raise the stakes of a DIY mistake. One uneven acid patch on a colored surface usually means refinishing the whole deck anyway.
A professional evaluation starts with identifying the moisture source, then moves to controlled chemical cleaning sized to the surface, full prep, and a finish coat or stain applied edge to edge for a uniform result, often backed by a workmanship warranty. Before that call, gather photos of the affected areas, note any past cleaning attempts, and flag spots that stay damp longer than the rest of the deck, since that history shortens the evaluation.
— Michel
What causes efflorescence to form on a pool deck in the first place
Efflorescence starts with soluble salts, mainly calcium hydroxide and other alkaline compounds, that are naturally present in concrete and mortar from the cement hydration process. Those salts sit dissolved in the water trapped inside the slab's pores.
When that water migrates toward the surface, whether from rain, irrigation, splash-out, or groundwater wicking up from below, it carries the dissolved salts along with it. As the water reaches open air and evaporates, it leaves the salts behind as a visible deposit, according to CMHA.
Fresh efflorescence is usually calcium hydroxide, which reacts with carbon dioxide in the air to form calcium carbonate, a more stable and harder compound. That's why deposits that start as loose powder can firm up into a crust if left for weeks or months without cleaning. Pool decks are especially prone to this cycle because they combine constant splash exposure, irrigation overspray, and, in many climates, humidity that slows evaporation and extends the window for salts to migrate.
The practical takeaway is that efflorescence is not a surface stain in the way dirt or mildew is. It's a symptom of water moving through the slab, which is why cleaning alone, without addressing drainage or moisture entry, tends to produce a temporary fix rather than a permanent one.
Which deck materials efflorescence affects, and why removal differs by surface
Efflorescence shows up most on porous materials: poured concrete, concrete pavers, brick, and natural stone like travertine or flagstone that's laid in a mortar bed. Each material's porosity and finish change how aggressively you can clean it.
Plain gray concrete tolerates dry brushing, rinsing, and standard-strength dilute acid reasonably well, since there's no color layer to etch unevenly. Integrally colored or stamped concrete is more sensitive. CMHA recommends dropping acid concentration to roughly 2% on colored surfaces, since standard-strength muriatic acid can lighten or blotch the pigment.
Natural stone, particularly travertine and limestone, reacts differently than concrete because those stones are themselves partly calcium carbonate. Acid that's safe on concrete can etch or dull the stone's polish, so poultice methods and gentle mechanical cleaning are generally the safer first choices before any acid touches natural stone.

Brick and mortar joints tend to show efflorescence first, since mortar is typically more porous than the brick itself. Cleaning approaches here favor dry brushing and poultice work over acid, since repeated acid exposure can erode mortar joints faster than it affects the brick face.
The common thread across all these surfaces is that the gentlest effective method should come first, and the surface's color, texture, and porosity should decide how far up the ladder you're willing to go before stopping to test.
How efflorescence affects a deck's durability and appearance over time
On its own, light efflorescence is mostly cosmetic. A thin white haze doesn't structurally weaken concrete, but it signals that moisture is moving through the slab, and that same moisture cycle is what eventually causes bigger problems.
Repeated wetting and drying, combined with salt crystallization at the surface, can contribute to spalling, where small chips or flakes break off the surface over time, particularly in freeze-thaw climates or where the crystallizing salts build pressure just below the surface. A deck that's been accumulating efflorescence for years, especially where it's hardened into a crust, often shows early signs of surface roughening or pitting underneath the deposit once it's finally cleaned.
Aesthetically, efflorescence is one of the more noticeable deck problems because it tends to form in patterns rather than evenly, streaking along joints or pooling under coping stones in a way that draws the eye more than uniform discoloration would. On stained or colored decks, the contrast between the original color and the white deposit is sharper, which is part of why colored surfaces call for more careful, lower-concentration treatment.
Left unaddressed long enough, recurring efflorescence can also interfere with how well a sealer or coating bonds to the surface, since salts and residual moisture sitting under a film-forming product tend to cause peeling or bubbling later. That's one more reason moisture control, not just surface cleaning, is the piece that protects the deck's lifespan.
Keeping efflorescence from coming back after you clean it
A clean deck today doesn't mean a clean deck next season if the moisture source behind the salts is still active. The maintenance habits that matter most are the same three conditions mentioned earlier: control the salts, control the moisture, and reduce how much evaporation happens at the surface.
Practical upkeep includes periodically checking sprinkler heads and irrigation timers to make sure they're not misting the deck edge, inspecting expansion joints and caulking once or twice a year for cracks that let water in, and watching for low spots where water collects after rain instead of draining away.
If a sealer was applied after the initial cleaning, check it periodically for wear, since a worn sealer can let moisture back in while still looking intact from a distance. Vapor-permeable sealers tend to hold up better over multiple seasons than solid film sealers, which can fail at the edges and trap moisture underneath, according to the ERDC/USACE report.
Finally, keep an eye on any area that previously had efflorescence, even after cleaning and sealing. A spot that cleared up but started showing a faint white haze again within a season or two usually means the moisture path was reduced but not fully closed, which is a sign to revisit drainage or joint repair before the deposit hardens into a crust again.
DIY cleaning versus professional restoration: what each actually gets you
DIY dry brushing, rinsing, and poultice work handle the majority of light to moderate efflorescence cases, cost little beyond a brush and some patience, and carry low risk when you stick to the gentle end of the ladder. For an isolated patch on plain gray concrete, this is often all a deck needs.
Where DIY starts to lose its advantage is on colored, textured, or stone decks, on decks with widespread or hardened crust, and on any job where a botched acid patch means redoing the whole surface anyway. A single uneven spot on an integrally colored deck is difficult to blend back in without professional-grade color-matching and full-surface application.
Professional restoration brings a few things DIY can't easily replicate: an onsite evaluation that identifies the moisture source before cleaning even starts, chemical treatments sized and diluted for the specific surface, and a full-surface finish that avoids the blotching risk of spot treatment. It also typically comes with a workmanship warranty, which a DIY attempt never includes.
The practical way to decide is by scope and material. Small, plain-concrete spots favor DIY. Large areas, colored or stone surfaces, or decks where a previous cleaning attempt left visible unevenness point toward a professional job where the whole surface gets treated and finished together.
Our take: start gentle, but don't chase a bad patch forever
The advice that gets efflorescence removal wrong most often isn't about dilution ratios. It's the instinct to treat one stain, see it fade, and call the job done, without ever checking whether the same spot is going to bloom again in six weeks. Moisture control is the unglamorous part of this topic, and it's the part that actually determines whether a cleaning job is permanent or seasonal.
We'd also push back gently on the common assumption that stronger acid means a better result. On colored or textured decks, a higher concentration more often means a blotchy patch that now needs the whole surface redone to look even again, exactly the outcome a careful, incremental approach is meant to avoid.
If we had to prioritize one thing for a homeowner standing over a white patch on the deck: identify why that spot stays wet longer than the rest of the slab before reaching for any brush or bottle. The cleaning step is the easy part. The moisture path is the part that decides whether you're doing this again next year.
— Michel
Getting professional help with pool deck staining and restoration
When efflorescence has spread across a wide area, hardened into a crust, or shows up on a colored or textured deck, we handle the full job rather than one risky patch. We evaluate the site, recommend appropriate surface preparation, and discuss finish options before any work begins.

Our pool deck staining service covers concrete, masonry, and stone surfaces, with careful masking to protect pool water and surrounding landscaping from overspray during the process. For homeowners dealing with a weathered cage alongside deck issues, our pool screen restoration service addresses rust and screen wear using stainless steel fasteners and industrial coatings, backed by a three-year warranty on completed work.
Browse our project gallery to see finished deck and enclosure work, or reach out through Mrpoolscreen to request an estimate for your deck.
FAQ
How do you get rust stains off a pool deck?
Rust stains usually respond better to a rust-specific remover or a poultice than to the acids used for efflorescence, since standard muriatic acid dilutions don't reliably lift iron stains. Identify and address the metal source, like a rusting fastener or rebar, first, since the stain will return otherwise.
How do you remove efflorescence from concrete?
Start with dry brushing to remove loose powder, then rinse thoroughly with water, which resolves most cases according to CMHA. If deposits persist, a poultice or a dilute acid wash, tested first on a small spot and rinsed thoroughly afterward, handles the remainder.
How do you clean pool tiles without draining the pool?
Light efflorescence or scale on tiles at or above the waterline can often be scrubbed with a nonmetallic pad and a diluted acidic cleaner applied directly to the tile face, avoiding runoff into the pool. For tile below the waterline, cleaning typically requires lowering the water level rather than a full drain.
Does CLR remove calcium from pool tile?
Calcium-dissolving household cleaners like CLR can help with light calcium scale on tile, though they work more slowly than a dedicated dilute acid treatment on heavier deposits. Test on an inconspicuous tile first, since even mild cleaners can affect glazed or decorative finishes differently than plain tile.
What causes efflorescence to keep coming back after cleaning?
Recurring efflorescence almost always means the moisture source behind it, like a misdirected sprinkler, a cracked joint, or poor drainage, hasn't been fixed. Cleaning the deposit without addressing that moisture path only buys time before the same salts resurface.
Sources
- Control and removal of efflorescence (CMHA)
- NCMA efflorescence control TEK 08-03A
- Removal and prevention of efflorescence on concrete and masonry (ERDC/USACE)