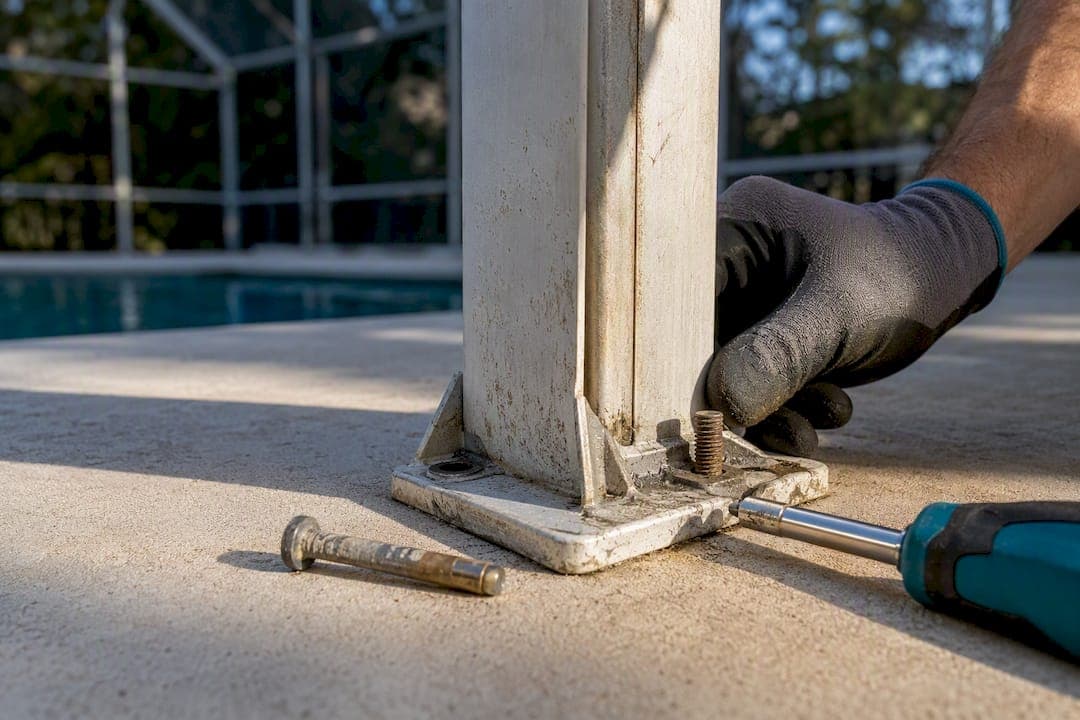
Most loose or corroded base plate anchors are a fixable weekend job, not a rebuild. Swapping worn hardware for stainless fasteners or setting a fresh chemical anchor solves the majority of cases. The line where DIY stops is clear: if a post rocks under hand pressure, or you see actual metal loss at the joint, that's a structural problem. Call a pro before you touch it.
TL;DR:
- Loose or corroded anchors are generally fixable with simple repairs, but actual metal loss or unstable posts require professional assessment and intervention.
- Inspectors recommend replacing rusted screws with stainless fasteners, using epoxy anchors for stripped holes, and upgrading damaged plates with heavier ones or sleeves for lasting repairs.
- Marine-grade stainless and water-based acrylic coatings significantly extend hardware lifespan compared to standard coated fasteners, especially in humid or coastal environments.
- Signs such as moving posts, multiple failed anchors, or metal loss indicate structural problems that need professional evaluation and possible permits.
- Minor DIY fixes can last one season, but repeated issues suggest full rehab with proper materials and techniques delivers a longer-term, more reliable solution.
Table of Contents
- What to Check Before Attempting Pool Cage Base Plate Repair
- Step-By-Step Repair Options for Loose or Damaged Anchors
- Which Fasteners and Coatings Actually Last Around a Pool
- When Should You Call a Restoration Contractor Instead?
- What Repairs Cost and How Long They Take
- How to Verify a Repair Actually Holds
- How Professional Restoration Handles Base Plate Damage
- Considering Professional Restoration for Your Pool Cage
- The Real Question Isn't DIY vs. Pro, It's How Long You Want the Fix to Last
- Sources
What to Check Before Attempting Pool Cage Base Plate Repair
A quick walk around the enclosure can reveal most of what you need to know before committing to a pool cage base plate repair. Start at the fasteners, since hardware fails first and loudest, long before the aluminum frame itself gives out, according to the guidance at EFC Contractors.
Work the perimeter and note:
- Any post that wiggles or rocks when you push on it by hand
- Bent posts, or posts sitting at an odd angle compared to their neighbors
- Anchors that are missing, sheared off flush with the plate, or spinning loose in the hole
- Cracked or crumbling concrete around the base plate
- Screws that keep working loose even after you've tightened them once already
Measure the gap where a post has lifted off its plate, and count how many anchors on that plate have actually failed. Photograph every problem spot before you fix anything. If a section feels genuinely unstable, rope it off or block the gate until repairs happen. A fastener failure checklist can help you spot early warning signs before they turn into a bigger fix.
Step-By-Step Repair Options for Loose or Damaged Anchors
Not every base plate problem needs the same fix. Match the repair to what you actually found during inspection.
- Tighten and replace visible screws first. Remove any rusted or stripped screws one at a time, so the post stays supported, and replace them with stainless fasteners and washers sized to match the original hole. Never crank a screw down hard into aluminum. Snug it, then stop.
- Fix a stripped hole with a chemical anchor. Drill out the damaged hole slightly oversized, vacuum or blow out the dust completely, and inject an epoxy anchoring adhesive before setting a new threaded rod or anchor. Most epoxy anchors need a full cure, often 24 hours, before you put any load on them. Rushing this step is the single most common reason a "repaired" anchor fails again within months.
- Replace a sheared or broken anchor entirely. Drill out the remnant, clean the hole, and install a sleeve or expansion anchor rated for the post's actual load, not just whatever size happens to fit. This is where a lot of homeowner fixes go wrong, since undersized anchors hold for a season and then fail again.
- Replace the base plate itself if it's bent, pitted, or torn. A thicker replacement plate, or an internal sleeve or splice plate, restores the load path a rusted-through plate can no longer carry. Professional repairs frequently use exactly this approach: pull the corroded plate, clean the joint fully, then upgrade to a heavier plate or interior sleeve rather than patching the old one, per the frame-repair process outlined at Telegraph.
You'll want a hammer drill, masonry bits sized to your anchor spec, a torque driver, a wire brush or grinder for cleanup, and epoxy anchoring adhesive rated for exterior use. The two mistakes that undo good work: over-tightening fasteners until the aluminum deforms, and skipping hole cleaning before setting adhesive anchors.
If the fix feels temporary, it probably is.*
Which Fasteners and Coatings Actually Last Around a Pool
Frame corrosion and hardware corrosion are two different problems with two different fixes. The aluminum frame usually just needs cleaning and a protective coating. The fasteners holding it down are a different story, since they take the brunt of chlorine, salt spray, and constant moisture.
In humid or coastal conditions, marine-grade or 316 stainless hardware holds up far longer than standard coated screws, which tend to corrode from the inside out even when they look fine on the surface. That's a documented pattern in Florida climates specifically, per the EFC Contractors inspection guide.
Fastener and coating choices at a glance:
- Coated expansion anchors: fine for dry, low-load, non-poolside applications
- Chemical (epoxy) anchors: better where concrete is cracked, pitted, or the hole has been enlarged
- 316 stainless or Nylotech fasteners are commonly recommended for exposure to pool chemicals or salt air
- Water-based acrylic coatings: seal cleaned aluminum against future oxidation
Before sealing or coating anything, rinse the joint thoroughly to neutralize chlorine and salt residue left behind, and grind away any oxidation. Skipping that prep is why some repairs corrode again within a single season, a pattern noted in the Telegraph repair breakdown.
When Should You Call a Restoration Contractor Instead?
Some warning signs mean it's time to stop drilling and start dialing. A post that visibly moves, more than a couple of anchors failing on the same plate, obvious metal loss where the post meets the plate, or a fix that's already failed once are all signals that the problem is structural, not cosmetic.
Contractors bring things a homeowner toolkit can't: proper load-path evaluation, custom-fabricated base plates, internal splice sleeves, and, where required, permit and engineering sign-off for structural work, according to Crego Screen Enclosures.
Before a contractor visit, have ready:
- Photos of every problem area
- A list of which fixes you've already tried
- Gap measurements and anchor counts from your inspection
What Repairs Cost and How Long They Take
A basic anchor kit with epoxy adhesive runs a modest DIY materials cost, cheap compared to hiring out a single-anchor fix. A small professional repair, patching a handful of failed anchors, typically wraps up in a day or two. A full perimeter restoration runs several days once you factor in adhesive cure time and, on structural jobs, permit review.
- Deck condition and accessibility affect labor time
- More failed anchors means more drilling, cleaning, and cure cycles
- Base plate replacement or permitted structural work adds the most time and cost
How to Verify a Repair Actually Holds
Don't call it done until you've tested it. A quick pull or torque check on each repaired anchor tells you almost everything.
- Grip the post near the base and apply firm, steady pressure in several directions. Any flex or movement means the anchor didn't set properly.
- Re-inspect the same anchors 24 to 72 hours after the repair, and again after the first heavy rain or wind event.
- Photograph each repaired point immediately after the work and again a week later, so you have a before-and-after record if you need to show a contractor or file an insurance claim.
How Professional Restoration Handles Base Plate Damage
A restoration crew typically works through the enclosure methodically: inspect every plate and anchor, replace only what's actually failed rather than everything, install industrial coatings on the frame, and finish with stainless fasteners throughout. Then they verify each repair before calling the job done.
Selective re-fastening and targeted base plate work, rather than tearing out a whole enclosure, can add years of service life at a fraction of full-rebuild cost, according to the repair approach detailed at Telegraph.
Mr. Pool Screen has documented this approach across projects in its gallery, pairing industrial-grade materials with this kind of targeted repair.
Considering Professional Restoration for Your Pool Cage
If the inspection turned up more than a screw or two, a professional restoration service can handle the whole job: selective anchor and base plate replacement, stainless and Nylotech fasteners, and industrial water-based acrylic coatings that outlast a DIY patch job. It's built for homeowners who'd rather not spend a weekend under a hot enclosure drilling out corroded anchors, and who want the fix to actually hold through next hurricane season.

Restoration typically costs a fraction of a full rebuild while addressing the same rust, weathering, and hardware failures a DIY fix often only postpones. Browse the pool screen restoration page to see what's included, or look through the project gallery for before-and-after examples close to what you're dealing with. Request a quote and get a straight answer on whether your enclosure needs a repair or a full restoration.
The Real Question Isn't DIY vs. Pro, It's How Long You Want the Fix to Last
Here's what most guides skip: a DIY anchor swap and a professional restoration aren't competing for the same job. One buys you another season. The other addresses why the anchor failed in the first place, usually chlorine and salt working into hardware that was never marine-grade to begin with.
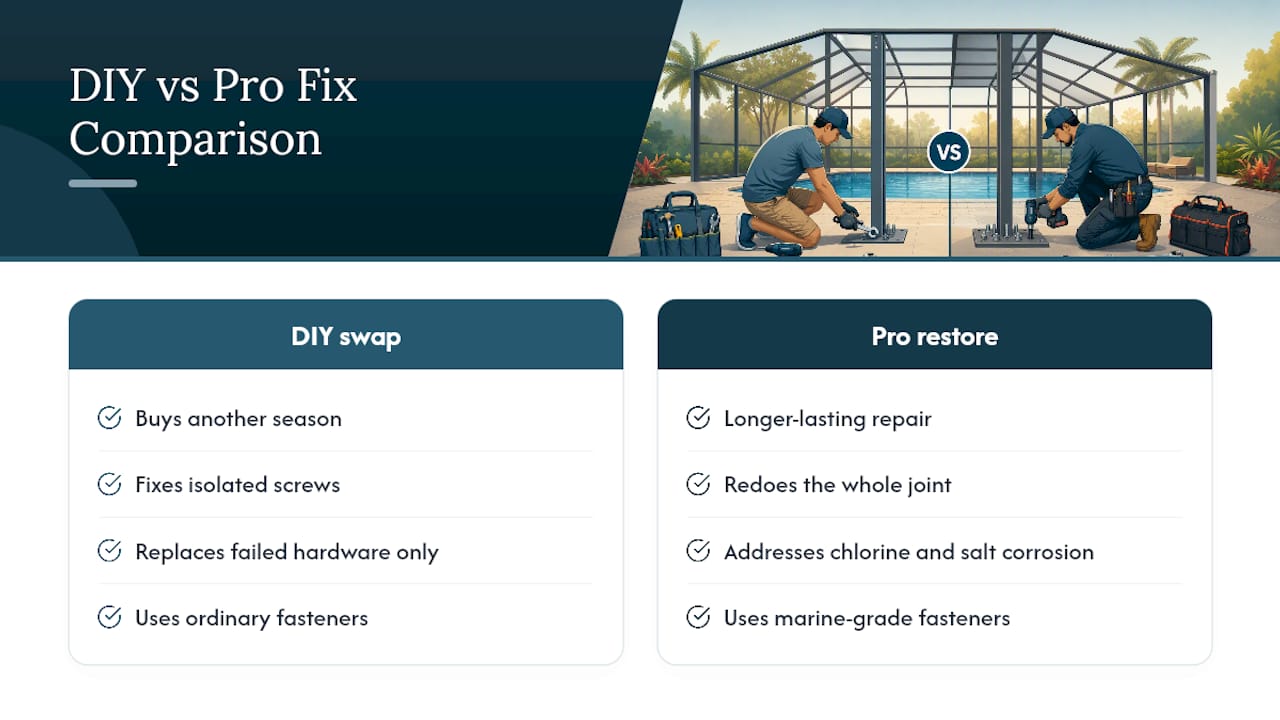
If you're handy and the damage is isolated to a screw or two, fix it yourself. It's a legitimate, permanent solution for minor cases. But if you've already re-anchored the same post twice, that's not a DIY problem anymore. That's a sign the whole joint needs to be redone properly, with the right fasteners and real surface prep, not another patch.
Inspect what you've got. Try the basic fixes if things look stable. Call a professional the moment a post actually moves.
— Michel
Sources
- Should You Paint or Replace a Rusty Pool Cage in Florida?
- Cape Coral Pool Cage Screen Repair: Frame Repairs and Re-Fastening – Telegraph