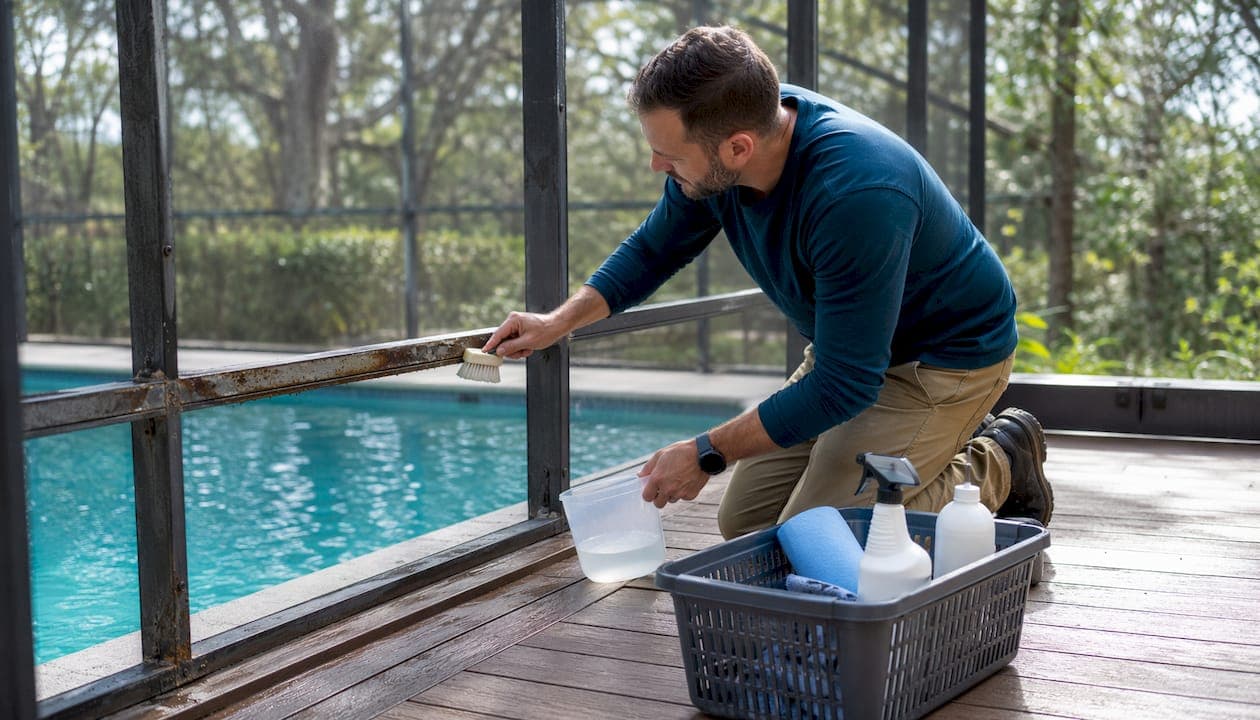
For light surface rust on a pool screen frame, scrub with white vinegar and a soft nylon brush, then rinse clean. For moderate rust with visible pitting, step up to a wire brush, 120–220 grit sandpaper, and a phosphoric-acid rust converter like Naval Jelly or Evapo-Rust. Deep structural corrosion — holes, bent posts, loose brackets — means the component needs removal and likely professional restoration. Quick tools to have on hand: white vinegar, baking soda, a soft nylon brush, a wire brush, sandpaper, rust converter, Rust-Oleum rust-inhibiting primer, stainless-steel replacement fasteners, gloves, and safety goggles. Mrpoolscreen handles the structural end if DIY isn't the right call.
Pro Tip: Before applying any chemical or abrasive, test it on a small hidden spot. Aluminum framing reacts very differently than steel hardware — what works on a bracket can etch or discolor an aluminum rail.
Table of Contents
- Why does rust form on pool screen frames?
- How do you inspect your pool enclosure for rust damage?
- Step-by-step DIY pool screen frame rust removal
- Aluminum frames vs. steel hardware: what you need to know
- How to protect and repaint frames after rust removal
- When should you call a professional instead of DIY?
- What maintenance schedule prevents rust from coming back?
- What does DIY rust removal actually cost, and how long does it take?
- Key Takeaways
- The part most homeowners get wrong
- Mrpoolscreen restores what most contractors would replace
- Useful sources
Why does rust form on pool screen frames?
Rust forms when a protective coating is breached and moisture, chlorine, salt, or dissimilar metals create oxidation or galvanic corrosion. Pool enclosures sit in one of the harshest environments a metal structure can face: high humidity, constant splash exposure, chlorine or salt off-gassing, UV degradation, and trapped pollen or dirt that holds moisture against metal surfaces for days at a time.
Most pool screen frames are aluminum, which doesn't rust in the traditional red-brown sense. Instead, aluminum oxidizes into a dull white or gray patina. The real rust culprits are the steel or galvanized fasteners, hinges, door tracks, and brackets that hold everything together. When those corrode, the staining migrates onto the aluminum and onto the screen mesh, making the whole enclosure look far worse than it actually is.
Three corrosion types show up on pool enclosures, and each calls for a different fix:
- Surface rust: Red or brown staining on fasteners or frame joints, no structural damage. Cosmetic, fully DIY-able.
- Scale and pitting: Rust has eaten into the metal surface, leaving rough texture or small craters. Needs mechanical removal plus a converter before repainting.
- Structural corrosion: Metal has thinned, holed, or weakened to the point of flex or failure. Requires component replacement or professional restoration.
Routine cleaning and inspection every few months catches surface rust before it progresses to pitting. The jump from cosmetic to structural happens faster in humid, storm-prone climates — and faster still around saltwater pools, where chloride ions accelerate galvanic attack on any exposed metal. Homeowners with salt systems should treat pool frame corrosion as an ongoing maintenance task, not a one-time fix.
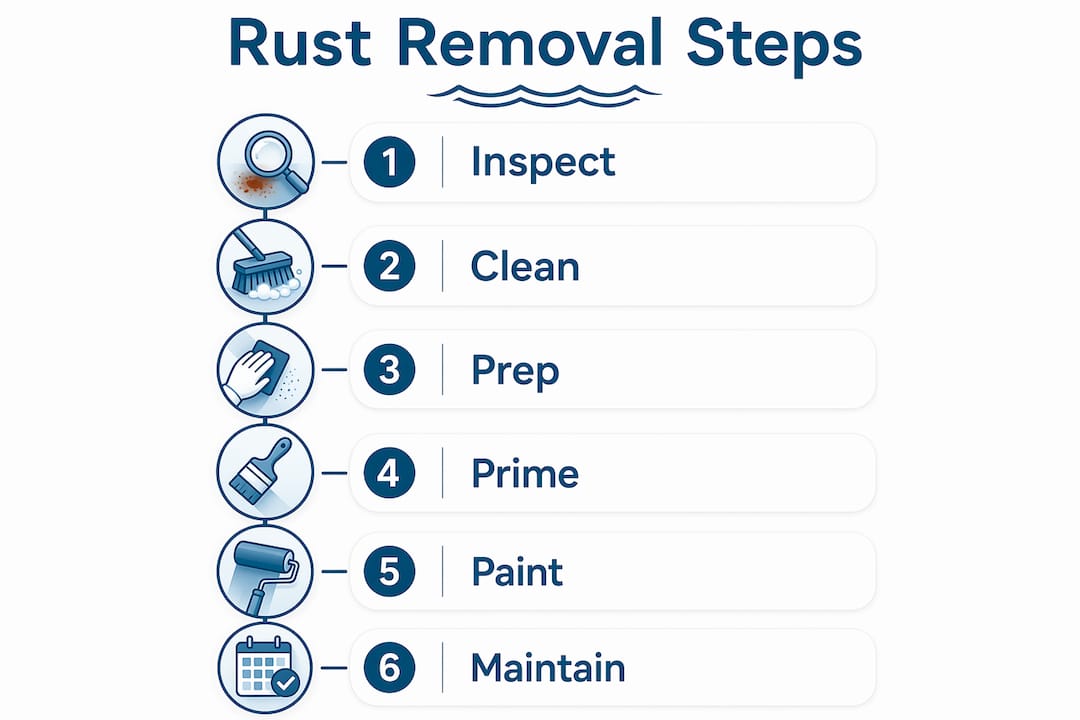
How do you inspect your pool enclosure for rust damage?
Inspect every seam, fastener, door track, and corner. If rust is limited to surface staining, you can DIY. If you find frame flex, holes, or loose brackets, call a pro.
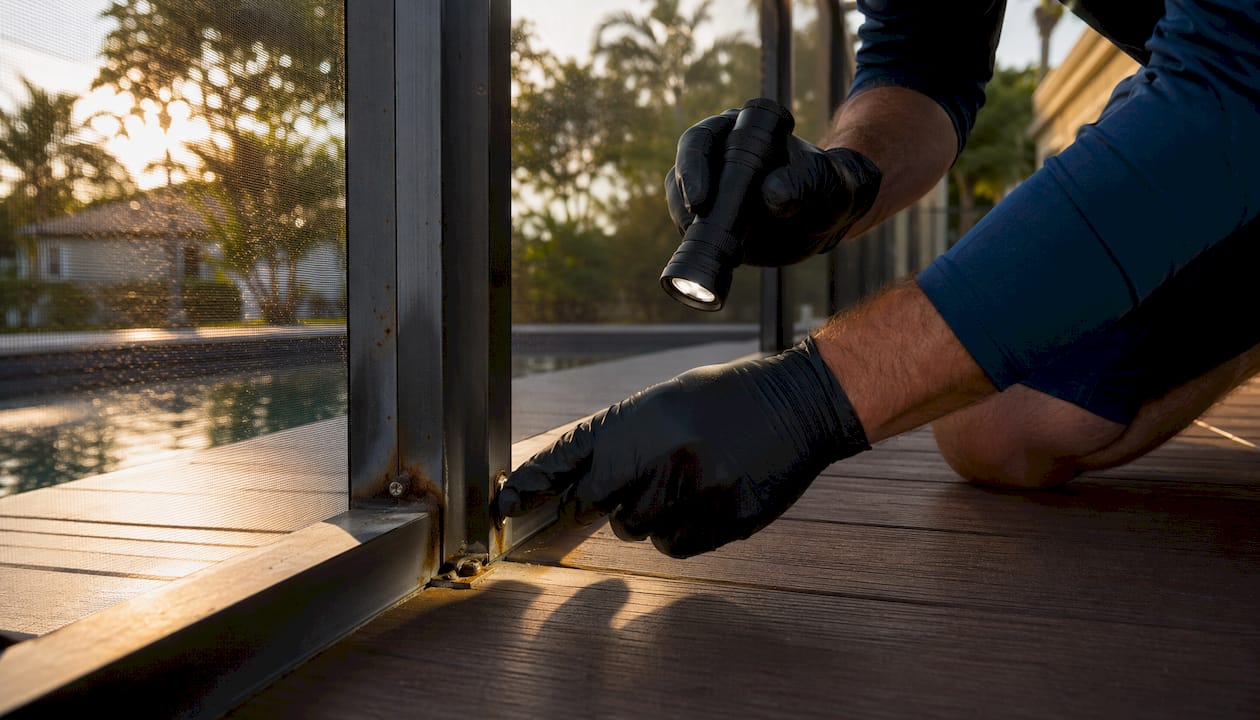
Work your way around the enclosure methodically. Use a stable ladder for roof sections, wear gloves and eye protection, and keep power tools away from the mesh.
Inspection checklist:
- Visual scan for rust flakes, white oxidation patches, or brown staining on joints and fasteners
- Manual wobble check at every post base and mid-rail connection
- Door and latch function — stiff or binding doors often signal track corrosion
- Fastener thread check: try tightening a few screws; if they spin freely, the threads are gone
- Rust staining on screen mesh or pool deck (indicates active corrosion above)
- Underside of top rails, where condensation and trapped chlorine gas tend to attack first
| Severity | Signs | Recommended action | Risk level |
|---|---|---|---|
| Surface | Staining, minor flaking, no pitting | DIY clean and treat | Low |
| Moderate | Visible pitting, loose fasteners, minor flex | DIY with converter + primer, or pro consult | Medium |
| Structural | Holes, bent posts, bracket failure, significant flex | Professional restoration or component replacement | High |
Frequent inspection identifies loose spline, fastener corrosion, and sagging panels before storms make them worse. A pool screen safety inspection checklist can help you stay systematic, especially after hurricane season.
Step-by-step DIY pool screen frame rust removal
Light rust: vinegar and baking soda scrub
White vinegar softens surface rust; baking soda neutralizes and aids scrubbing. This combination works well on stained fasteners, light rail discoloration, and rust bleed onto the frame surface.
- Put on gloves and eye protection.
- Pour undiluted white vinegar into a spray bottle or small bowl.
- Apply vinegar directly to the rusted area and let it sit for 10–15 minutes.
- Sprinkle baking soda over the wet surface — it will fizz briefly.
- Scrub with a soft nylon brush in circular motions.
- Rinse thoroughly with a garden hose.
- Dry the area with a clean cloth.
- After 24–48 hours, check for any remaining active rust (look for new orange staining).
This method works on cosmetic staining. It won't touch deep pitting, and it's not strong enough for heavily corroded fasteners.
Moderate rust: wire brush, sandpaper, and rust converter
For rust that has started to pit the surface, mechanical removal comes first.
- Wear gloves, goggles, and a dust mask.
- Use a wire brush or 80–120 grit sandpaper to remove all loose rust and flaking metal. Work down to bare or near-bare metal.
- Wipe clean with a dry rag, then wipe again with a damp cloth to remove dust.
- Apply a phosphoric-acid rust converter (Naval Jelly is a widely available option) per the product label. It converts remaining rust to a stable, paintable compound.
- Allow full dwell time as directed — typically 15–30 minutes.
- Wipe off excess converter and neutralize with water per label instructions.
- Let the surface dry completely before priming.
Proper surface prep is the most common reason DIY paint jobs fail. Skipping the converter step and going straight to primer over pitted metal almost guarantees early peeling.
Heavy rust: soaking parts with Evapo-Rust or Naval Jelly
For heavily corroded hinges, brackets, and small hardware, removal and off-site soaking is safer than applying concentrated chemicals to the full enclosure. Remove the component, place it in a container, and submerge it in Evapo-Rust for 30–60 minutes. Evapo-Rust dissolves oxidized iron without heavy abrasion and doesn't require the same neutralization steps as phosphoric-acid products. Rinse, dry, and inspect before reinstalling.
For fasteners that are too corroded to save, replace them rather than treat them. More on that in the next section.
Safety and disposal notes:
- Never mix vinegar, CLR, and phosphoric-acid products in the same container.
- Work in a ventilated area when using Naval Jelly or CLR.
- Dispose of chemical-soaked rags in a sealed bag; check local municipal guidelines for chemical waste disposal.
- Avoid getting rust converter on aluminum frame sections — prolonged phosphoric acid exposure can etch the surface.
Mesh vs. metal: Never use wire brushes or abrasive sandpaper on screen mesh. If rust stains have migrated into the mesh, try a diluted CLR solution applied with a soft cloth, then rinse immediately. Heavily stained or torn mesh panels usually need replacement rather than cleaning. For detailed mesh cleaning techniques, the pool screen mildew stain removal guide covers the process step by step.
Aluminum frames vs. steel hardware: what you need to know
Treat aluminum frames gently. Avoid harsh acids and heavy abrasives. Steel fasteners and brackets often need removal and replacement with stainless-steel parts.
The distinction matters because most homeowners apply the same treatment to everything and end up damaging the aluminum while under-treating the steel.
How each material behaves:
- Aluminum: Oxidizes to a white or gray patina, not red rust. The oxidation layer is actually somewhat protective. Heavy abrasives scratch through the anodized or painted surface and accelerate future corrosion.
- Galvanized steel: The zinc coating sacrifices itself to protect the steel underneath. Once the zinc is gone, red rust appears quickly, especially near pool chemicals.
- Standard steel fasteners: Corrode fastest of all. Even a small breach in the coating leads to rapid rust in a humid, chlorinated environment.
Safe treatment by material:
- For aluminum: pH-neutral cleaners, soft nylon brushes, and light sanding (220 grit maximum) for paint prep. Avoid prolonged contact with phosphoric-acid products.
- For steel hardware: wire brush, rust converter, and primer are all appropriate. Replace badly corroded pieces rather than treating them.
- For galvanized brackets: treat the same as steel once the zinc coating is compromised.
316-grade stainless steel fasteners outlast galvanized hardware significantly in salt and chlorine environments. When replacing screws, bolts, or hinges, 316 stainless is the right choice for any pool enclosure. In saltwater pool environments, nylon-sheathed fasteners add another layer of protection by eliminating direct metal-to-metal contact.
Pro Tip: When replacing fasteners, match materials carefully. Stainless steel against aluminum is generally fine. Mixing steel and aluminum with trapped moisture creates a galvanic cell that accelerates corrosion on both. Nylon washers or sheathed fasteners break that circuit.
How to protect and repaint frames after rust removal
After removing active rust, always apply a rust-inhibiting primer and a suitable exterior metal topcoat designed for pool environments. Skipping the primer and going straight to paint is the single fastest way to end up back at square one within a season.
The correct sequence:
- Clean and sand the surface to remove all loose material and create adhesion.
- Apply rust converter if any rust remains after mechanical removal.
- Apply a rust-inhibiting primer (Rust-Oleum makes widely available options for metal surfaces). Allow full dry time per the label — typically 1–4 hours before recoating.
- Apply 1–2 topcoats of exterior metal paint or, for high-wear areas, a two-part epoxy coating.
Sanding to remove loose rust, applying a rust-inhibiting primer, then topcoating with exterior metal paint is the standard workflow that makes repaints last. Two-part epoxies offer harder, more chemical-resistant finishes for areas with constant splash or chemical exposure, though they require more careful mixing and application.
Curing and environmental conditions:
| Step | Typical dry time | Notes |
|---|---|---|
| Rust converter | 15–30 min dwell, then rinse | Do not apply over wet or oily surfaces |
| Rust-inhibiting primer | 1–4 hours touch dry | Wait 24 hours before topcoat in humid conditions |
| Exterior metal topcoat | 2–4 hours touch dry | Full cure: 5–7 days; avoid rain for 24 hours |
| Two-part epoxy | 8–24 hours touch dry | Temperature-sensitive; follow label closely |
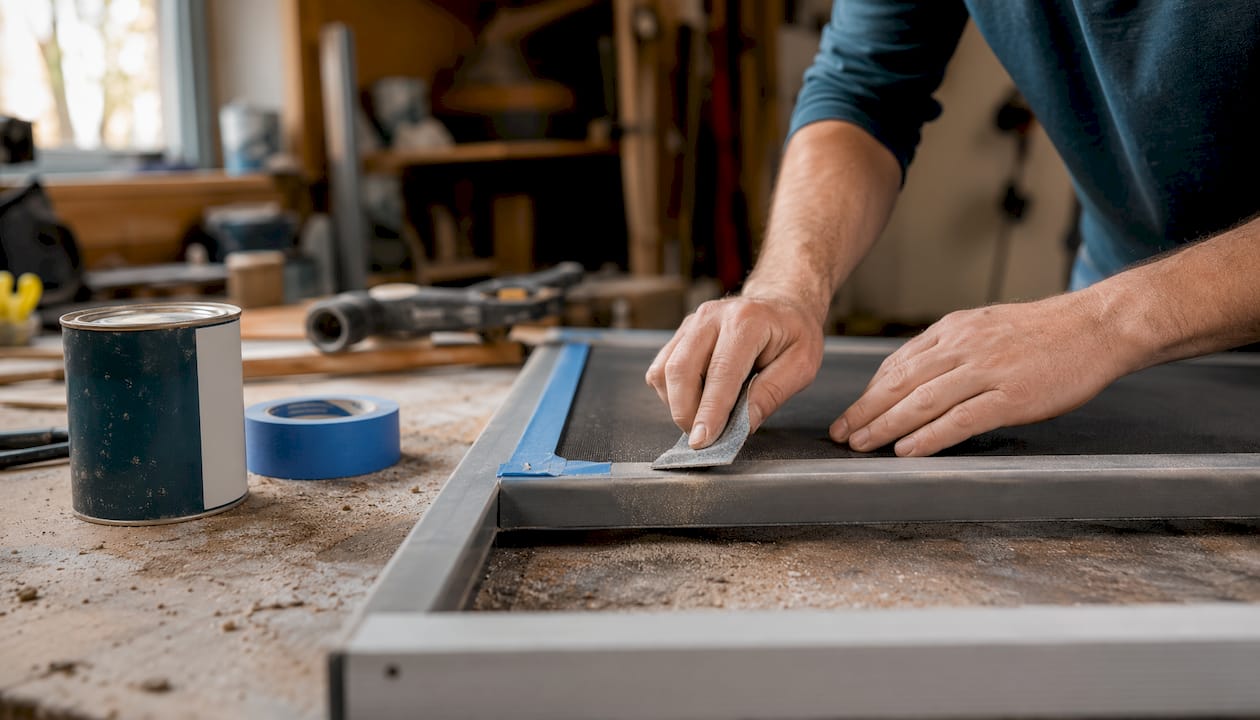
Don't paint over trapped moisture. If the frame feels cool or damp, wait for a dry afternoon with temperatures above 50°F. Painting in high humidity traps water under the film and causes early bubbling.
For fastener replacement, install 316 stainless hardware and treat hinge and latch contact points with a marine-grade corrosion inhibitor or silicone grease. Maintaining pool chemistry at pH 7.2–7.8 also reduces the rate at which pool chemicals attack metal surfaces.
When should you call a professional instead of DIY?
Hire a pro when corrosion compromises structural integrity — holes, bent or loose posts, bracket failure — or when the job requires specialized coatings, scaffolding, or full-panel removal.
Hire checklist:
- Visible frame flex when you push on a post or rail
- Multiple failed fasteners in the same section
- Separation at roof-to-wall connections
- Large-area pitting covering more than a few square feet
- Holes in frame members
- You lack the tools, PPE, or comfort level to work with chemical rust removers at height
Questions to ask any contractor:
- Do you restore frames, or do you only replace them?
- What specific coatings and fasteners do you use, and are they rated for pool environments?
- What warranty do you offer on workmanship and materials?
- Can you provide a staged cost estimate before starting?
- Are you licensed and insured in this state?
Red flags to watch for:
- No written estimate before work begins
- Vague answers about which materials they use
- Recommending full replacement without a thorough on-site assessment
- Using generic exterior house paint instead of rust-inhibiting metal systems
Local maintenance providers who specialize in screen enclosures understand the specific failure modes of pool cages in ways that general contractors often don't. A specialist will catch hidden corrosion at roof connections and door frames that a visual-only inspection misses.
What maintenance schedule prevents rust from coming back?
A quarterly visual inspection, a semiannual wash, and an annual fastener check prevent most corrosion problems before they require serious intervention.
| Task | Frequency | Notes |
|---|---|---|
| Visual scan for rust staining or frame damage | Every 3 months | Check fasteners, door tracks, and corner joints |
| Wash frames and mesh with garden hose | Every 3–6 months | Soft-bristle brush for stubborn dirt; no pressure washer on spline |
| Lubricate hinges and rollers | Every 6 months | Silicone spray; avoid oil-based lubricants near mesh |
| Inspect and tighten fasteners | Annually | Replace any that spin freely or show heavy rust |
| Touch up primer and paint on bare spots | Annually or as needed | Address bare metal within 30 days of discovery |
| Storm prep check | Before hurricane season | Confirm all brackets and roof connections are secure |
High-pressure washing loosens spline and can damage mesh, so stick to a garden hose and a soft brush for routine cleaning. Rinse splash-prone areas around the base of posts after heavy pool use, and keep gutters clear so water doesn't pool against frame connections.
For a full seasonal checklist, the pool screen maintenance checklist covers storm prep and winterizing steps in detail.
Pro Tip: Log each inspection with a photo and a date. A two-year photo record of a fastener showing gradual rust progression is exactly the kind of documentation that speeds up warranty claims and helps a restoration contractor scope the job accurately.
What does DIY rust removal actually cost, and how long does it take?
Light DIY cleanups take a few hours and cost under $50 in materials. Moderate jobs covering several panels with primer and paint run under several hundred dollars and can take a weekend. Professional restoration projects for a full residential enclosure commonly range from several hundred to a few thousand dollars, depending on scope.
Typical cost drivers:
- Stainless-steel fasteners (316 grade): more expensive per unit than galvanized, but the right long-term investment
- Rust converter and primer: $15–$40 per can; a full enclosure may need several
- Exterior metal topcoat or epoxy: $25–$60 per quart
- Scaffolding or lift rental for tall enclosures: adds significantly to DIY cost and complexity
- Replacement screen panels: $5–$20 per panel for standard mesh, more for specialty screens
- Professional labor: varies by region and scope; get at least two written estimates
Timeline by job type:
- Quick stain removal (vinegar scrub, light rust): 2–4 hours including drying time
- Moderate rust removal, prime, and one topcoat: 1–3 days depending on cure times and enclosure size
- Full professional restoration of a residential enclosure: typically 1–5 days on-site
Hidden corrosion behind panels or at roof connections can extend any timeline. Local labor rates in Florida, where pool enclosures are most common, differ from national averages. Always get a written estimate that breaks out materials, labor, and any contingency for hidden damage before committing to a contractor.
For rust removal on concrete and exterior surfaces adjacent to the enclosure, professional surface cleaning services can address staining on the deck that migrates up from corroded frame bases.
Key Takeaways
The fastest path through pool screen frame rust removal is matching your method to the severity: vinegar for surface stains, a rust converter for pitting, and a professional for anything structural.
| Point | Details |
|---|---|
| Match method to severity | Surface rust responds to vinegar; pitting needs a rust converter; structural damage needs a pro. |
| Prep is everything | Sanding, converting, and priming before topcoat is what makes any paint job last more than one season. |
| Replace steel fasteners | Swap corroded screws and brackets for 316-grade stainless steel to stop the rust cycle at its source. |
| Inspect quarterly | A 15-minute visual check every three months catches surface rust before it becomes a structural problem. |
| Mrpoolscreen for structural work | For holes, frame flex, or multi-panel corrosion, Mrpoolscreen's restoration service replaces hardware and applies industrial coatings at a fraction of full-rebuild cost. |
The part most homeowners get wrong
Most pool enclosure rust problems don't start with a catastrophic failure. They start with one corroded screw that nobody noticed for two years. By the time the staining is obvious enough to prompt action, the fastener has been wicking moisture into the frame joint for months, and what looked like a $30 cleaning job is now a $300 repair.
The conventional wisdom says "treat the rust when you see it." That's not wrong, but it misses the real leverage point: the inspection habit. Homeowners who walk their enclosure every few months with a flashlight and a screwdriver catch problems at the surface-stain stage, when white vinegar and a brush genuinely solve the problem. Homeowners who wait until the rust is visible from the pool deck are usually dealing with pitting at minimum.
There's also a persistent misconception that aluminum frames don't need attention because they don't rust. They don't rust, but they do oxidize, and more importantly, every steel or galvanized fastener holding that aluminum frame together absolutely does rust. The frame looks fine right up until a bracket fails. Treating pool screen maintenance as "aluminum is fine, ignore it" is how enclosures end up needing full restoration instead of a fastener swap and a coat of primer.
The other overlooked spot: the underside of top rails. Condensation and trapped chlorine gas attack from below, where no one looks. Flip a rail over during your next inspection and you may be surprised at what's there.
Mrpoolscreen restores what most contractors would replace
Replacing a full pool enclosure in Central Florida can run well into the thousands. Mrpoolscreen's restoration approach targets the actual problem — corroded hardware, degraded coatings, weakened joints — without tearing down what's still structurally sound. The result is a restored enclosure that looks and performs like new, at a cost that's often up to 60% less than a full rebuild.

The process starts with an on-site assessment to identify every corroded fastener, compromised bracket, and coating failure. From there, the team removes and replaces hardware with 316-grade stainless steel, applies industrial-grade primers and topcoats rated for pool environments, and documents the work with before-and-after photos. If your inspection checklist turned up frame flex, holes, or multiple failed fasteners, that's exactly the scenario Mrpoolscreen is built for.
Request a restoration estimate and get a written scope of work before any repair begins. You can also browse the project gallery to see before-and-after results from completed Central Florida enclosures.
Useful sources
The following resources back the methods and product recommendations in this guide. Always follow product label instructions and check local municipal guidelines for disposing of chemical waste from rust removers and solvents.
- Pool Screen Restoration | Mrpoolscreen | Orlando, Florida — Service details, materials used, and the restoration process for homeowners considering professional help.
- Pool Screened Enclosure Maintenance Tips | Hammond Industries — Practical cleaning and inspection guidance for extending enclosure life.
- Screen Enclosure Maintenance and Repair Guide | Gutterworks Services — Covers inspection frequency, storm prep, and the risks of high-pressure washing on spline and mesh.
- 5 Ways to Save Money on Corrosion Protection | My Pool Calculator — Material selection guidance including 316 stainless, epoxy coatings, and pH management for pool environments.
- Revive Your Pool: Easy Steps to Paint Rusted Above Ground Rails | CyPaint — Step-by-step repainting workflow covering surface prep, primer selection, and topcoat application.
- Rust Repair Tips for Above Ground Pools | Pool Tips USA — Practical rust removal steps including wire brush prep, rust converter use, and hardware replacement.
- Rust Removal Services | Pali Pressure Pros — Product selection and safe application methods for exterior rust removal, useful for deck and surface staining adjacent to pool enclosures.