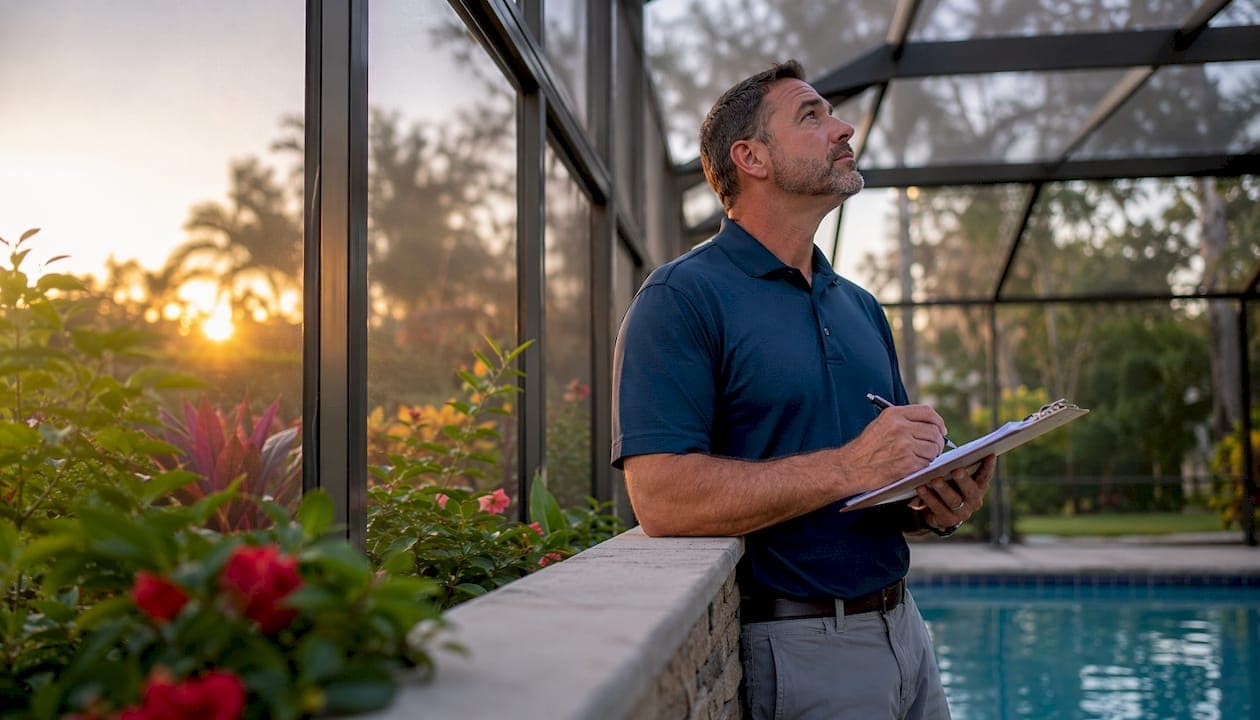
Pool enclosure restoration renews a weathered or damaged screened pool cage by repairing the structure, replacing fasteners and screens, and refinishing the aluminum frame. The contractor sequence runs: inspection → frame repairs → fastener replacement → rescreening → surface prep and painting → final inspection. Most homeowners are surprised by how much of the work happens before a single new screen goes in.
What to know before you read further:
- Typical timeline: Rescreen-only jobs take a few days; a full restoration with repainting and fastener upgrades runs about one to two weeks.
- Cost range: Restoration consistently costs less than a full rebuild. Mrpoolscreen's restoration services can save clients up to 60% compared to full replacement.
- Permits: Simple rescreening rarely requires a permit. Structural repairs, anchor replacement, or significant frame work usually do.
Table of Contents
- Why restoration is worth it beyond the cosmetics
- How to tell if your pool enclosure needs restoration now
- What contractors repair or replace: screens, frames, fasteners, and coatings
- The step-by-step restoration process contractors follow
- When permits, engineering, and building codes matter
- How long restoration takes and what drives the cost
- How to care for your enclosure after restoration
- When a full replacement makes more sense than restoration
- A Mrpoolscreen restoration project: from estimate to final walkthrough
- Key Takeaways
- What most homeowners get wrong about pool enclosure restoration
- What Mrpoolscreen offers and how to prepare for your estimate
- Authoritative sources for homeowners who want to dig deeper
Why restoration is worth it beyond the cosmetics
The financial case for restoration is straightforward: you preserve a structure that already has footings, anchors, and engineered framing in place. A full rebuild means paying for all of that again. Restoration addresses the weathering, rust, and screen degradation that accumulate over years of Florida sun and humidity without throwing away the bones of a sound structure.
Safety is the less-discussed benefit. Corroded fasteners and degraded anchors reduce the enclosure's ability to handle wind loads. Replacing those components to current standards restores the structural performance the enclosure was originally designed to deliver. That matters in a state where wind-load compliance under ASCE 7 and the Florida Building Code is not optional.
Curb appeal follows naturally. A freshly painted, fully rescreened enclosure changes the look of an entire backyard. For homeowners thinking about resale, a restored enclosure signals maintained property rather than deferred work.
Statistic to know: Mrpoolscreen's restoration approach is designed to save homeowners up to 60% compared to the cost of a full enclosure rebuild, while delivering like-new structural performance and appearance.
One often-overlooked benefit: pest and debris control. Sagging or torn screens let in insects, leaves, and small animals. A properly tensioned, fully sealed enclosure after restoration performs the way it did when it was new. For homeowners who use their pool regularly, that alone justifies the investment. You can read more about the full range of restoration benefits for homeowners who want to weigh the decision carefully.
How to tell if your pool enclosure needs restoration now
Most enclosures give clear signals before they fail. A quick walkaround takes about 15 minutes and can tell you whether you need a contractor's estimate.
Visual and functional warning signs:
- Widespread screen tears, holes larger than a quarter, or fraying edges
- Screens that sag or billow even when there's no wind
- Visible rust streaks running down frame members from fastener locations
- Frame corrosion, pitting, or powdering near connections and anchors
- Missing, loose, or visibly corroded fasteners
- Bent posts, bowed rails, or sections that feel unstable when pressed
- Persistent insect infiltration or debris accumulation despite intact-looking screens
- Discoloration or chalking on the aluminum finish
Structural red flags that need urgent attention:
- Bent or buckled vertical posts (these compromise wind-load capacity immediately)
- Cracked or heaved deck anchors at the base of posts
- Visible separation at roof-to-wall connections
- Any section where the frame has shifted out of plumb
Pro Tip: Tap along frame members with your knuckle. A hollow or dull thud where the metal should ring solid can indicate internal corrosion or a compromised splice. Also crouch down and look along the base rail at fastener heads — rust-stained or missing heads are a reliable sign that the whole fastener population needs replacement, not just the visible ones.
For a more structured approach, Mrpoolscreen's pool screen safety inspection checklist walks homeowners through exactly what to look for before calling a contractor.
What contractors repair or replace: screens, frames, fasteners, and coatings
Understanding the physical components helps you read a contractor estimate without guessing.
Frame
Most residential pool enclosures use extruded aluminum profiles. A structural repair involves post straightening, splice plate installation, anchor replacement, or footing work. A non-structural repair covers cosmetic dents, minor bends in non-load-bearing rails, and surface corrosion treatment. The distinction matters for permitting, which is covered in the next section.
Screen mesh
Standard residential mesh is Phifer 18×14, meaning 18 strands per inch horizontally and 14 vertically. It provides good airflow and visibility. Upgrade options include:
- No-see-um mesh: Much finer weave, blocks tiny insects, reduces airflow slightly.
- Super Screen: Heavier-duty polyester mesh with a longer expected lifespan and better UV resistance.
Each option involves tradeoffs between visibility, insect exclusion, and cost. Your contractor should walk you through the differences before you commit.
Fasteners
This is where most homeowners are caught off guard. A full-size pool enclosure can have thousands of fasteners holding frame members, anchors, and screen spline channels together. Reusing corroded hardware is one of the most common shortcuts that leads to rust streaking and structural weakness within a few years. Upgraded fasteners — nylon-headed screws or stainless steel — resist corrosion far better than standard zinc-coated hardware, especially in coastal or high-humidity environments. Mrpoolscreen uses stainless steel fasteners as a standard part of their restoration process.
Coatings and paint
Builder-grade paints chalk and peel within a few seasons in Florida's UV environment. High-quality water-based acrylic coatings with proper surface prep — cleaning, etching or sanding, primer, and multiple finish coats — bond to aluminum and hold up significantly longer. Surface prep is not optional; it determines whether the paint lasts three years or ten.
Standard vs. upgrade at a glance:
| Component | Standard | Upgrade |
|---|---|---|
| Screen mesh | Phifer 18×14 | No-see-um or Super Screen |
| Fasteners | Zinc-coated | Nylon-head or stainless steel |
| Paint/coating | Single-coat finish | Multi-coat water-based acrylic with primer |
| Frame repair | Surface treatment | Splice repair, anchor replacement |
The step-by-step restoration process contractors follow
Here is what actually happens on your property, in sequence.
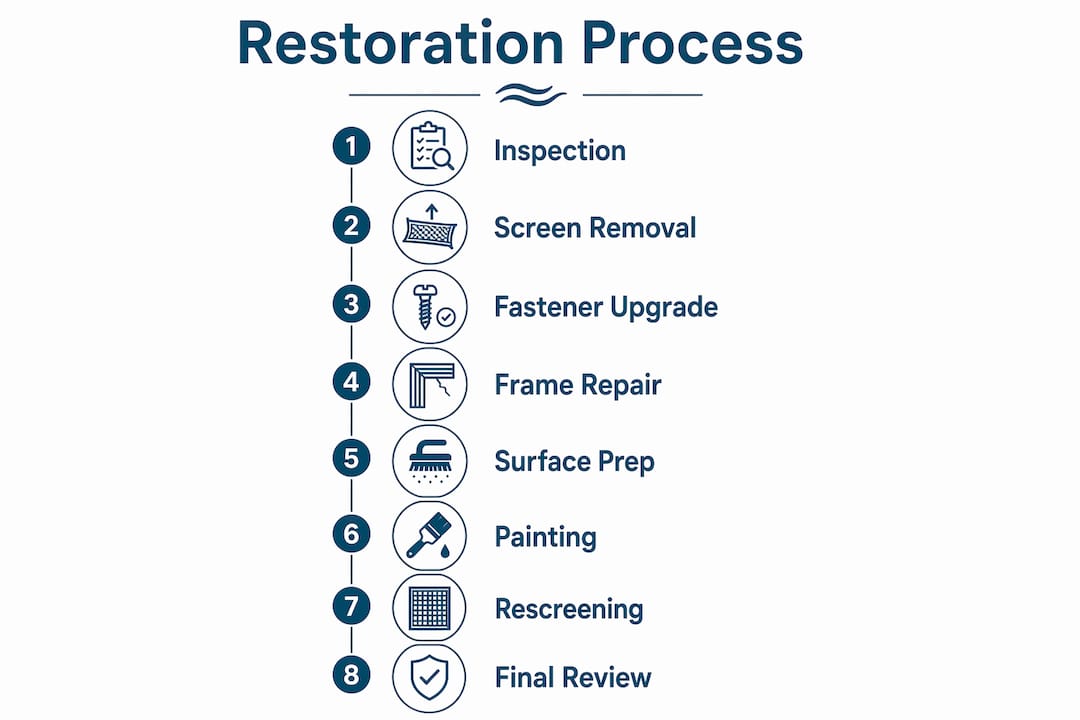
Step 1: Inspection and measurement
The contractor photographs every section, documents frame condition, tests anchor stability, and notes fastener corrosion levels. Ask for a written scope of work that references these findings. Any contractor who skips documentation is also skipping accountability.
Step 2: Site protection and screen removal
Technicians protect pool decking, landscaping, and house surfaces before removing screens, doors, and spline channels. This prevents paint overspray and debris from damaging surfaces that aren't part of the job.
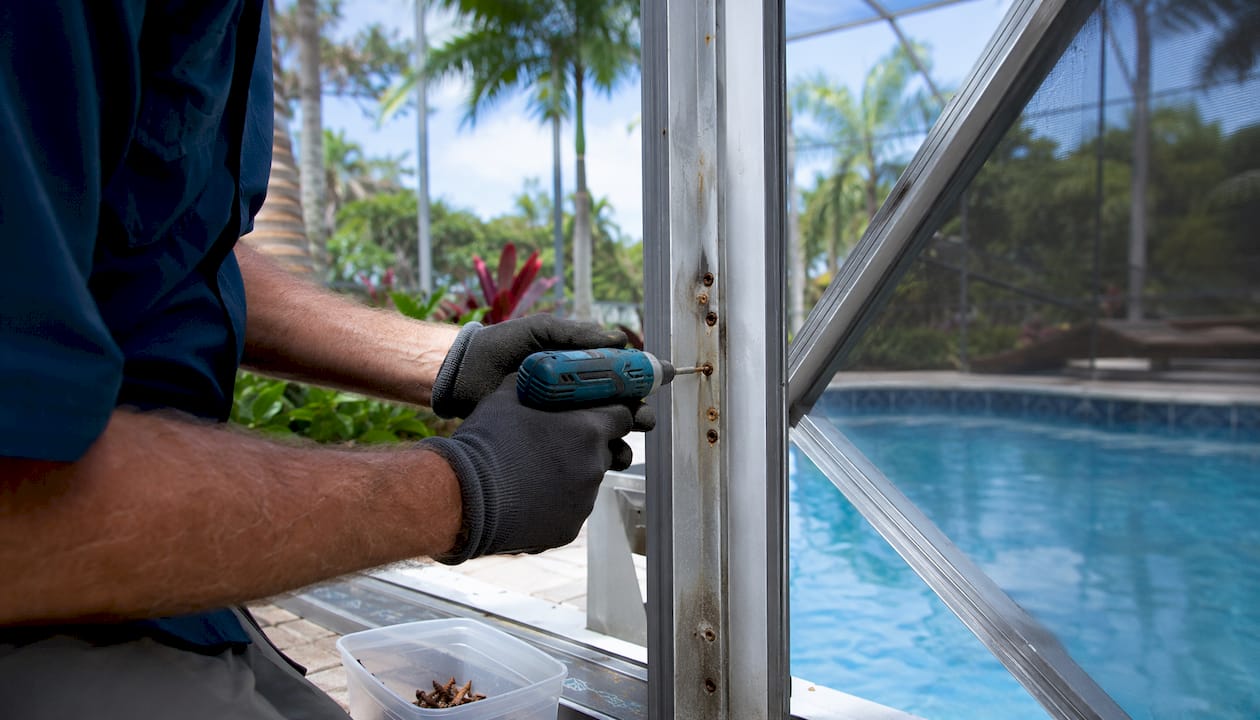
Step 3: Fastener removal and upgrade
Old fasteners come out completely. Reusing them defeats the purpose of the restoration. Upgraded fasteners go in at every connection point, restoring the clamping force and corrosion resistance the frame needs.
Step 4: Frame repairs and straightening
Bent posts get straightened or spliced. Damaged anchors get replaced. If the work crosses into structural territory (new footings, anchor replacement, significant frame modification), engineered drawings may be required before work proceeds. A licensed contractor will tell you upfront if this applies.
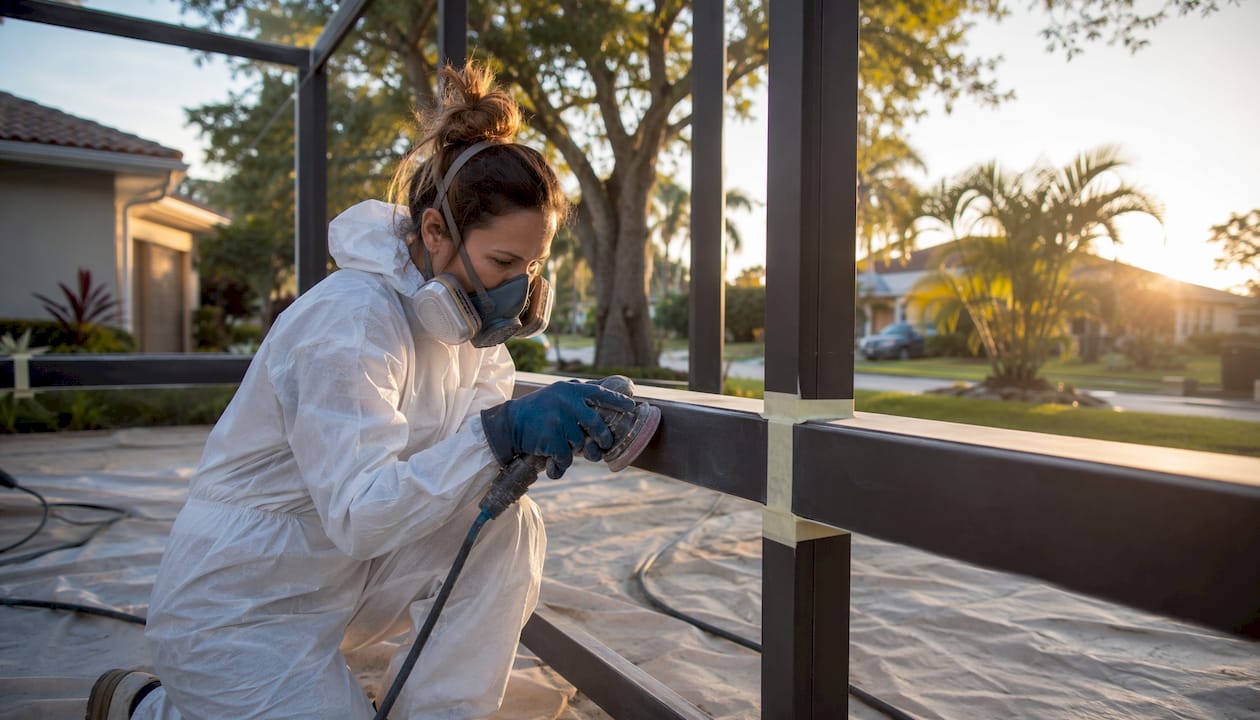
Step 5: Surface prep and painting
The aluminum gets cleaned, etched or sanded, primed, and then finished with high-quality acrylic coatings. Curing time between coats matters. Rushing this step is the single most common reason a paint job fails early.
Step 6: Rescreening and spline work
Mesh is cut to panel dimensions, tensioned evenly, and locked in with spline cord. Uneven tension causes sagging; a skilled crew pulls each panel consistently. This is also when mesh upgrades (no-see-um, Super Screen) get installed if the homeowner chose them.
Step 7: Final reassembly and inspection
Doors rehang, fastener torque gets checked, caulk and seals are inspected, and the contractor walks the homeowner through the completed work. This is when warranty terms should be explained and documented in writing.
Step-by-step timeline and homeowner checklist:
| Step | Typical Duration | What to Verify at Completion |
|---|---|---|
| Inspection and measurement | Half day | Written scope with photos |
| Site protection and screen removal | Half day | Decking and landscaping protected |
| Fastener removal and upgrade | 1 day | Upgraded fastener type confirmed in writing |
| Frame repairs and straightening | 1–2 days | Structural repairs documented; permit pulled if required |
| Surface prep and painting | 1–2 days | Primer coat confirmed; cure time respected |
| Rescreening and spline work | 1–2 days | Even tension, no sagging panels |
| Final inspection and walkthrough | Half day | Warranty document in hand |
Pro Tip: Ask your contractor to schedule painting before rescreening begins. Paint overspray on new mesh is a common rework trigger. Experienced crews sequence the tasks so paint cures fully before screens go in, which shortens total project time and eliminates that problem entirely.
When permits, engineering, and building codes matter
Simple rescreening without any structural work generally does not require a building permit in most Florida counties. The line shifts when anchors, footings, or structural frame members are repaired or replaced.
Florida Building Code guidance and county-level rules (Volusia County is a well-documented example) require permits and signed-and-sealed engineering drawings when work involves post spacing, footing specifications, or frame member sizing that must meet ASCE 7 wind-load standards. When structural value restoration exceeds set thresholds, the structure is treated as new construction under many county rules, which triggers the full permitting sequence.
What to expect on a permitted project:
- Signed and sealed engineering drawings showing post spacing, footing specs, and frame sizing
- Permit pulled before structural work begins
- Inspections at footing, framing, and final stages
- Final sign-off before the enclosure is considered code-compliant
Your responsibilities as a homeowner:
- Hire a licensed contractor (verify the license number with the Florida DBPR)
- Confirm the permit is pulled before structural work starts
- Keep copies of all permit documents and engineering drawings
Un-permitted structural work creates real problems: insurance claims can be denied, and the work may need to be torn out and redone if discovered during a sale inspection. The 2026 homeowner's guide to screen enclosures covers permit requirements in more detail for homeowners navigating this for the first time.
Code note: Rescreening-only projects commonly do not require a building permit in many Florida counties so long as the structural frame is not altered. Permit requirements change when anchors, footings, or more than a specified fraction of structural value are repaired — at that point, the project is treated as structural work and requires licensed contractors and engineer-signed drawings.
How long restoration takes and what drives the cost
A rescreen-only job on a standard residential enclosure typically takes 1–3 days. Add repainting and a full fastener upgrade and you're looking at roughly 1–2 weeks. Complex structural repairs with permitting and inspections can extend that further, depending on county inspection scheduling.
What pushes costs up or down:
- Enclosure size (square footage of screen area and linear feet of frame)
- Condition of the frame, anchors, and footings
- Mesh type selected (standard vs. no-see-um vs. Super Screen)
- Fastener type (zinc vs. nylon-head vs. stainless steel)
- Whether permits and engineering drawings are required
- Paint quality and number of coats
- Site accessibility and complexity (second-story connections, tight landscaping)
Project scope vs. timeline and cost level:
| Project Scope | Typical Duration | Relative Cost Level |
|---|---|---|
| Rescreen only | 1–3 days | Low |
| Repaint + fastener upgrade | 3–7 days | Medium |
| Structural repair + full restoration | 1–3 weeks | Medium–High |
Questions to ask your contractor before signing:
- Is fastener replacement included, or billed separately?
- What mesh type and fastener grade are in the base quote?
- Are permit fees and engineering drawings included if needed?
- Is deck anchor replacement included, or an add-on?
- What is the warranty on labor and materials, and is it in writing?
- What triggers additional charges after work begins?
How to care for your enclosure after restoration
A restored enclosure can last many years with basic attention. The work you put in after restoration determines whether you get the full value out of it.
Routine maintenance actions:
- Rinse the frame and screens with a garden hose every 1–2 months to remove salt, pollen, and debris.
- Inspect fastener heads annually for early rust staining — catching one corroded fastener early prevents a cascade.
- Repair small screen tears promptly with a patch kit; a quarter-sized hole becomes a foot-long rip after one storm.
- Touch up paint chips or scratches as soon as you notice them to prevent moisture from getting under the coating.
- Keep vegetation trimmed back from the frame to reduce moisture retention and abrasion.
- Check door hinges and latches seasonally; these wear faster than the frame itself.
Seasonal timing matters. The best windows for repainting and rescreening in Central Florida are late fall through early spring, when humidity drops and temperatures are moderate. Painting in peak summer humidity risks poor adhesion and extended cure times. If you're scheduling maintenance work, aim for October through March.
Service cadence: A visual inspection every year catches small problems before they become structural ones. A full professional inspection every 3–5 years gives you a documented baseline and catches hidden corrosion or anchor movement that a homeowner walkaround misses. Keep all warranty documents and permit records in a home file; you'll need them if you file an insurance claim or sell the property. For ongoing care, pairing your enclosure maintenance with a pool care service keeps the whole outdoor space in shape between professional inspections.
More detailed prevention guidance is available in Mrpoolscreen's weather damage prevention tips for pool enclosures.
When a full replacement makes more sense than restoration
Restoration is the right call in most cases. But there are situations where a full rebuild is the smarter investment.
Replace rather than restore when:
- More than roughly 15–20% of the frame is extensively corroded, collapsed, or structurally compromised
- The enclosure has experienced repeated failures after prior repairs
- Major deck anchor or footing damage requires essentially rebuilding the base
- The homeowner wants a different footprint, layout, or significantly upgraded materials
- Cumulative repair costs on a contractor estimate approach or exceed a meaningful fraction of a full rebuild quote
The decision comes down to a simple comparison: get an itemized restoration estimate and a full rebuild quote side by side. Ask both contractors to specify what they're including and what they're excluding. A restoration quote that omits anchor replacement or engineering drawings is not an apples-to-apples comparison with a rebuild quote that includes them.
One practical signal: if a contractor recommends restoration on a frame that is visibly buckled in multiple locations or has cracked footings at several posts, get a second opinion. Honest contractors tell you when restoration is not the right answer. The pool cage maintenance vs. repair guide covers this decision in more detail.
A Mrpoolscreen restoration project: from estimate to final walkthrough
A typical Mrpoolscreen project in Central Florida starts with a detailed on-site estimate that documents every section of the enclosure, photographs existing damage, and identifies which repairs are structural versus cosmetic. The written scope covers fastener type, mesh selection, paint system, and any permit requirements before a homeowner signs anything.
On a representative full restoration, the crew protects the pool deck and surrounding landscaping, removes all screens and spline channels, and pulls every fastener. Stainless steel fasteners go in at every connection point. Frame repairs and any anchor work happen next, followed by surface prep: cleaning, etching, primer, and finish coats of water-based acrylic coating. Screens go in only after paint has cured, eliminating overspray rework. The final walkthrough covers every panel, door, seal, and fastener before the homeowner signs off.
Materials used on a standard Mrpoolscreen restoration include stainless steel fasteners, Phifer 18×14 mesh (with no-see-um or Super Screen available as upgrades), and water-based acrylic coatings applied over a primed surface. These material choices directly support the warranty Mrpoolscreen provides on completed work.
Savings context: Mrpoolscreen's restoration services are designed to save homeowners up to 60% compared to the cost of a full enclosure rebuild, while restoring like-new structural performance and appearance.
Homeowners who request an estimate from Mrpoolscreen should expect a written scope of work that itemizes materials, labor, permit requirements, and warranty terms. The estimate is the document that protects you if scope questions arise during the project.
Key Takeaways
Pool enclosure restoration delivers structural, safety, and financial value when the frame is sound and the damage is addressed before it compounds.
| Point | Details |
|---|---|
| Restoration scope | Covers inspection, fastener replacement, frame repairs, surface prep, repainting, and rescreening in sequence. |
| Permits and engineering | Structural repairs and anchor replacement require permits and engineer-signed drawings; rescreening alone usually does not. |
| Fastener replacement | Replacing all fasteners with stainless or nylon-head hardware is critical to long-term wind-load performance and rust prevention. |
| Timeline and cost | Rescreen-only jobs take 1–3 days; full restoration runs 1–2 weeks; restoration can save up to 60% versus a full rebuild. |
| Mrpoolscreen | Mrpoolscreen specializes in full-service pool enclosure restoration in Central Florida, using stainless fasteners and water-based acrylic coatings with a written warranty. |
What most homeowners get wrong about pool enclosure restoration
The conventional wisdom treats pool enclosure restoration as a cosmetic project. Fresh paint, new screens, done. That framing misses the point almost entirely.
The structural work is what makes a restoration worth doing. Replacing thousands of fasteners, restoring anchor connections, and bringing the frame back to its designed wind-load capacity — that's the part that extends the enclosure's service life by years. The paint and screens are the visible result of that work, not the work itself.
There's a second thing homeowners consistently underestimate: the cost of skipping fastener replacement. A contractor who repaints over corroded hardware is selling you a cosmetic job with a structural liability underneath it. Within two or three seasons, rust streaks reappear, fastener heads fail, and the frame starts losing clamping force at connections. The money saved on fasteners gets spent twice over on the next repair cycle.
The third gap is documentation. Homeowners who don't ask for a written scope, permit records, and warranty terms in writing have no recourse when something goes wrong. A reputable contractor hands you that paperwork without being asked. If you have to push for it, that's a signal worth paying attention to.
Restoration done right is one of the better home improvement investments available to Florida homeowners. The enclosure protects the pool, the yard, and the people using both. Getting the structural work right the first time is what makes that protection last.
What Mrpoolscreen offers and how to prepare for your estimate
Mrpoolscreen's restoration service covers the full scope: inspection and documentation, stainless fastener replacement, frame repairs, surface prep and water-based acrylic repainting, and professional rescreening. The company serves homeowners across Orlando and Central Florida, with a focus on projects where quality materials and a written warranty matter.

Before your estimate appointment, pull together any photos you've taken of damage, note any areas where you've seen rust streaking or insect infiltration, and check whether prior work on the enclosure was permitted. That information helps the estimator scope the job accurately and flag any permit requirements upfront.
Mrpoolscreen's estimates are itemized: materials, labor, permit plan notes if applicable, and warranty terms are all spelled out before you commit. Homeowners who want to see the quality of completed work can browse the project gallery before their appointment.
To request an estimate for your pool screen restoration, contact Mrpoolscreen directly. You'll receive a written scope of work, material specifications, and warranty documentation as part of the standard process.
Authoritative sources for homeowners who want to dig deeper
The sources below were used to verify permit requirements, code standards, and material guidance in this article.
"Jurisdictions such as Volusia County require permits for new enclosures or significant structural modifications; permitting includes submitting signed and sealed engineering drawings that show post spacing, footing specifications, and frame member sizing to meet ASCE 7 and the Florida Building Code." — Florida Building Commission
Florida Building Commission: The primary source for Florida Building Code requirements, including wind-load standards under ASCE 7. Use this to verify what structural work triggers permitting in your county.
Volusia County Pool Authority: Documents the typical permitting sequence for pool enclosure work in Volusia County, including inspection checkpoints at footing, framing, and final stages. Useful as a regional reference for how Florida counties handle structural enclosure permits.
Slide Insurance — Screened Enclosures & Pool Cages Guide: Explains how standard homeowner policies typically treat screened enclosures, including the distinction between everyday-peril coverage and named-storm or hurricane coverage. Worth reviewing before filing a claim or choosing a restoration scope.
Shelter Structures — Pool Enclosure Screen Repair: Practical guidance on identifying when screen damage warrants repair versus full replacement, including the 15–20% surface-damage threshold as a decision benchmark.