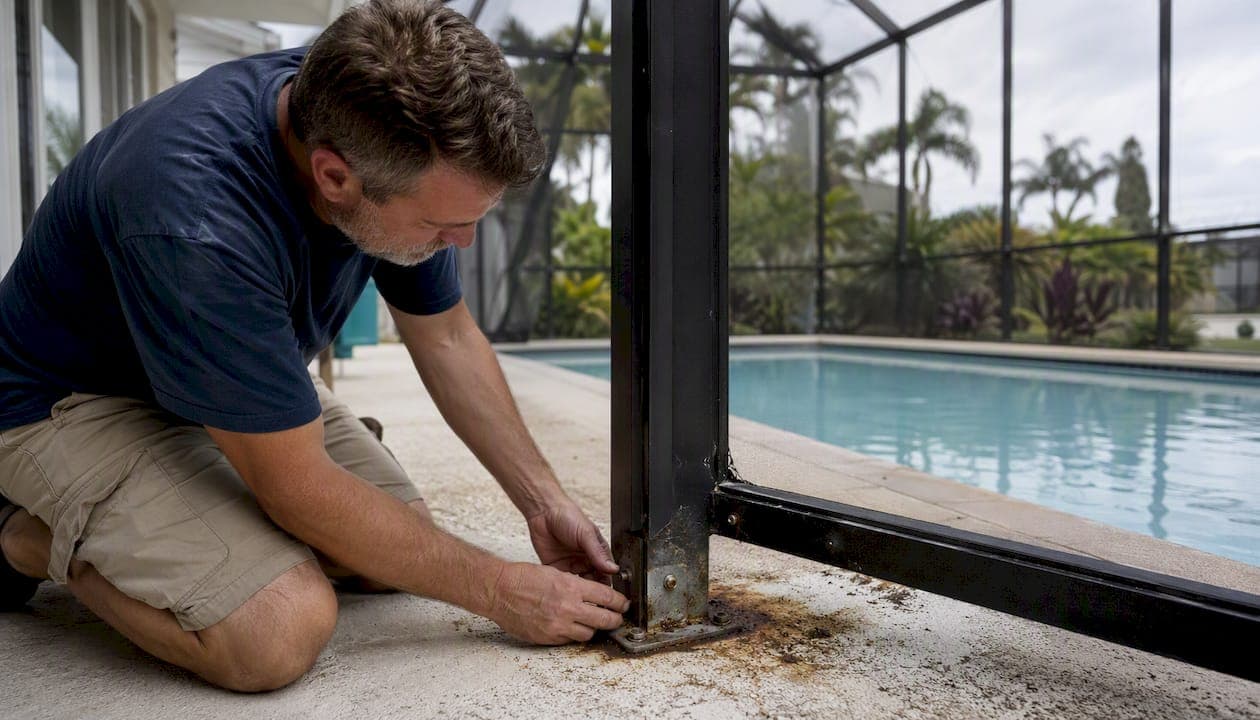
For most homeowners, the fastest win is a focused inspection and connection-strengthening retrofit. Walk your enclosure perimeter today, photograph every ledger fastener and base plate, and replace any corroded hardware with stainless steel anchors before the next wind event. That single step addresses the most common cause of enclosure collapse. Long-term, a professional restoration of corroded ledger connections and anchor points is the most cost-effective upgrade you can make.
Do these within 30 minutes:
- Walk the full perimeter and photograph ledger edges, fastener heads, and base plates at ground level
- Wiggle each upright by hand; any movement greater than roughly 1/8 inch at the base warrants a pro call
- Remove or secure loose furniture, planters, and pool equipment from inside and around the cage
- Check that screen panels are fully splined and not sagging or pulling away from the frame
Quick verdict: Tightening loose fasteners and clearing debris are safe DIY tasks. Corroded ledger anchors, spalled concrete footings, or any structural movement require a licensed contractor.
Key Takeaways
Strengthening host connections is the single most effective pool enclosure wind mitigation step a homeowner can take, and it costs a fraction of a full rebuild.
| Point | Details |
|---|---|
| Connection failure is the primary risk | Screw pullout at ledger and base-plate anchors is the most common cause of enclosure collapse under wind loads. |
| Inspect ledger and base plates first | Check for rust staining, loose fasteners, and concrete spalling at ground level before every storm season. |
| Stainless fasteners are the top retrofit | Replacing corroded hardware with stainless 410 or 316 fasteners and Nylotech anchors delivers the best strength-to-cost improvement. |
| Know your enclosure's design path | Screen-removal alternate cages require panel removal before high winds; full wind-load designs do not. Locate your permit paperwork to confirm which applies. |
| Mrpoolscreen restores, not just repairs | Mrpoolscreen's restoration process, covering fastener replacement, ledger repair, re-screening, and industrial coatings, typically saves homeowners up to 60% versus a full rebuild. |
Table of Contents
- How pool enclosures fail in high winds
- Your homeowner inspection checklist: what to check today
- Pre-storm actions to take 48–72 hours before high winds
- Permanent retrofit options that increase wind resilience
- Permits, code basics, and insurance credits you should know
- Ballpark costs and timelines for repair, restoration, and rebuild
- When to hire a licensed contractor and what to ask them
- What the research says: connection failures and a restoration example
- How we think about a vulnerable enclosure
- Mrpoolscreen can assess and restore your enclosure
- Sources
How pool enclosures fail in high winds
Connection failure is the single most common cause of screened enclosure collapse under wind loads. Specifically, screw pullout at the host-connection points, where the aluminum frame meets the house ledger or concrete slab, is where most failures begin. Once one connection goes, the load redistributes and the rest follow quickly.
Research published on ResearchGate confirms that hardware failure, particularly screw pullout and other connection failures, is the primary cause of enclosure collapse under repeated wind loading. The study recommends optimizing screw layout, size, and angle as the most direct path to improved performance.
Beyond connection failure, enclosures face several distinct wind-load threats:
- Screw pullout: Fasteners strip from the ledger or slab, releasing the frame
- Ledger failure: The horizontal member anchoring the cage to the house wall separates entirely
- Base-plate corrosion: Aluminum base plates corrode at the concrete interface, weakening the footing connection
- Frame bending: Uprights buckle under windward pressure when connections are already compromised
- Partial-snag (scoop) failure: Wind catches a torn or loose screen panel, creating a sail effect that amplifies load on the nearest connection
- Airborne-debris impact: Loose furniture, branches, or screen fragments become projectiles that puncture panels and strike connections
Screen enclosures are often the first structure to fail in a wind event. When they fail, they generate airborne debris that can cause secondary damage to equipment pads and the host structure itself — meaning a disorderly failure is frequently worse than a controlled one. Florida's Best Pool Service notes that partial failures, where sections tear loose but remain attached, often produce more damaging debris than a complete collapse.
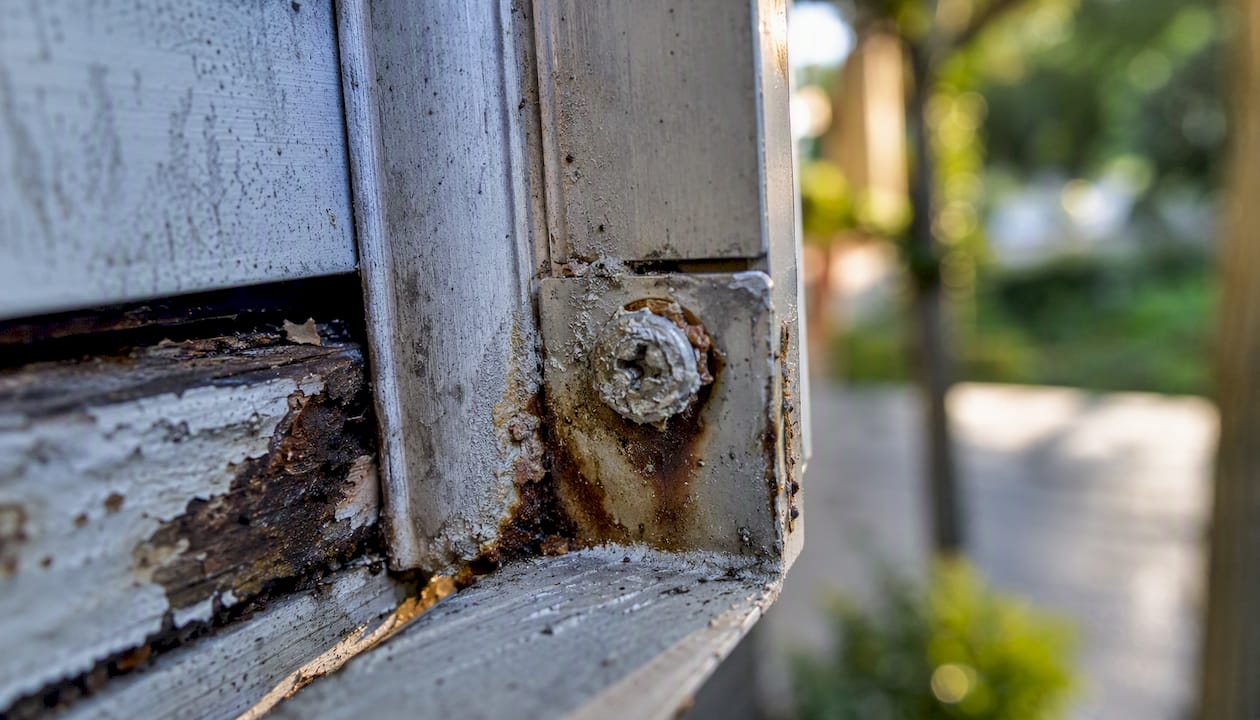
What a good inspection photo should show: Frame the ledger edge where it meets the house wall, capturing the fastener heads and any rust staining. Shoot base plates at slab level from multiple angles. Close-up shots of corroded anchors, cracked concrete around footings, and any visible gap between the frame and the wall are exactly what a contractor or insurance adjuster needs to assess risk.
Your homeowner inspection checklist: what to check today
Start at the ledger, the horizontal beam where your cage meets the house. That connection is the highest-priority point in any pool enclosure wind mitigation assessment, and it's visible from the ground.
Ground-level quick checks (no ladder required):
- Ledger and wall connection: Look for rust streaks running down the house wall below the ledger. Any orange staining signals corroding fasteners inside the wall. Photograph the full ledger run.
- Fastener heads: Scan visible screw heads along the ledger and top rail. Rust, stripped heads, or missing screws are immediate red flags.
- Base plates: Crouch at each upright and look at where the aluminum post meets the concrete. White powdery residue (oxidation) or orange rust around the anchor bolt means the connection is degrading.
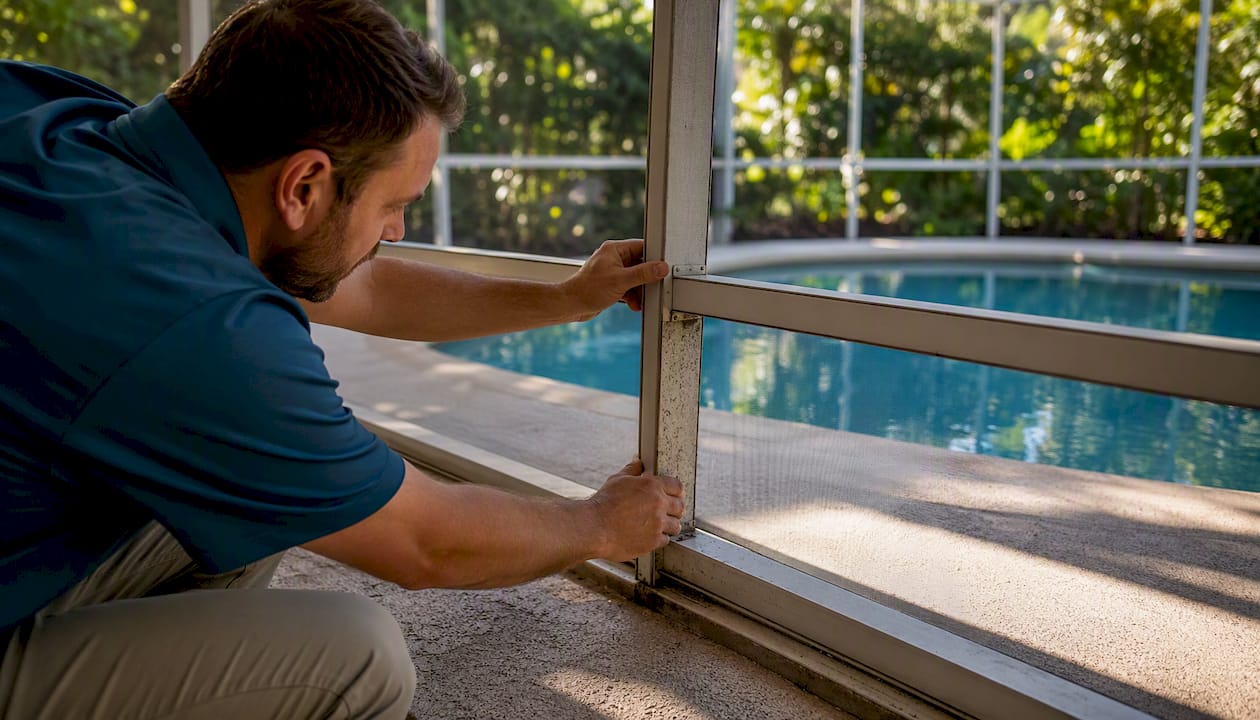
- Uprights and frame members: Push each upright firmly with both hands. A solid cage should feel rigid. Any wobble or audible creak warrants closer inspection.
- Screen panels: Check that spline is seated fully around every panel. Sagging mesh, torn corners, or screens pulling away from the frame create the sail effect that amplifies wind load.
- Chair rail and mid-rails: Look for bends, kinks, or sections that have separated from the uprights. These mid-frame members distribute load; a bent one signals prior wind stress.
- Equipment pad exposure: Note whether your pump, filter, and heater are shielded by the cage or exposed. Equipment outside the cage is vulnerable to debris from a failing enclosure.
For a deeper look at routine upkeep that supports wind resistance, this homeowner safety guide covers annual inspection steps worth bookmarking.
Call a pro if you find:
- Ledger fasteners that spin freely or pull out with hand pressure
- Concrete spalling (flaking or crumbling) around base-plate anchor bolts
- Any upright that moves more than roughly 1/8 inch at the base
- Visible separation between the ledger and the house wall
Pro Tip: To test fastener tightness without climbing, use a long-handled screwdriver or a telescoping inspection mirror to check accessible screw heads along the lower ledger run. If a screw turns with minimal resistance, it has lost its grip in the substrate and needs replacement before the next storm season.
Pre-storm actions to take 48–72 hours before high winds
The single most valuable thing you can do in the 48–72 hour window before a wind event is remove every potential projectile from inside and around the cage, then follow your enclosure's engineered panel-removal protocol if one exists.
72 hours out:
- Pull all patio furniture, umbrellas, potted plants, and decorative items inside the house or garage
- Check whether your enclosure was built under the "screen removal alternate" design path. If it was, your engineer-of-record paperwork will specify which panels to remove before winds reach a threshold. Florida Building Code treats screened enclosures as structural systems with two common design paths: full wind-load design or the screen-removal alternate, which requires venting the structure by removing panels when winds exceed a specified threshold.
- Photograph the enclosure's current condition from all four sides. Date-stamp the images and store them in cloud backup.
48 hours out:
- Secure or store pool equipment covers, hoses, and chemical containers
- Lower pool water 12–18 inches below the normal waterline. Do not drain the pool completely; the water weight helps keep the shell in place if the water table rises, and a full drain risks the shell floating or cracking.
- Confirm that gate latches and door hardware on the enclosure are secured
24 hours out:
- Make a final pass for any loose items missed earlier
- Shut off gas to pool heaters and secure electrical disconnect panels
- Store your inspection photos and any permit or engineering paperwork in a waterproof bag or digital folder you can access after the storm
Pro Tip: Take a short video walk-around of the enclosure interior and exterior the day before the storm. Video captures details, like a screen that's already pulling away from the spline, that still photos miss. It also establishes pre-storm condition clearly for any insurance claim.
For a broader hurricane prep checklist that covers the rest of your property alongside pool-specific steps, that resource is worth running through in parallel.
Permanent retrofit options that increase wind resilience
Prioritize in this order: host connections first, then anchors and ledger hardware, then panel and screen upgrades. Spending money on new screens before fixing corroded base plates is like painting over rust.
Retrofit options ranked by impact:
- Stainless steel fasteners and Nylotech anchors: Replacing corroded screws with stainless 410 or 316 fasteners and upgrading anchor hardware at base plates is the highest-impact, lowest-cost retrofit available. FSU experimental research shows that host-connection stiffness largely governs overall enclosure fragility, and that optimized hardware combinations improve strength-to-cost ratios significantly.
- Ledger profile and super-gutter upgrades: A larger super-gutter profile distributes load across more fastener points. In coastal and High-Velocity Hurricane Zone (HVHZ) areas, this is often required by code for new installations and is worth retrofitting on older cages.
- Gusset and diagonal bracing additions: Corner gussets and diagonal knee braces reduce frame racking under lateral wind loads. These are pro-installed additions that make a measurable difference on taller cages.
- Base-plate replacement: Severely corroded base plates should be cut out and replaced entirely, not just painted over. New plates with stainless anchor bolts set in epoxy provide a clean, corrosion-resistant footing.
- Sacrificial screen strategy vs. full-frame design: Some engineers design enclosures to shed screens under high wind rather than transfer the full load to the frame. If your cage is older and not rated for full wind load, this approach, combined with a pre-storm removal plan, can reduce frame stress.
- Hurricane-rated screen mesh: Heavy-duty polyester or fiberglass mesh rated for higher wind speeds reduces the sail effect on individual panels. This is a meaningful upgrade for cages that must stay screened year-round.
Pro Tip: The single most cost-effective improvement you can make is replacing corroded ledger fasteners with stainless steel hardware and repairing any ledger separation. Everything else builds on that foundation. For a step-by-step look at what that process involves, pool screen frame rust removal walks through the specifics.
For a broader look at which upgrades make sense for your enclosure's age and condition, this restoration overview covers the decision framework in detail.
Permits, code basics, and insurance credits you should know
Check your permit and engineering paperwork first. Whether your cage was built under the screen-removal alternate or a full wind-load design determines what you must do before a storm and what a contractor can legally repair without pulling new permits.
Wind zones and code references: U.S. pool enclosures are governed by ASCE 7 wind-load standards, adopted through the International Building Code (IBC) and state amendments. Florida's version is the Florida Building Code (FBC), which sets design wind speeds by county and zip code. Coastal counties carry higher design speeds; Miami-Dade and Broward sit inside Florida's High-Velocity Hurricane Zone, where enclosures must meet stricter design wind speeds and often require Miami-Dade Notice of Acceptance (NOA) product approvals for extrusions and hardware.
Under Florida Building Code, a screened enclosure is classified as a structural system, not an accessory. That classification means repairs that alter load-bearing members, replace ledger sections, or change the frame profile typically require a permit and plan review, not just a handyman visit.
Permit triggers: Cosmetic repairs, like re-screening or repainting, generally don't require permits. Structural repairs, including ledger replacement, base-plate replacement, or any change to the frame profile, usually do. When in doubt, call your local building department before starting work.
Insurance and wind-mitigation credits: Homeowners with permitted, code-compliant enclosures may qualify for wind-mitigation credits through Florida's insurance framework when a licensed inspector documents the enclosure in a formal wind-mitigation report. Wind-mitigation inspections in Florida can reduce annual premiums meaningfully, but the enclosure must have a valid permit and documented compliance to qualify. Hurricane damage to enclosures is often excluded from standard homeowners policies or handled through a separate windstorm rider, so reviewing your policy language before storm season is worth the hour it takes.
Documents to locate and keep accessible:
- Original building permit and inspection sign-off card
- Engineer-signed drawings (especially if you're in an HVHZ county)
- Any NOA product approval numbers for extrusions or hardware
- Contractor warranty paperwork
- Pre-storm and post-storm photographs with date stamps
Ballpark costs and timelines for repair, restoration, and rebuild
Repair costs vary widely based on the extent of connection damage, ledger condition, cage size, and whether you're in a high-wind zone requiring engineered drawings. Here's a practical breakdown of what drives cost and time:
Primary cost drivers:
- Ledger and anchor work (the most labor-intensive and highest-impact line item)
- Super-gutter size and profile (larger profiles cost more but carry more load)
- Labor rates in HVHZ counties, which run higher due to code requirements
- Whether permits and engineer-signed drawings are required
- Cage size and height (taller cages require more hardware and more labor hours)
Cost and timeline ranges:
- Spot repair (re-screening, minor fastener replacement, spline replacement): typically a few hundred dollars and completed in a day or less
- Connection and ledger retrofit (stainless fastener replacement, base-plate work, ledger repair): mid-range cost, usually completed in one to three days depending on cage size
- Full restoration (repainting with industrial coatings, full fastener replacement, re-screening, ledger repair): Mrpoolscreen's restoration approach typically saves clients up to 60% compared to a full rebuild, with most projects completed within a week
- Full replacement (new frame, new screens, new anchors, permits, engineering): the highest cost and longest timeline, often two to four weeks when permits and NOA approvals are involved
The trigger for moving from restoration to full replacement is usually a ledger that has separated from the wall beyond repair, a frame that has been bent or buckled by a prior wind event, or a cage so old that its aluminum alloy no longer meets current code minimums.
When to hire a licensed contractor and what to ask them
Hire a licensed contractor if ledger anchors are corroded through, concrete is spalling around base plates, or the structure moves under hand pressure. Those are structural conditions, not maintenance items, and DIY repairs on a load-bearing connection can create liability and void any insurance claim.
Red flags that require a licensed pro:
- Ledger fasteners that spin freely or pull out by hand
- Visible gap between the ledger and the house wall
- Concrete crumbling around base-plate anchor bolts
- Any upright that rocks or leans
- Prior storm damage that was never permitted or repaired to code
- Projects in HVHZ counties requiring NOA-approved materials and stamped drawings
Questions to ask every contractor before signing:
- Are you licensed and insured for structural aluminum work in this county?
- Will you pull the required permits, and can you show me the permit history on this cage?
- What aluminum alloy and temper are you using for any replacement members?
- What fastener grade are you specifying — stainless 410 or 316?
- For coastal or HVHZ projects: what super-gutter profile and NOA approval numbers apply?
- Do you carry engineer-signed drawings for this scope of work?
- What warranty do you provide, and does it cover connection hardware specifically?
After the job, obtain:
- Permit sign-off and final inspection card
- Engineer-signed drawings (if applicable)
- NOA product approval numbers for any replaced extrusions
- Warranty documentation in writing
- Contractor's certificate of insurance
That paperwork is what a licensed wind-mitigation inspector needs to document your enclosure for insurance credits, and it's what an adjuster will ask for after a storm.
What the research says: connection failures and a restoration example
The evidence on pool enclosure wind mitigation is unusually clear. FSU's experimental fragility analysis converted component test results into fragility curves and found that host-connection stiffness is the dominant variable controlling overall enclosure vulnerability. Enclosures with stiffer, better-fastened connections performed dramatically better across all wind-load scenarios. The research identifies specific hardware combinations that improve strength-to-cost ratios, pointing directly at fastener upgrades as the highest-leverage intervention.
Laboratory and field research converge on the same practical recommendation: improving host-connection hardware — screw size, layout, angle, and spacing — yields strong benefit-to-cost ratios compared to wholesale frame replacement. The ResearchGate study on repeated loading cycles found that optimizing these variables at the connection level is more effective than upgrading the frame members themselves.
A typical Mrpoolscreen restoration scope: A Central Florida homeowner with a 15-year-old cage showing ledger rust staining, corroded base-plate anchors, and faded frame coating. Mrpoolscreen's team replaced all fasteners with stainless steel hardware, repaired the ledger connection, re-splined torn screen panels, and applied an industrial water-based acrylic coating to the frame. The homeowner retained the existing frame, which was structurally sound once the connection hardware was addressed.
What this means for your retrofit decisions:
- Fix connections before anything else; the research supports this unambiguously
- Stainless steel fasteners and Nylotech anchors are the hardware of choice for corrosion resistance
- Re-screening and recoating after connection repair extends the useful life of the entire structure
- Full replacement is warranted only when the frame itself is bent, buckled, or below current code minimums
For a detailed look at how the restoration process works from assessment through completion, this end-to-end restoration guide covers every stage.
How we think about a vulnerable enclosure
When Mrpoolscreen assesses an aging cage, the first priority is never cosmetic. Before any paint or new screen goes on, the team documents every connection point, photographs ledger and base-plate conditions, and identifies whether the structure is safe to work on. A cage that moves under hand pressure gets stabilized before any other work begins.
Restoration is preferred over replacement in most cases because the aluminum frame itself is rarely the problem. Frames bend when connections fail, not the other way around. Fix the connections, address the ledger, replace corroded hardware with stainless steel, and most frames have years of useful life remaining. Full replacement makes sense when the frame has been bent by a prior wind event, when the alloy is below current code minimums, or when the ledger separation is too severe to repair in place.
Mrpoolscreen's approach ties directly to what the research recommends: prioritize host-connection hardware, use industrial-grade coatings that protect the frame from the corrosion cycle that leads to connection failure in the first place, and document everything so the homeowner has a paper trail for insurance and future inspections.
Mrpoolscreen can assess and restore your enclosure
A corroded ledger or failing base-plate anchor is not a cosmetic problem. It's a structural one, and catching it before a storm is the difference between a restoration job and a full rebuild.

Mrpoolscreen specializes in pool screen restoration for Central Florida homeowners, with a process built around the fixes that actually reduce wind vulnerability: stainless steel fastener replacement, ledger repair, re-splining, industrial water-based acrylic coatings, and full documentation of the work performed. If your cage shows rust staining, loose connections, or any of the red flags in this guide, the right next step is a professional assessment. Contact Mrpoolscreen to schedule an inspection or get a quote at Mrpoolscreen.
Sources
- FSU screened enclosure connection research (experimental fragility analysis)
- Hurricane-Rated Pool Enclosures in Miami-Dade | Wind Code Guide
- Pool Screen Enclosure Considerations for Florida Service
- How to Prepare Your Pool for Hurricane Season in Fort Myers - Liquid Concepts
- High Wind Debris Management (Screens, Enclosures) | Florida's Best Pool Service