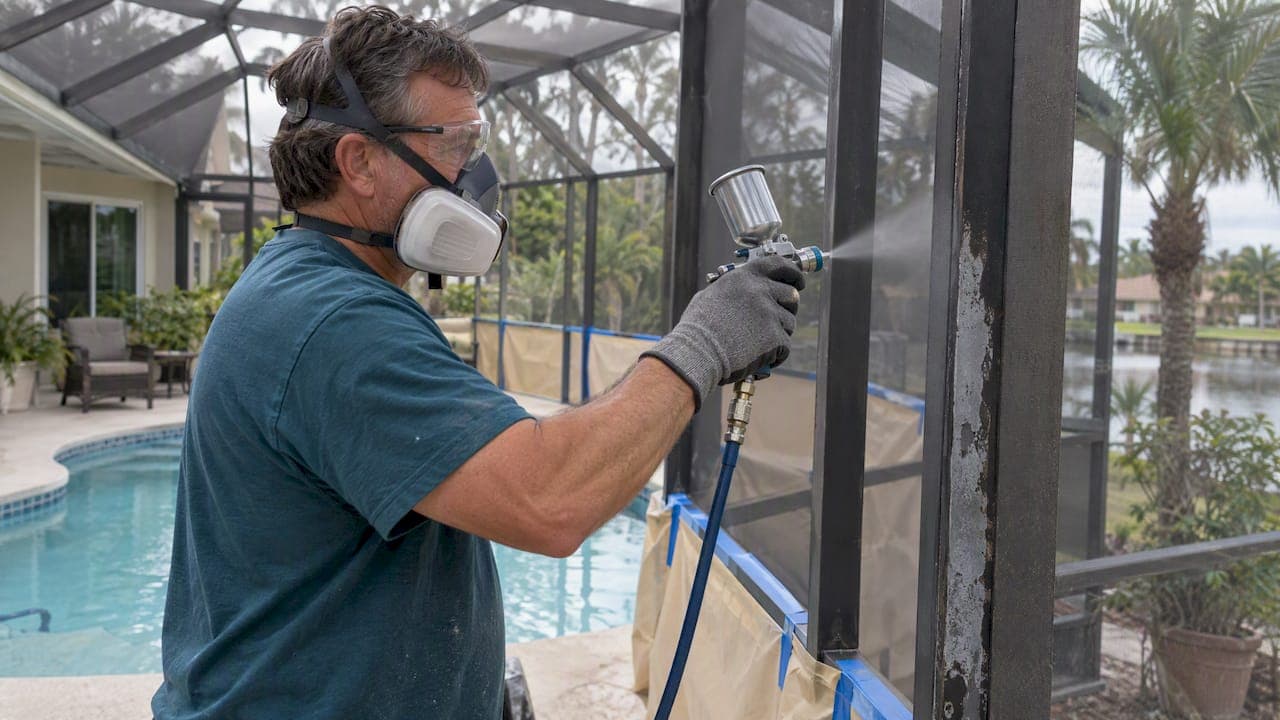
Yes: an aluminum pool cage can be spray painted successfully, and the result holds up well when you clean, repair, and prime the metal before coating it with a product rated for aluminum. The basic sequence is clean, treat any corrosion, prime if needed, then apply several thin, overlapping coats within the manufacturer's temperature and humidity window. If corrosion runs deep or fasteners have failed, professional restoration gives you a longer-lasting result than a DIY touch-up.
TL;DR:
- Bare, pitted, or unidentified aluminum coatings need a metal specific primer; direct to metal sprays suit only clean, lightly weathered surfaces without corrosion.
- One metallic spray product's guidance calls for temperatures of 50 to 90°F and humidity below 85%, with about 24 hours allowed for full cure.
- Keep the sprayer 8 to 16 inches from the frame and apply thin, overlapping coats; aerosols suit touchups, while rented sprayers cover full enclosures.
- A weekend DIY job suits small cosmetic projects, but failed fasteners, deep corrosion, old paint of unknown origin, or warranty needs favor professional restoration.
Table of Contents
- When does a pool cage need repainting?
- Which paint and primer work best on aluminum pool cages?
- How do you prep and stay safe before spray painting?
- How do you spray a pool cage for an even, lasting finish?
- What tools and supplies do you need, and how much paint?
- How do you maintain a repainted pool cage and how long will it last?
- How we restore pool cages and when a pro makes sense
- DIY or hire a pro: a quick decision guide
- Get a pool cage restoration estimate
- FAQ
- Sources
When does a pool cage need repainting?
Aluminum pool cages weather in predictable stages, and catching the early signs saves you time and money. Chalking (a powdery residue on the surface), fading, and thin flaking usually mean the finish has reached the end of its life but the metal underneath is still sound. Rust streaks, blistering, and patches of exposed bare aluminum point to a more advanced problem that needs treatment before any paint goes on.
- Chalking or fading: cosmetic only, often fixable with cleaning and a single coat.
- Flaking or peeling paint: signals the old coating has lost adhesion and needs full removal in that area.
- Rust streaks at seams or fasteners: usually means corrosion has started under the surface, not just on top of it.
- Blistering or bubbling: often trapped moisture or corrosion pushing the coating away from the metal.
- Exposed bare aluminum with pitting: needs mechanical treatment before any primer or topcoat.
A straightforward cosmetic repaint on a small to mid-size enclosure typically takes a homeowner a weekend, factoring in prep, drying, and recoat windows. Projects involving fastener replacement or corrosion treatment run longer, and a professional crew usually compresses that timeline because prep and application happen in parallel across the structure. Our pool cage painting cost guide breaks down what drives the budget for either path.
Which paint and primer work best on aluminum pool cages?
Not every spray paint is built for an aluminum screen frame sitting outside year-round, and picking the wrong one is the most common reason a repaint fails early. Homeowners generally choose between a few categories:
- Alkyd metallic sprays: affordable and widely available, good for small touch-ups.
- Industrial enamels: tougher film for full-enclosure jobs that need to resist UV and humidity cycling.
- Direct-to-metal (DTM) aerosols: formulated to skip a separate primer step on clean, sound aluminum.
- Water-based acrylic systems: the category professional restoration crews favor for full enclosures because of their durability and lower odor during application.
A primer is required when the aluminum is bare, pitted, or previously coated with a product you cannot positively identify; a self-etching or metal-specific primer gives the topcoat something to grip. DTM products are acceptable shortcuts only on clean, lightly weathered surfaces with no exposed corrosion.
Before buying, check the technical data sheet (TDS). The Rust-Oleum Professional Metallic Spray TDS specifies an application window of roughly 50 to 90°F with relative humidity below 85% for proper drying, along with recommended surface prep and primer use. The same documentation lists dry and recoat times: touch dry in 15 to 30 minutes, safe to handle in 1 to 2 hours, and a full cure around 24 hours depending on the product.

A thinner coat that follows the TDS window outperforms a heavier coat applied outside it. Manufacturer sheets consistently tie success to thin, multiple passes and strict adherence to temperature and humidity limits rather than how much paint goes on.
Solvent-based enamels need active ventilation and a respirator rated for organic vapors; water-based acrylics are lower-odor but still call for eye protection and gloves during application.
How do you prep and stay safe before spray painting?
Preparation determines whether the new coating lasts one season or several, and it is the step most DIY repaints shortchange.
- Degrease and wash the entire frame with a detergent solution to remove dirt, pollen, and salt film, then rinse thoroughly and let it dry completely.
- Scuff or wire-brush glossy or painted areas to create a surface profile the new coating can grip.
- Remove loose or flaking paint down to sound material, and treat any corrosion spots before moving forward; our rust removal guide walks through the mechanical and chemical options.
- Run a small adhesion test on an inconspicuous panel before committing to the whole structure, a step we cover in detail in our guide to restoring a faded aluminum pool cage.
- Inspect fasteners and swap corroded screws or bolts for stainless steel or nylon alternatives, since rusted hardware will bleed through new paint within months.
- Mask off screens, glass, decking, and nearby plants with film and tape to prevent overspray from landing where it shouldn't.
If you're removing old paint by sanding or scraping and the coating's age or origin is unknown, treat it as a potential lead hazard. The manufacturer's own safety guidance warns that disturbing old paint can release lead dust, and recommends contacting the National Lead Information Hotline at 1-800-424-LEAD and using a NIOSH-approved respirator with HEPA vacuum and wet cleanup methods rather than dry sweeping. Our frame corrosion guide covers how to assess whether corrosion is surface-level or structural before you start.
Pro Tip: Run the adhesion test and the lead-safety check on the same day you wash the frame, so you're not tempted to skip either step once you're mid-project.
How do you spray a pool cage for an even, lasting finish?
Technique matters as much as product choice once the frame is prepped and masked. Hold the can or sprayer 8 to 16 inches from the surface depending on the product, and keep the nozzle moving in steady, overlapping passes rather than pausing in one spot.
- Apply thin coats, not one heavy one: manufacturer data for metallic spray products suggests practical coverage around ten to fifteen square feet per can at the recommended dry film thickness of one to two mils per coat, and multiple light passes dry more evenly than a single thick one.
- Respect the temperature and humidity window: apply within the manufacturer's specified temperature range generally from about 50 to 90 degrees Fahrenheit, and keep relative humidity below the commonly recommended limits, which vary between approximately 65% and 85% depending on the product; scheduling the job during a drier stretch of the year avoids a failed cure.
- Choose equipment to match the scope: aerosol cans suit small touch-ups and fastener spot-treatment, while an HVLP or airless sprayer covers a full enclosure faster and more evenly, though it requires more cleanup and setup.
- Watch for runs and orange-peel texture: both usually mean the coat went on too heavy or too close; let the area cure, then lightly sand and re-coat rather than spraying over the defect.
- Let each coat hit its recoat window before the next pass: spraying too soon traps solvent underneath and causes wrinkling later.
Once the final coat is on, give the enclosure a full cure before heavy exposure to rain or handling. Our guide to protecting a freshly painted enclosure outlines the 24 to 72 hour window homeowners should plan around.
What tools and supplies do you need, and how much paint?
A basic supply list covers most DIY repaints: primer and topcoat or DTM cans, a respirator, a HEPA vacuum for cleanup, sandpaper and wire brushes, stainless replacement fasteners, masking film and tape, and drop cloths for the deck and landscaping underneath.
- Estimate your can count by measuring the enclosure's approximate surface area, then dividing by the coverage figure on the can, typically 10 to 15 square feet per can at the recommended thickness.
- Buy a little extra, since corners, fasteners, and touch-up areas use more product per square foot than flat panels.
- Rent a sprayer for a full, large enclosure if you want a more uniform finish and faster coverage; stick with aerosol cans for smaller jobs or patch repairs where setup and cleanup time outweighs the benefit.
How do you maintain a repainted pool cage and how long will it last?
A rinse with a garden hose every few weeks keeps pollen, salt, and dust from building up on the fresh finish, and a quick visual check for chipped paint or rust bleeding through fasteners once or twice a year catches problems early. Touch up small chips as soon as you see them rather than waiting for them to spread.
- Coastal salt exposure, UV intensity, and humidity cycling all shorten coating life faster than inland, shaded locations.
- Impact damage from branches, screen repairs, or ladders creates entry points for corrosion if left unpainted.
- Fastener corrosion is usually the first failure point, which is why swapping to stainless hardware during the repaint matters.
A DIY aerosol touch-up job generally needs refreshing sooner than a full professional restoration approach, based on general project experience restoring enclosures across varying exposure conditions. Our paint longevity guide covers what homeowners in humid, high-UV climates should realistically expect from each approach.
How we restore pool cages and when a pro makes sense
We approach a repaint as a restoration project rather than a cosmetic fix: careful masking to protect screens and decking, mechanical and chemical treatment of any corrosion, and a water-based acrylic coating system applied over stainless steel fasteners rather than the original hardware. That combination addresses the failure points that a quick aerosol pass over existing rust cannot fix.
- We replace corroded screws and bolts with stainless or Nylotech hardware as part of the restoration process.
- We schedule applications around humidity thresholds, generally holding off when relative humidity runs high enough to slow proper curing, a practice detailed in our paint longevity notes.
- We mask thoroughly to prevent overspray on screens, glass, and surrounding landscaping before coating.
- Restoring an enclosure this way costs significantly less than a full rebuild, making it a practical choice for an aging cage that is structurally sound but cosmetically tired.
You can see examples of completed projects in our project gallery, and our guide to restoring and upgrading screen enclosures covers the broader range of restoration options beyond a straight repaint.
DIY or hire a pro: a quick decision guide
If the job is cosmetic, the enclosure is small, and you're comfortable with ladders and a respirator, a weekend DIY repaint is reasonable. Once corrosion has reached fasteners or structural members, or you want a finish backed by a warranty, hiring a restoration crew is worth the cost. Lead-safe paint removal and a guaranteed finish are two things a professional job protects that a DIY repaint often cannot.
— Michel
Get a pool cage restoration estimate
If your enclosure needs more than a weekend touch-up, we can walk the structure with you, flag any corrosion or fastener issues, and scope out a plan before any paint goes on. Our restoration work uses water-based acrylic coatings and stainless steel fasteners, and we mask thoroughly to keep overspray off screens, glass, and decking.

- We inspect the full frame, not just the visibly damaged sections, before quoting a project.
- We address rust and corroded hardware as part of the restoration, not as a separate add-on.
- We offer a warranty on finished work.
Visit our Pool Screen Restoration page to see what's included, or request a free estimate to get a inspection scheduled for your enclosure.
FAQ
Can a pool cage be painted?
Yes, an aluminum pool cage can be painted successfully once the surface is cleaned, any corrosion is treated, and a metal-compatible primer or direct-to-metal coating is applied. Skipping prep or painting outside the manufacturer's temperature and humidity window is the main reason a repaint fails early.
What is the best paint for a pool cage?
Direct-to-metal aerosols and industrial enamels both work well for aluminum frames, while water-based acrylic systems are what professional restoration crews typically use on full enclosures for durability. The right choice depends on whether the frame is bare or previously painted, which the product's technical data sheet will specify.
How much does it cost to repaint a pool cage?
Cost depends heavily on enclosure size, the amount of corrosion treatment needed, and whether you handle it yourself or hire a restoration crew. Our pool cage painting cost guide breaks down the factors that drive the budget either way; for a professional quote, request a free estimate.
What type of paint is safe to use around pools and screened structures?
A water-based acrylic or direct-to-metal coating rated for exterior aluminum is generally the safer, lower-odor choice for a structure near a pool, since it cures with fewer strong solvent fumes than older alkyd formulas. Always check the product's technical data sheet for ventilation and cure-time guidance before applying it near an occupied pool area.